Hey all! To keep up with my latest projects, come follow along with me on Instagram and Pinterest.
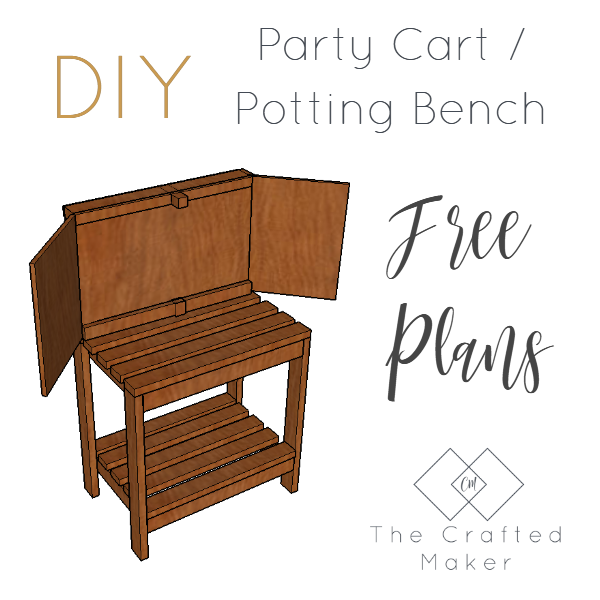
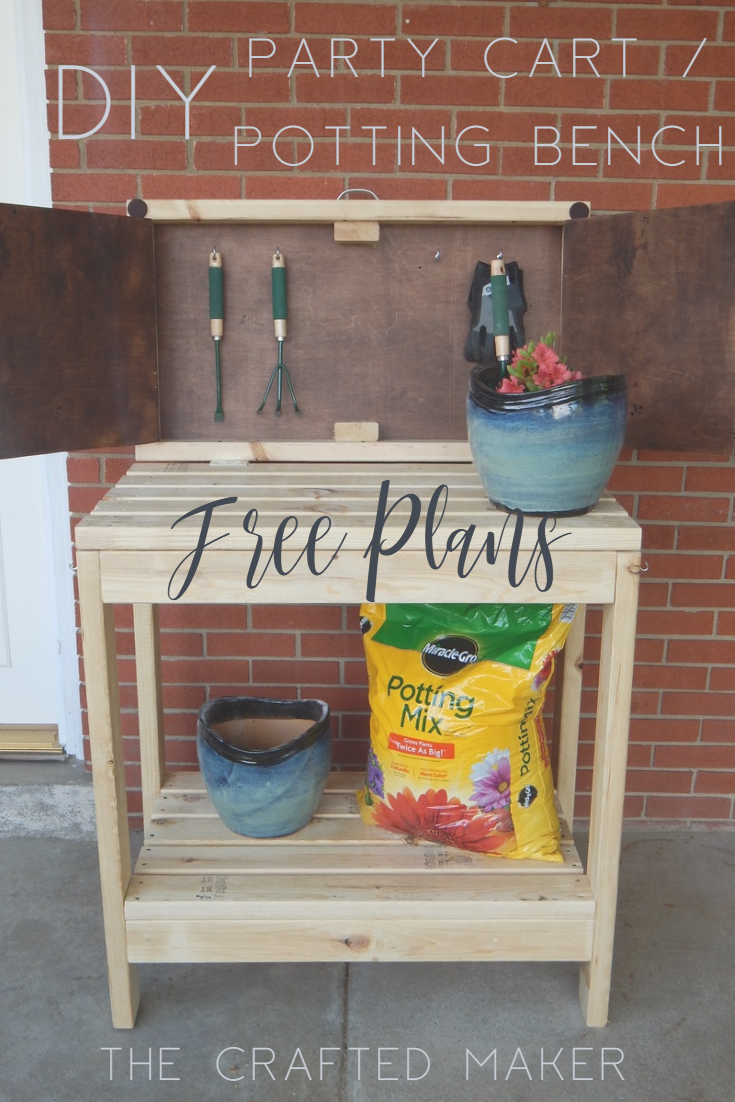
Okay guys and gals, I am super, super excited about this project. I by no means have a green thumb (mine is more like a black thumb), but I do enjoy the way the flowers look and the color they provide. My mother, on the other hand, is a gardening ninja. She can plant those flowers all day long. She’s definitely got green fingers and she’s a gardening queen! So, in honor of Mother’s Day coming up, I decided to make her something. Since its Springtime, I have seen a lot of plans for potting benches, but none that could be out of sight when not in use. I thought long and hard about it and came up with this plan.
The plan is simple to make and only requires 2X4’s and a very small amount of plywood and hardware.
Let’s get to building…
I have provided a downloadable plan you can use when building your own DIY party cart / potting bench, but I will walk you through my build step by step.
First things first, I cut all of the wood needed for the project except the plywood (it is always better to cut sections later that will fit tightly together, wood is not always perfect, neither is this person cutting it. (I won’t tell if you don’t!)
Once the cutting was done, I started to assemble the body of the bench. It is made up of four legs and sections connecting those legs. Start with the longest board sections. I started my boards 6″ from the bottom.

Once you have both of the leg sections built, connect those with the 17″ 2X4 boards.
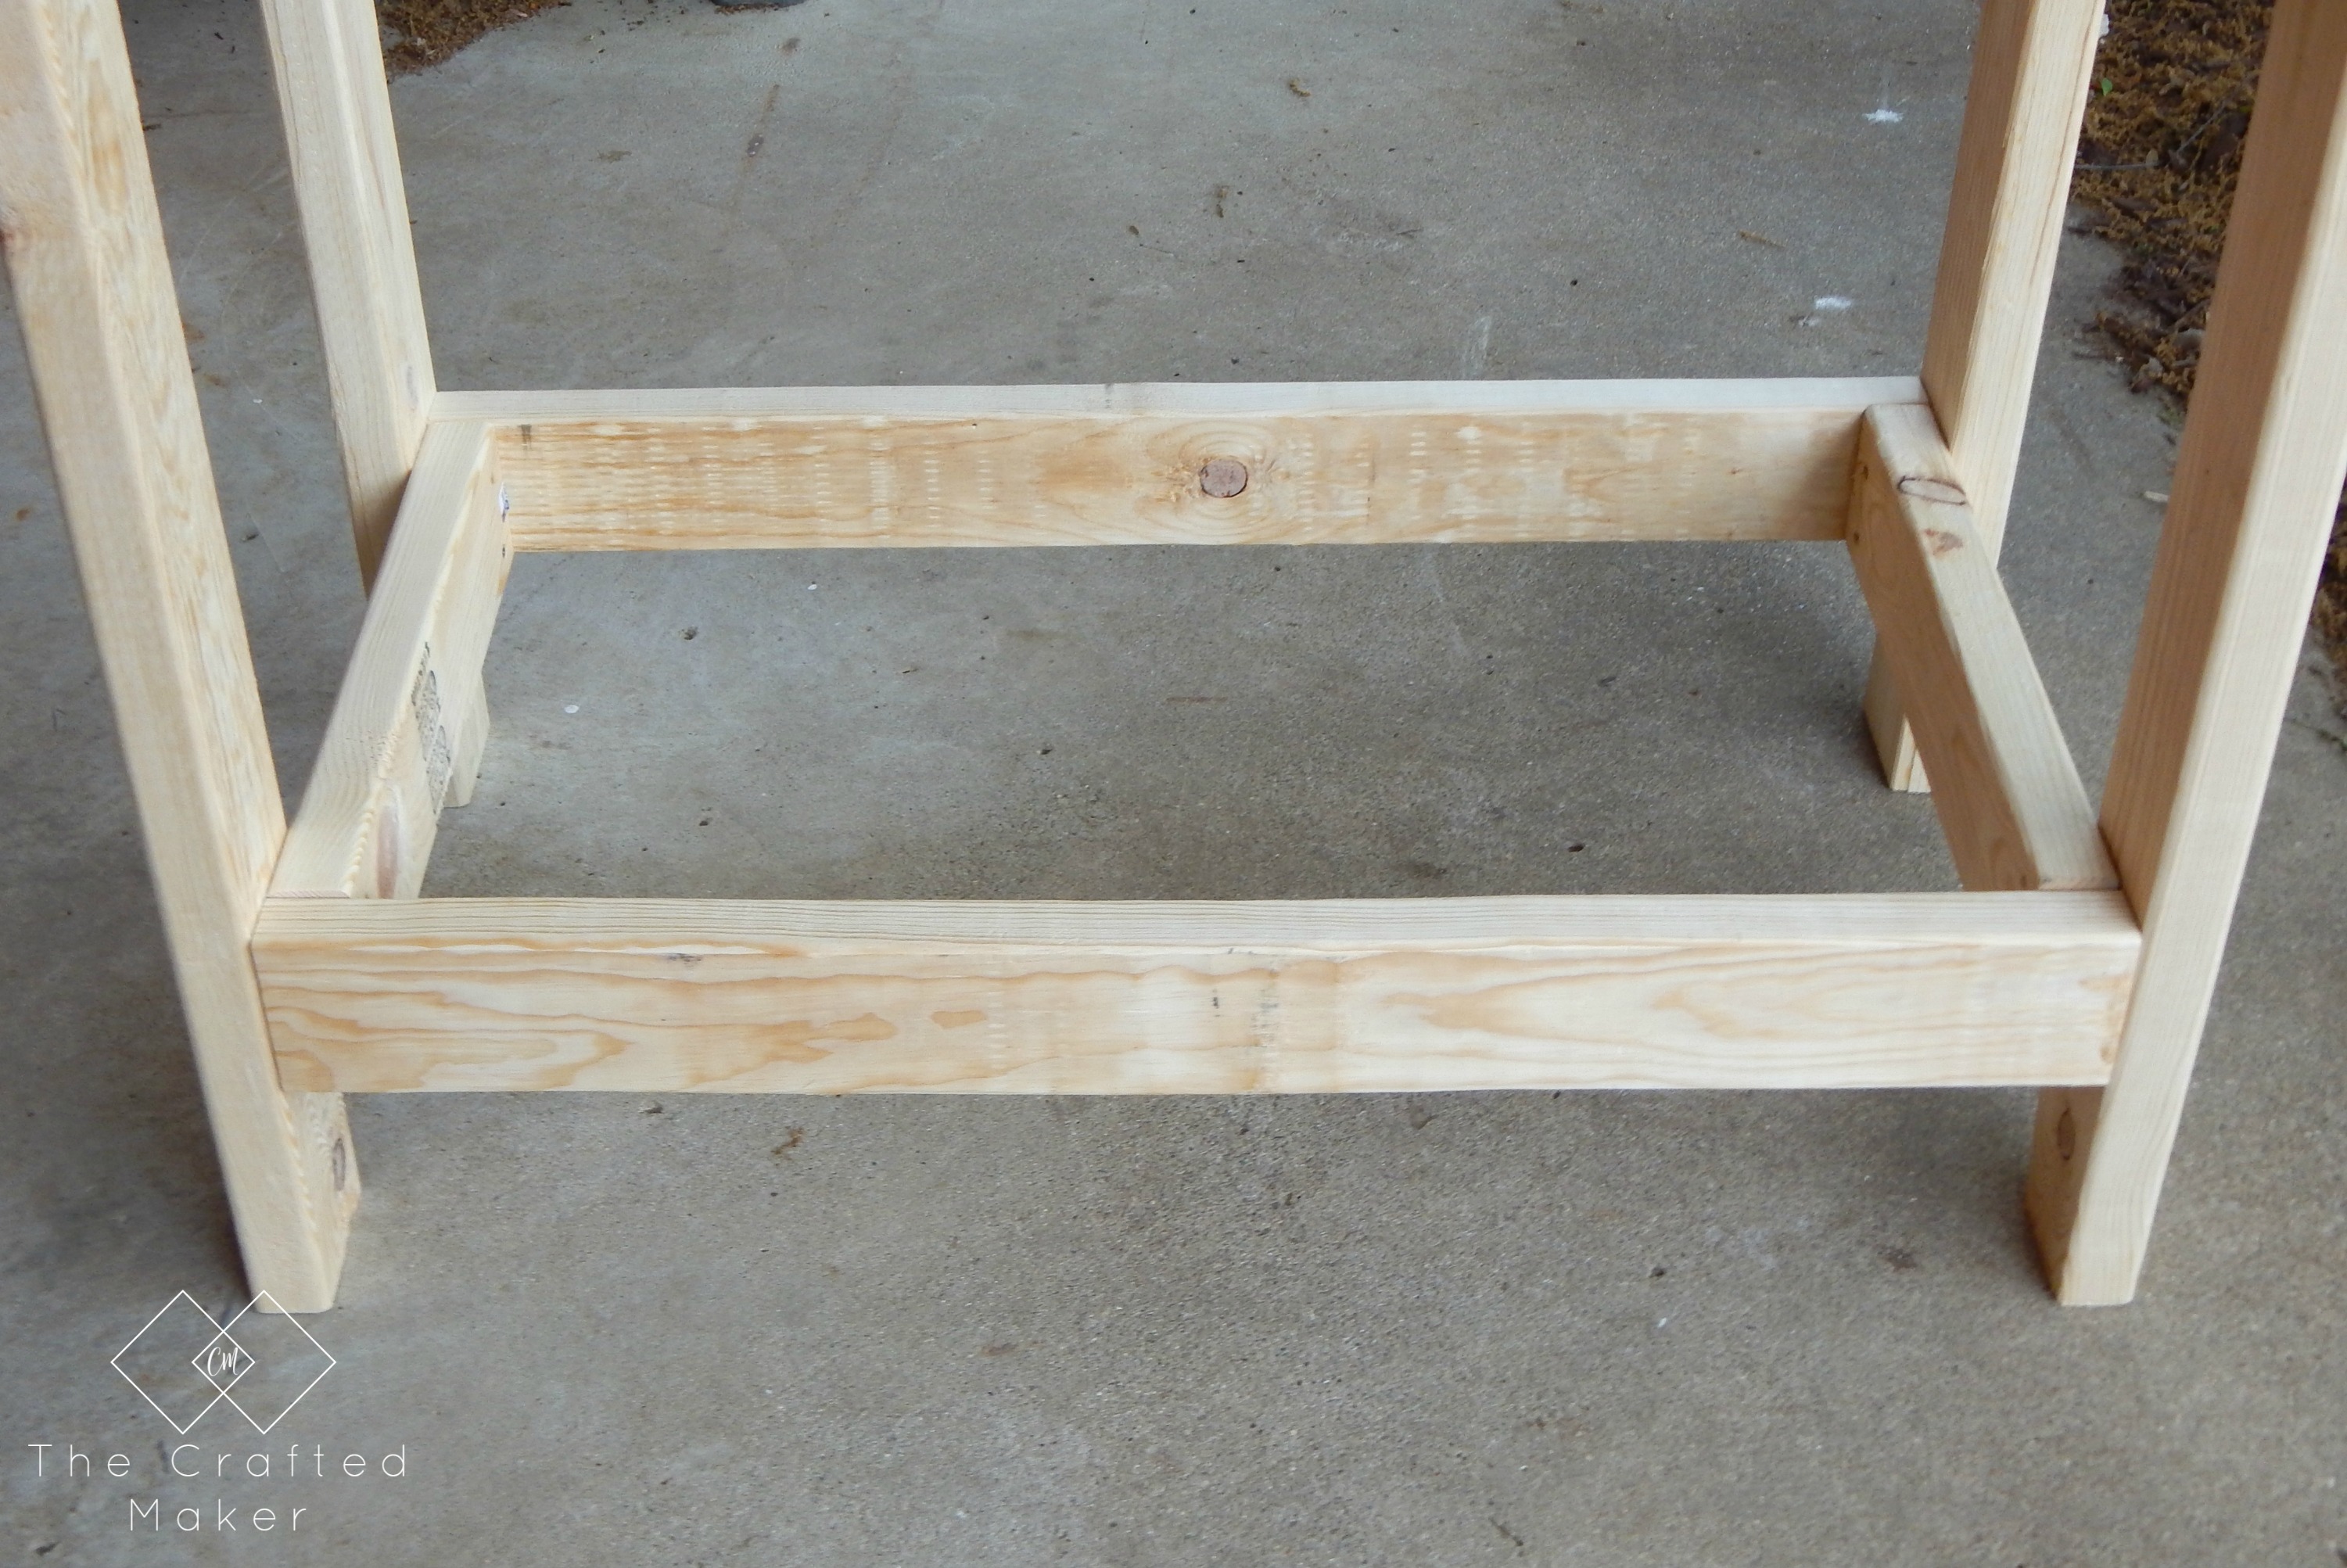
Do the same for the top part of the body until you have two shelf bases made in between the legs.
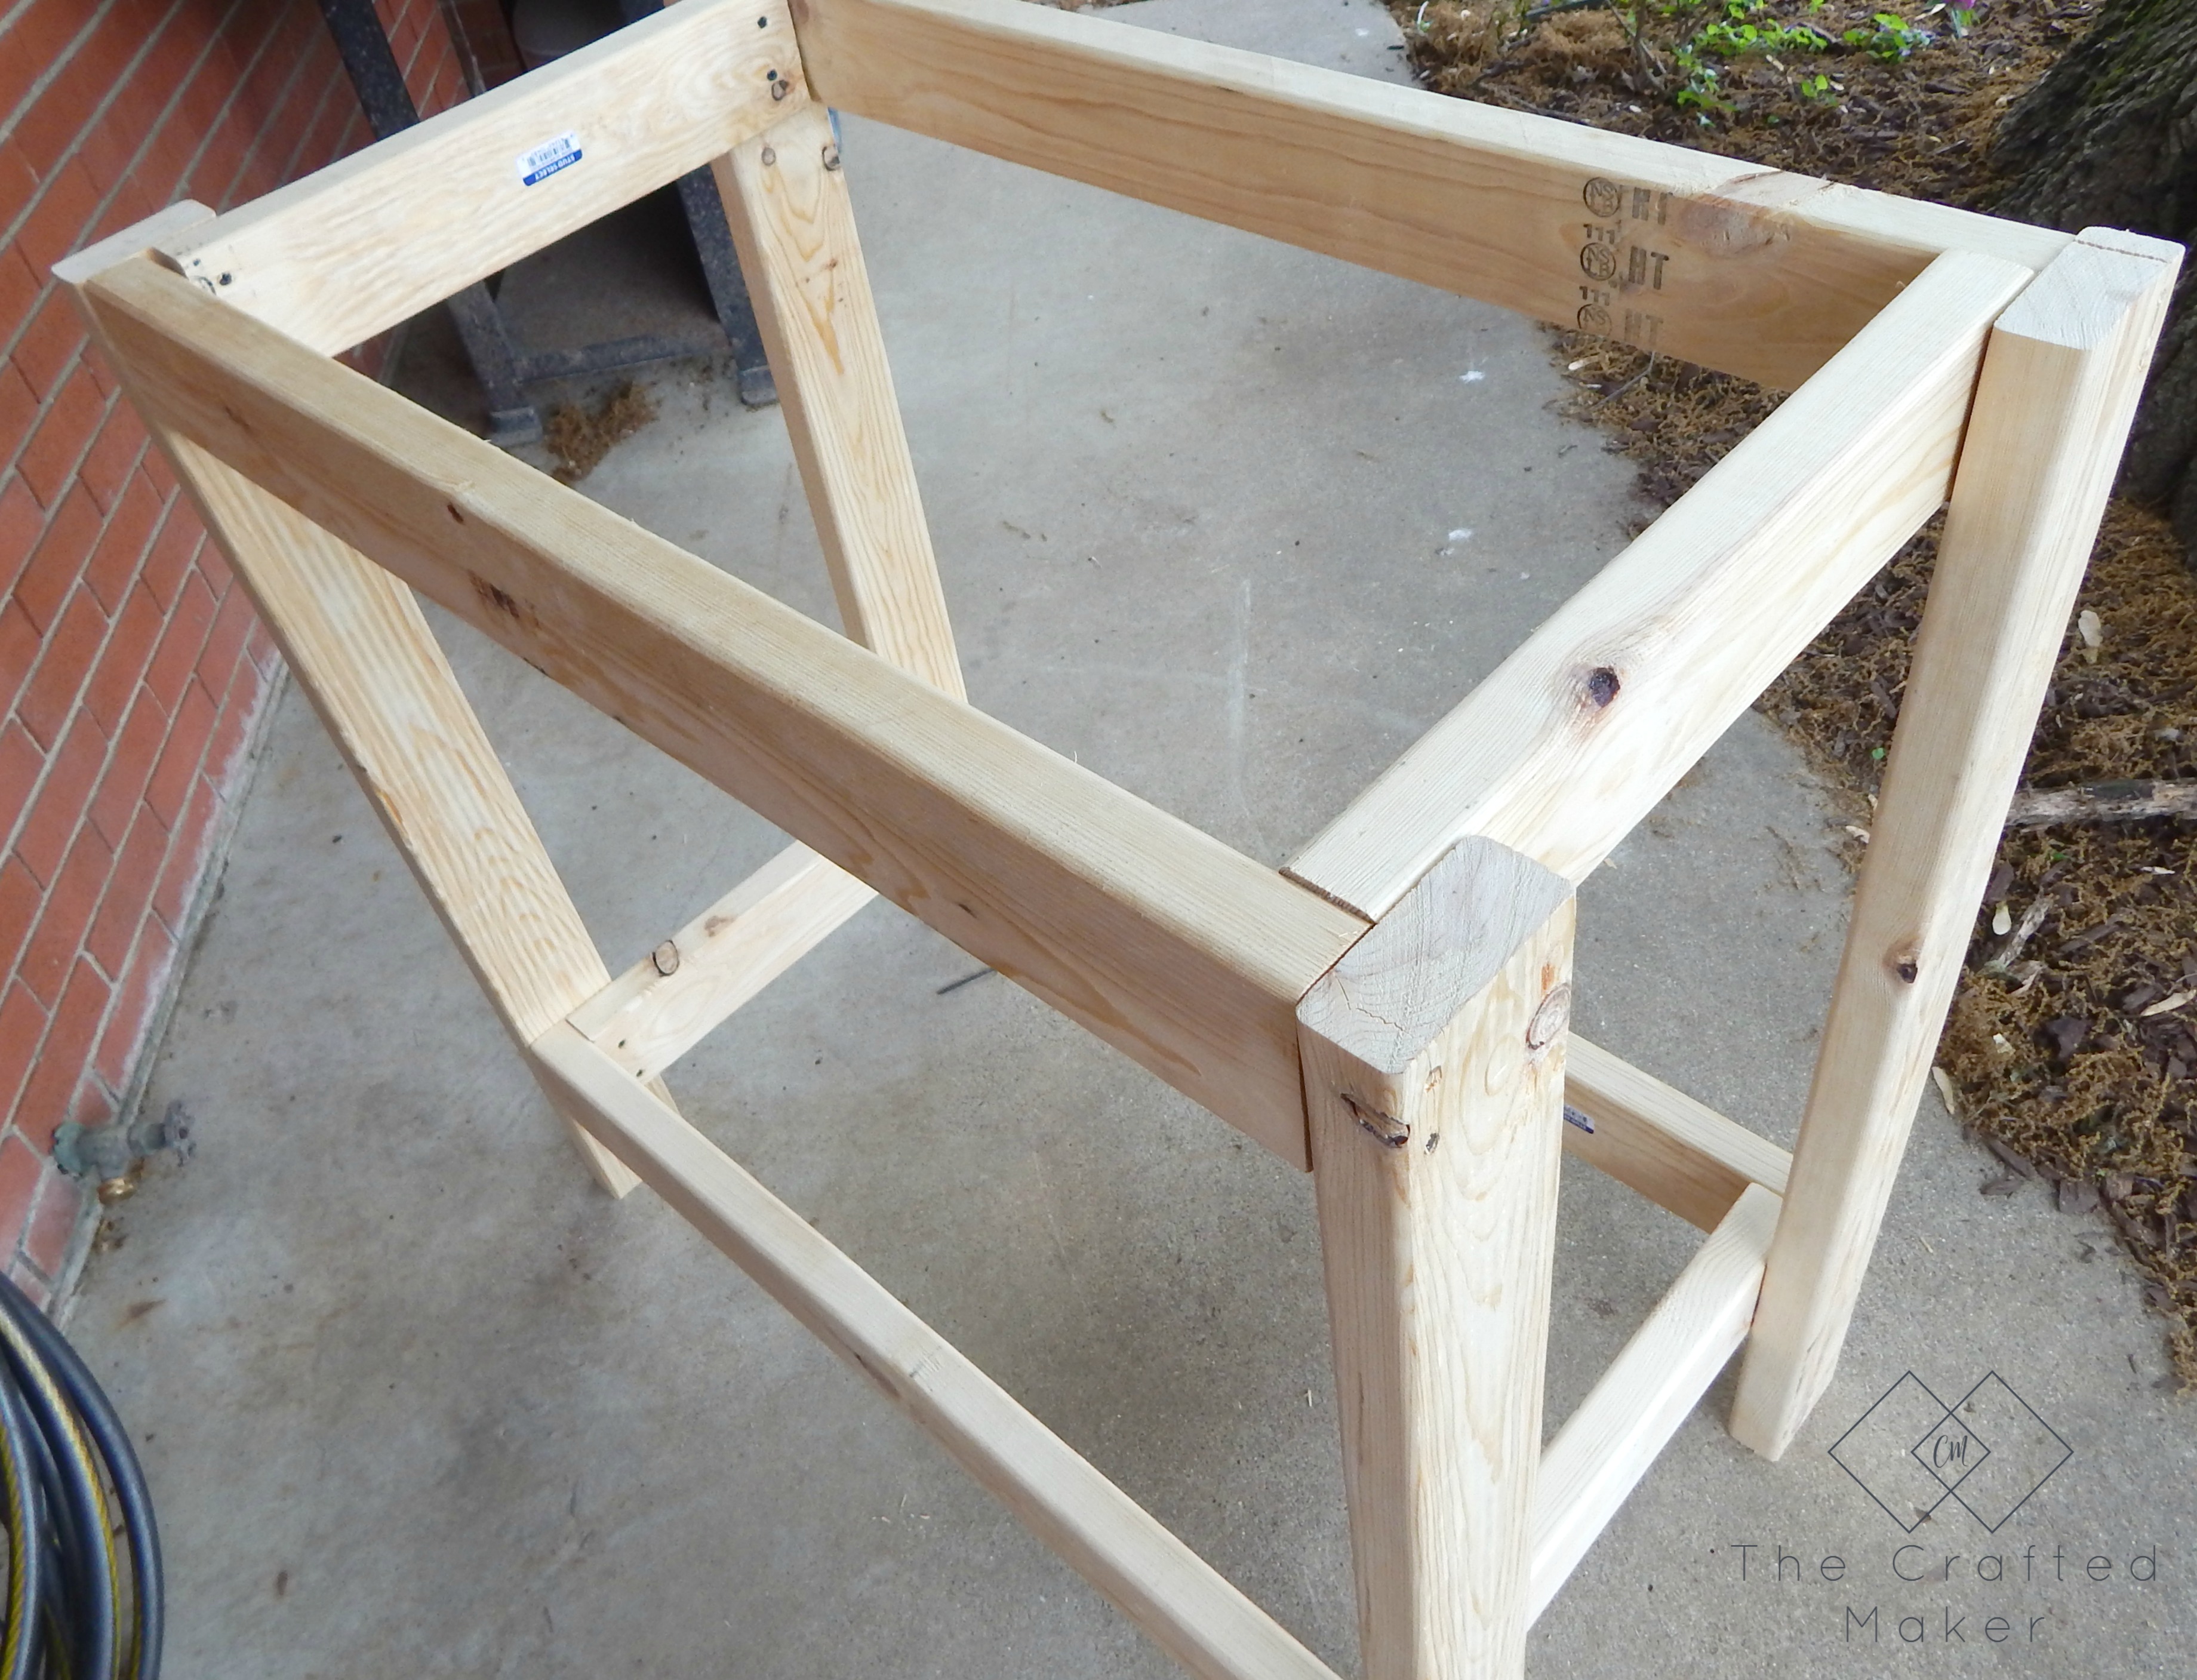
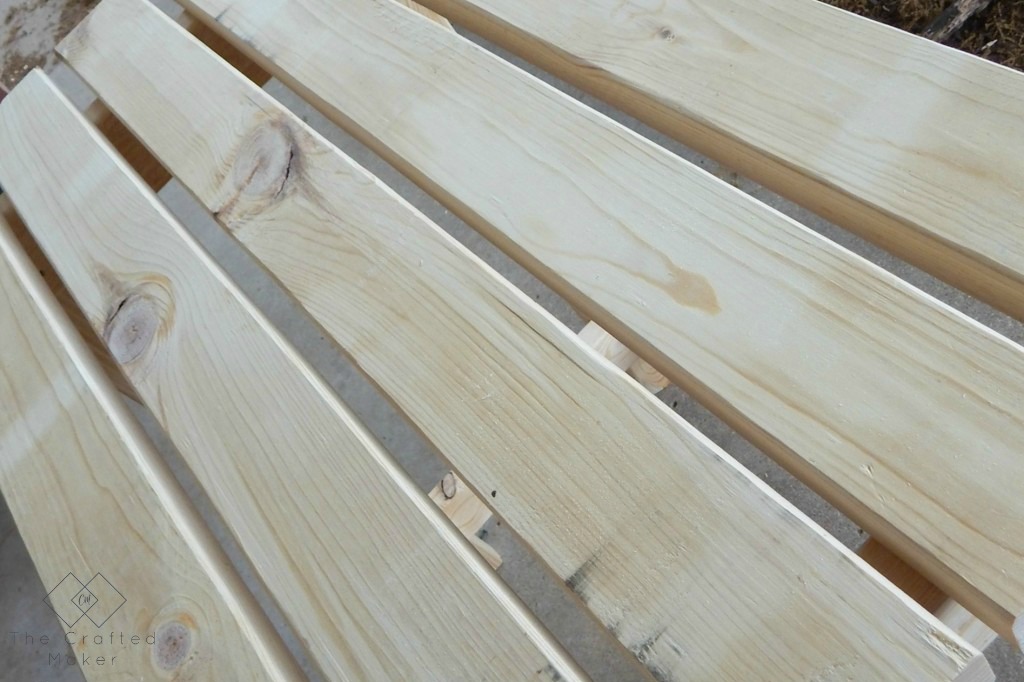
Time to add the shelving boards. The top and bottom boards for the shelves are different sizes. The bottom boards fit inside the legs and the top shelf boards sit on top of the legs. I spaced the boards about 1/2″ apart.
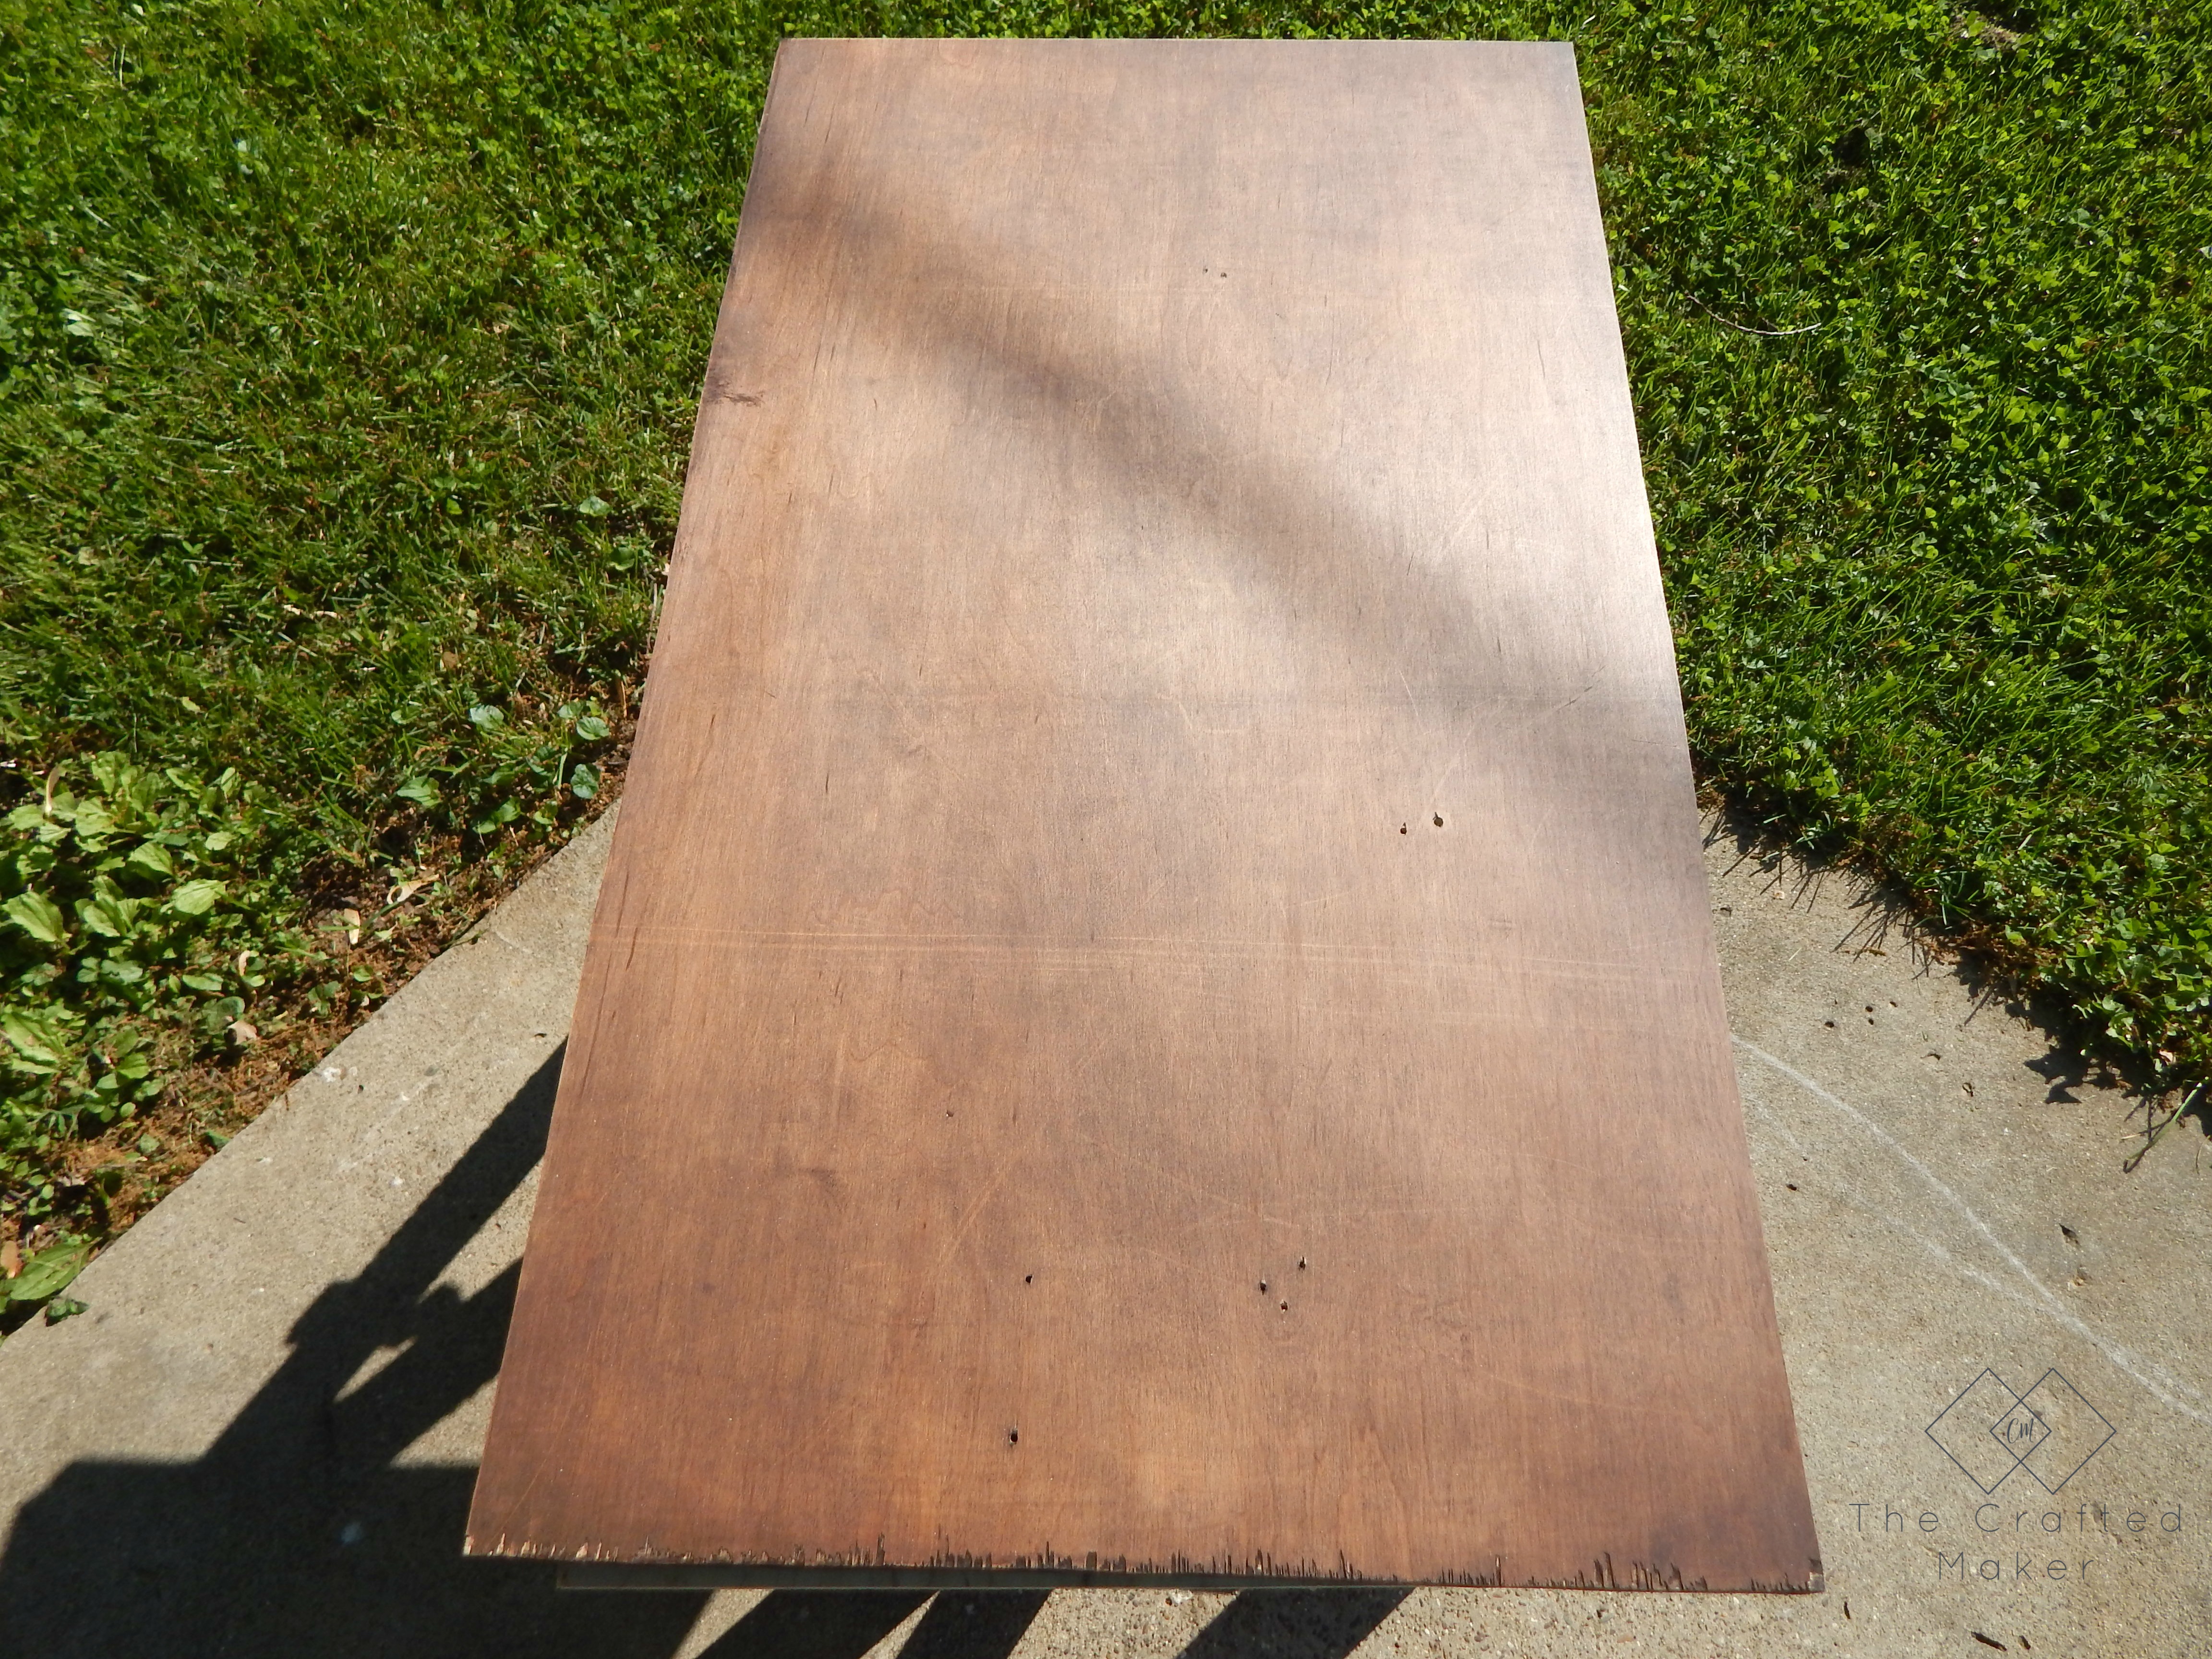
The base is coming along quite nicely. Time to start on the top of the bench. Cut a piece of the plywood @ 36″X20″. I stained the board before going any further, this piece and the doors are the only things I stained. I wanted some contrast with the unfinished wood.
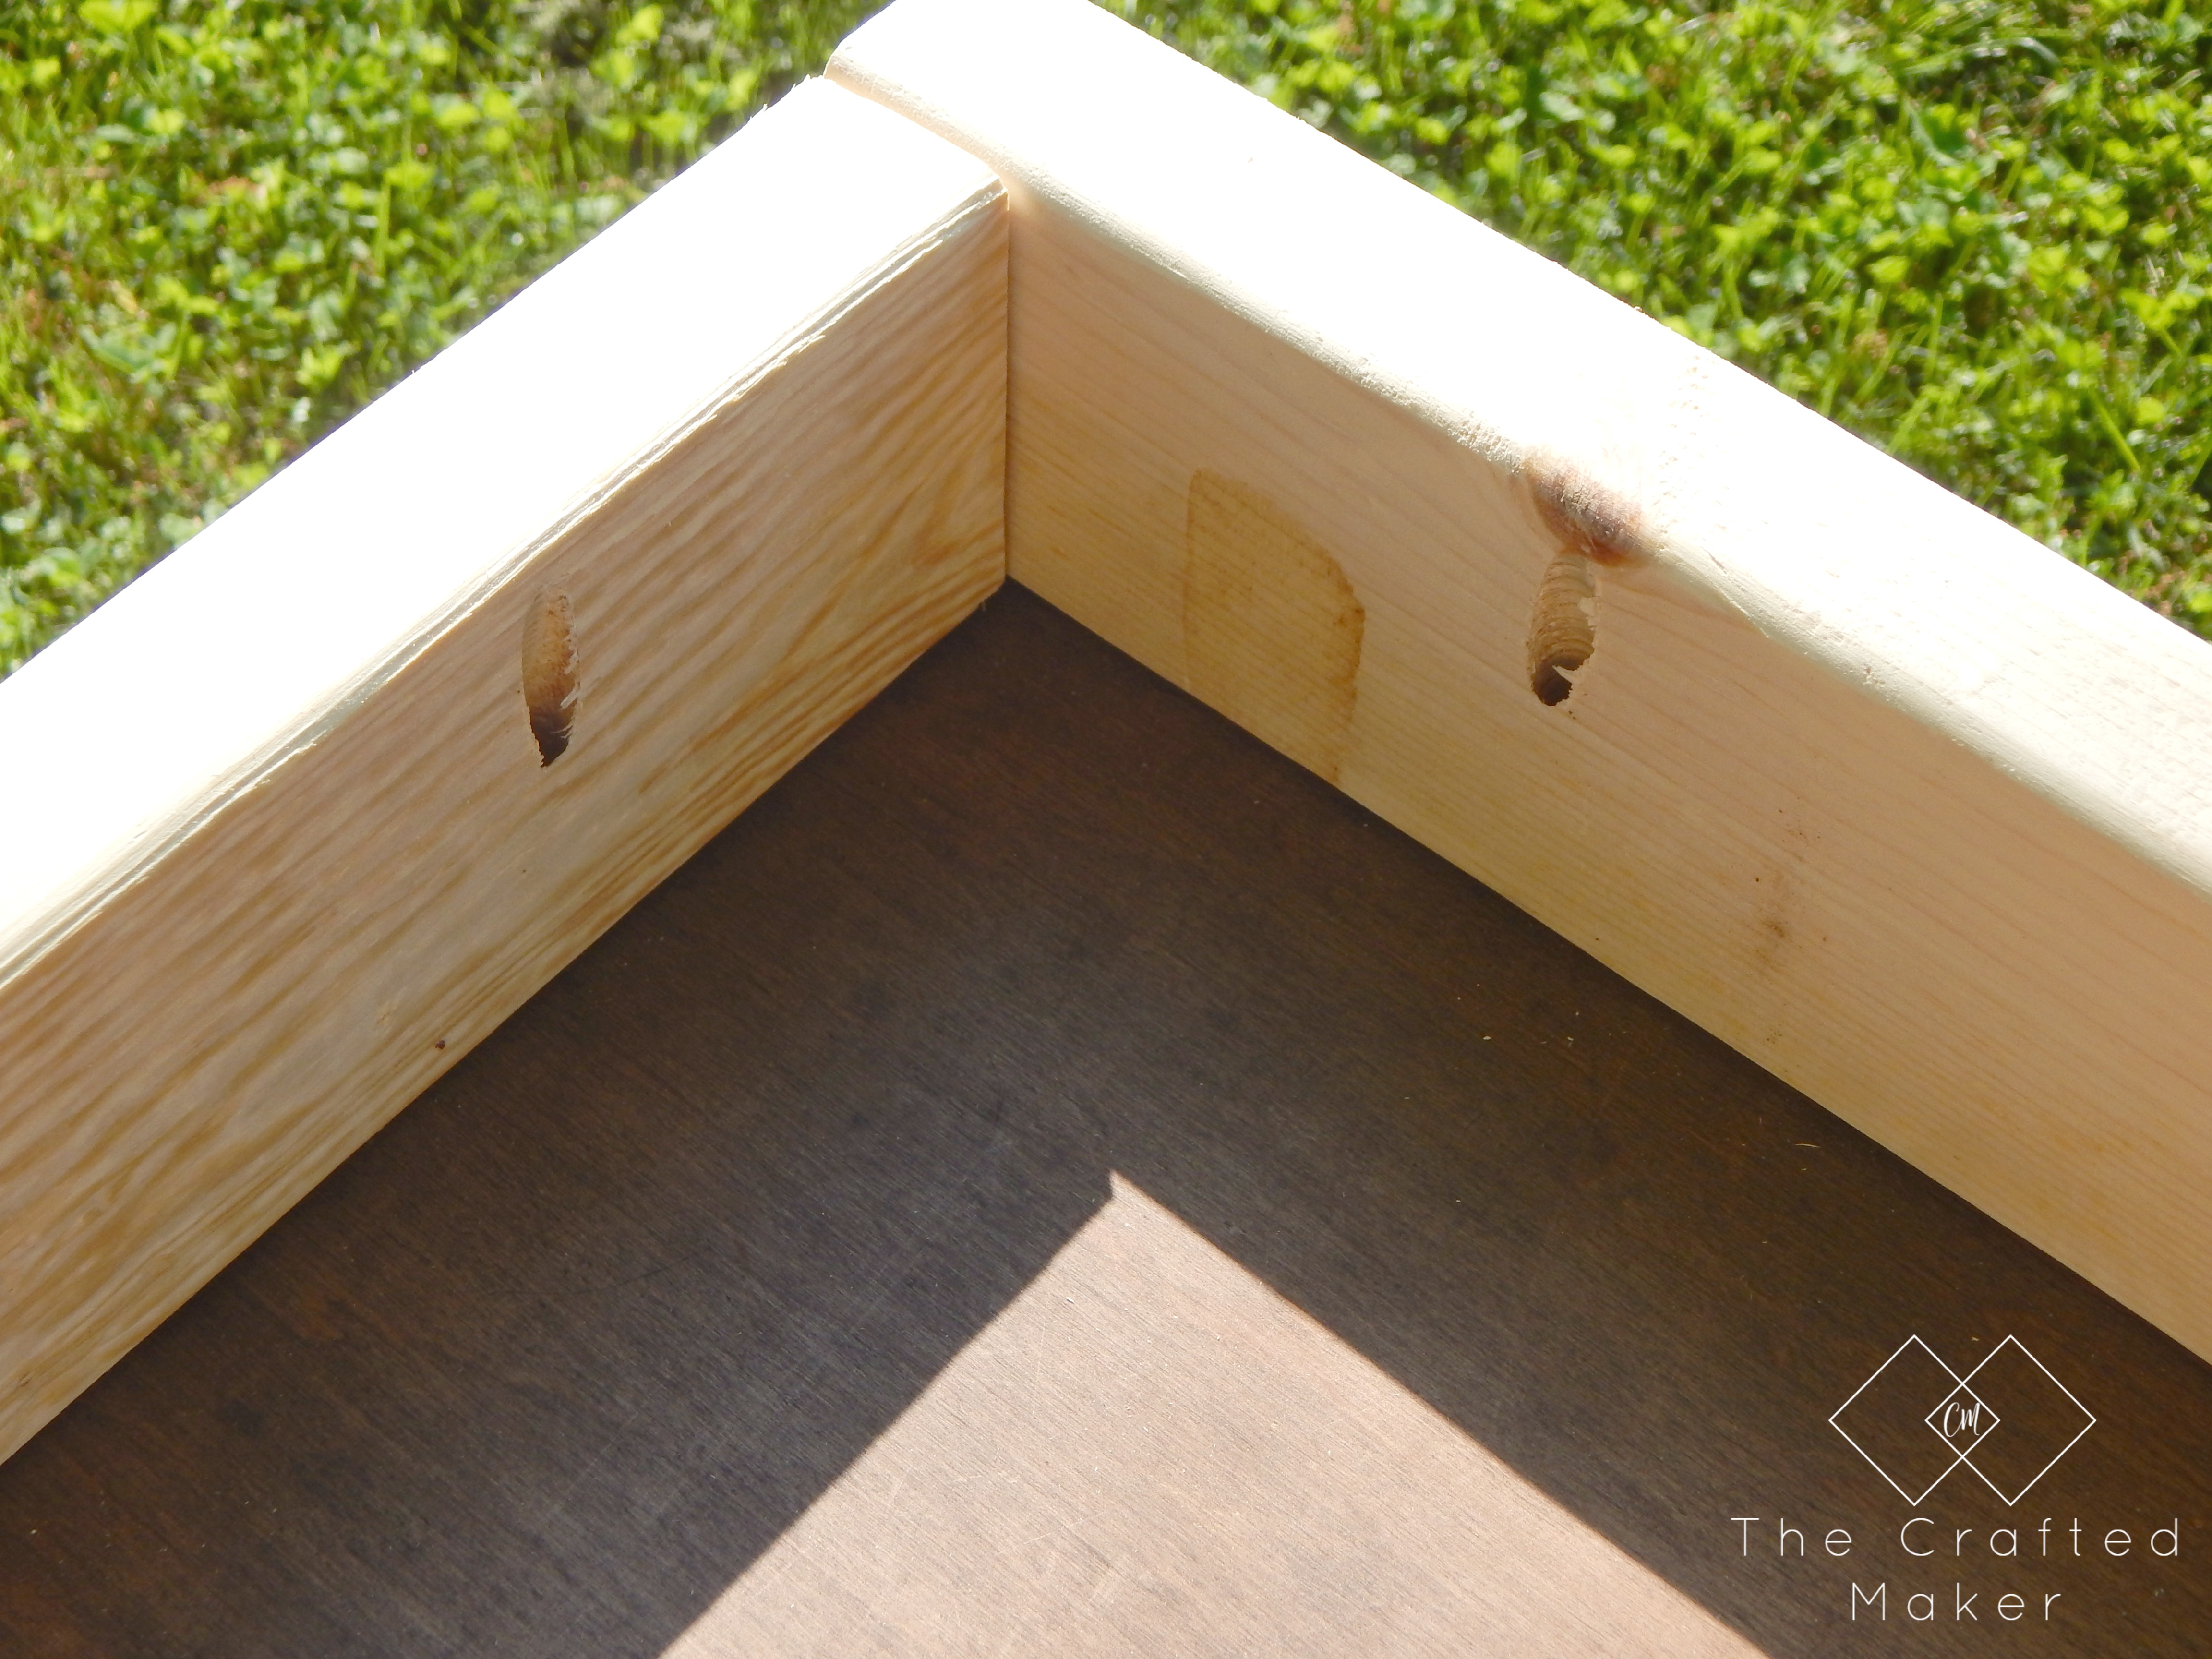
Take the 2X4’s in the cut list for the top and drill pocket holes in them, this is what will make up the frame for the doors.


With pocket hole screws, attach the boards to the plywood.

The pocket hole screws should give this a nice and tight attachment to the plywood.
This is where you need to get the tape measure out again. Because wood is never 100% straight, it is best to measure for the doors now. There are dimensions in the plans for these boards, but better safe than sorry. Especially if this is the only plywood you have. It is never a fun thing to have to go to the hardware store in the middle of a project. Eeeekkk.
I went ahead and stained the doors also to save some time. If you are going to stain or paint the whole project, you could wait until the end.

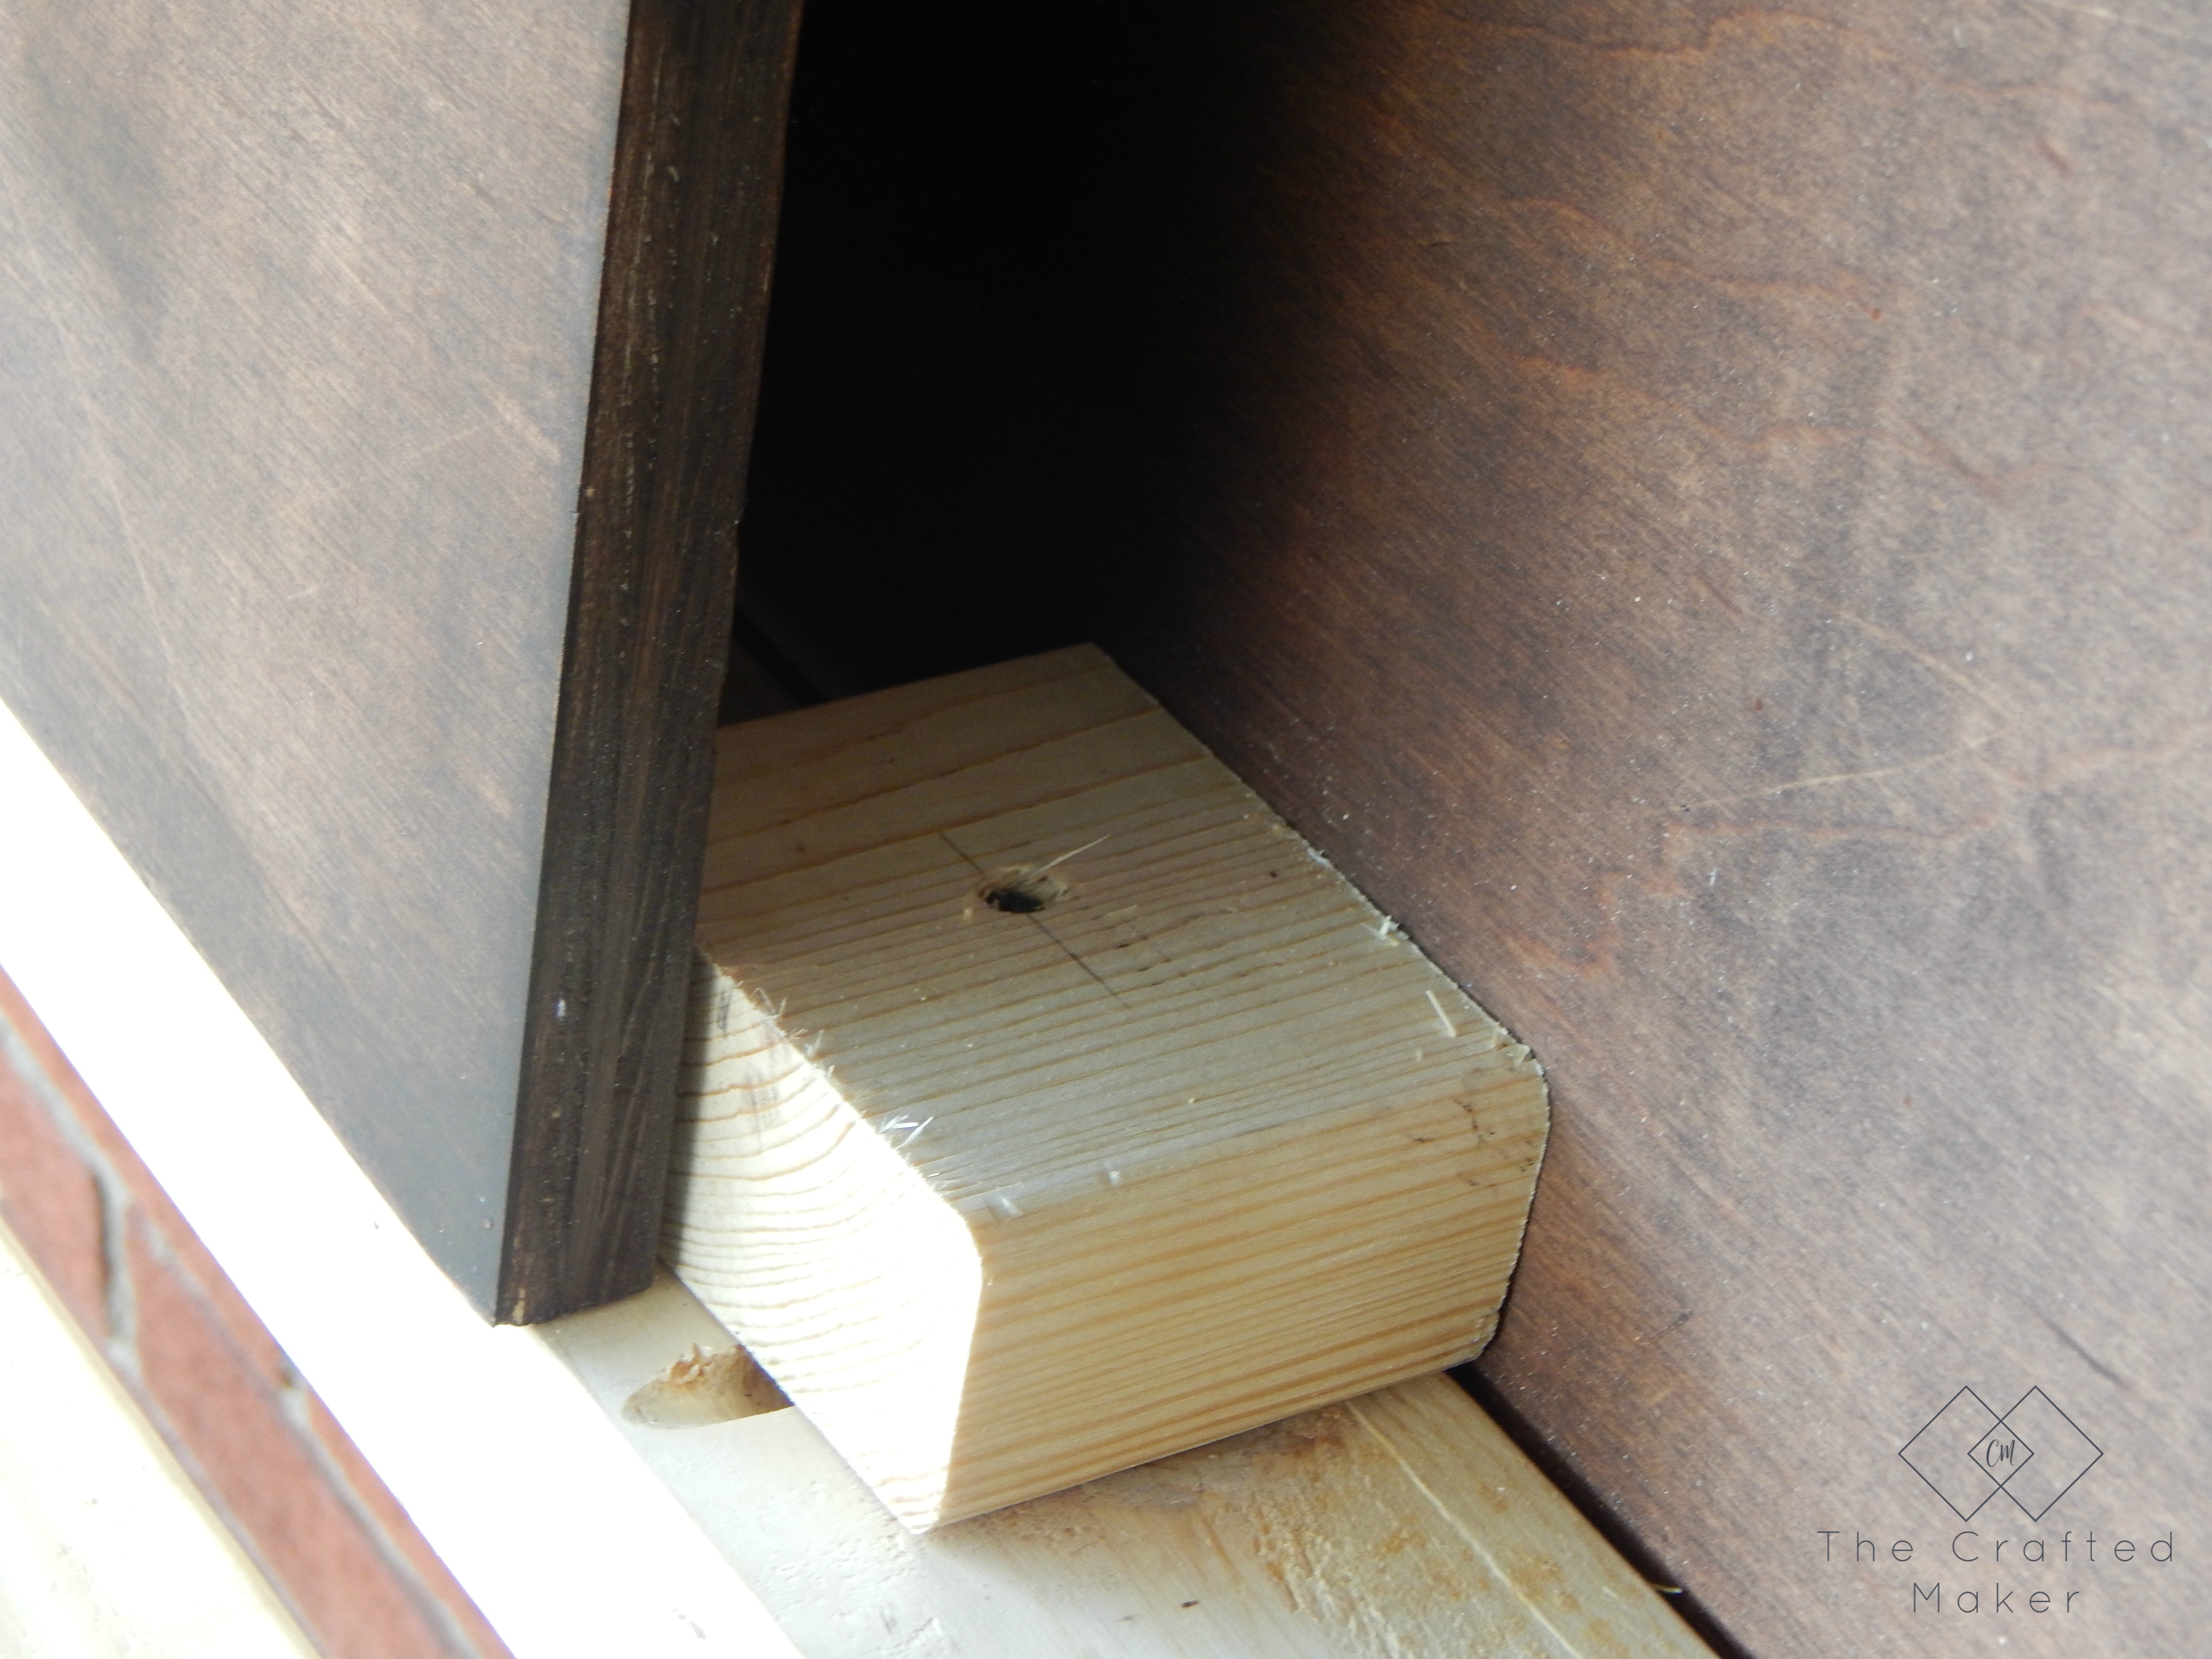
Before we mount the doors to the frame, you will need to cut the blocks of wood to allow the door to rest without falling in the middle. I just used 2 pieces of scrap 2X4 for this cut @ 2 3/4″. Find the middle of your frame and place one on the top and bottom. One screw should hold these in place.
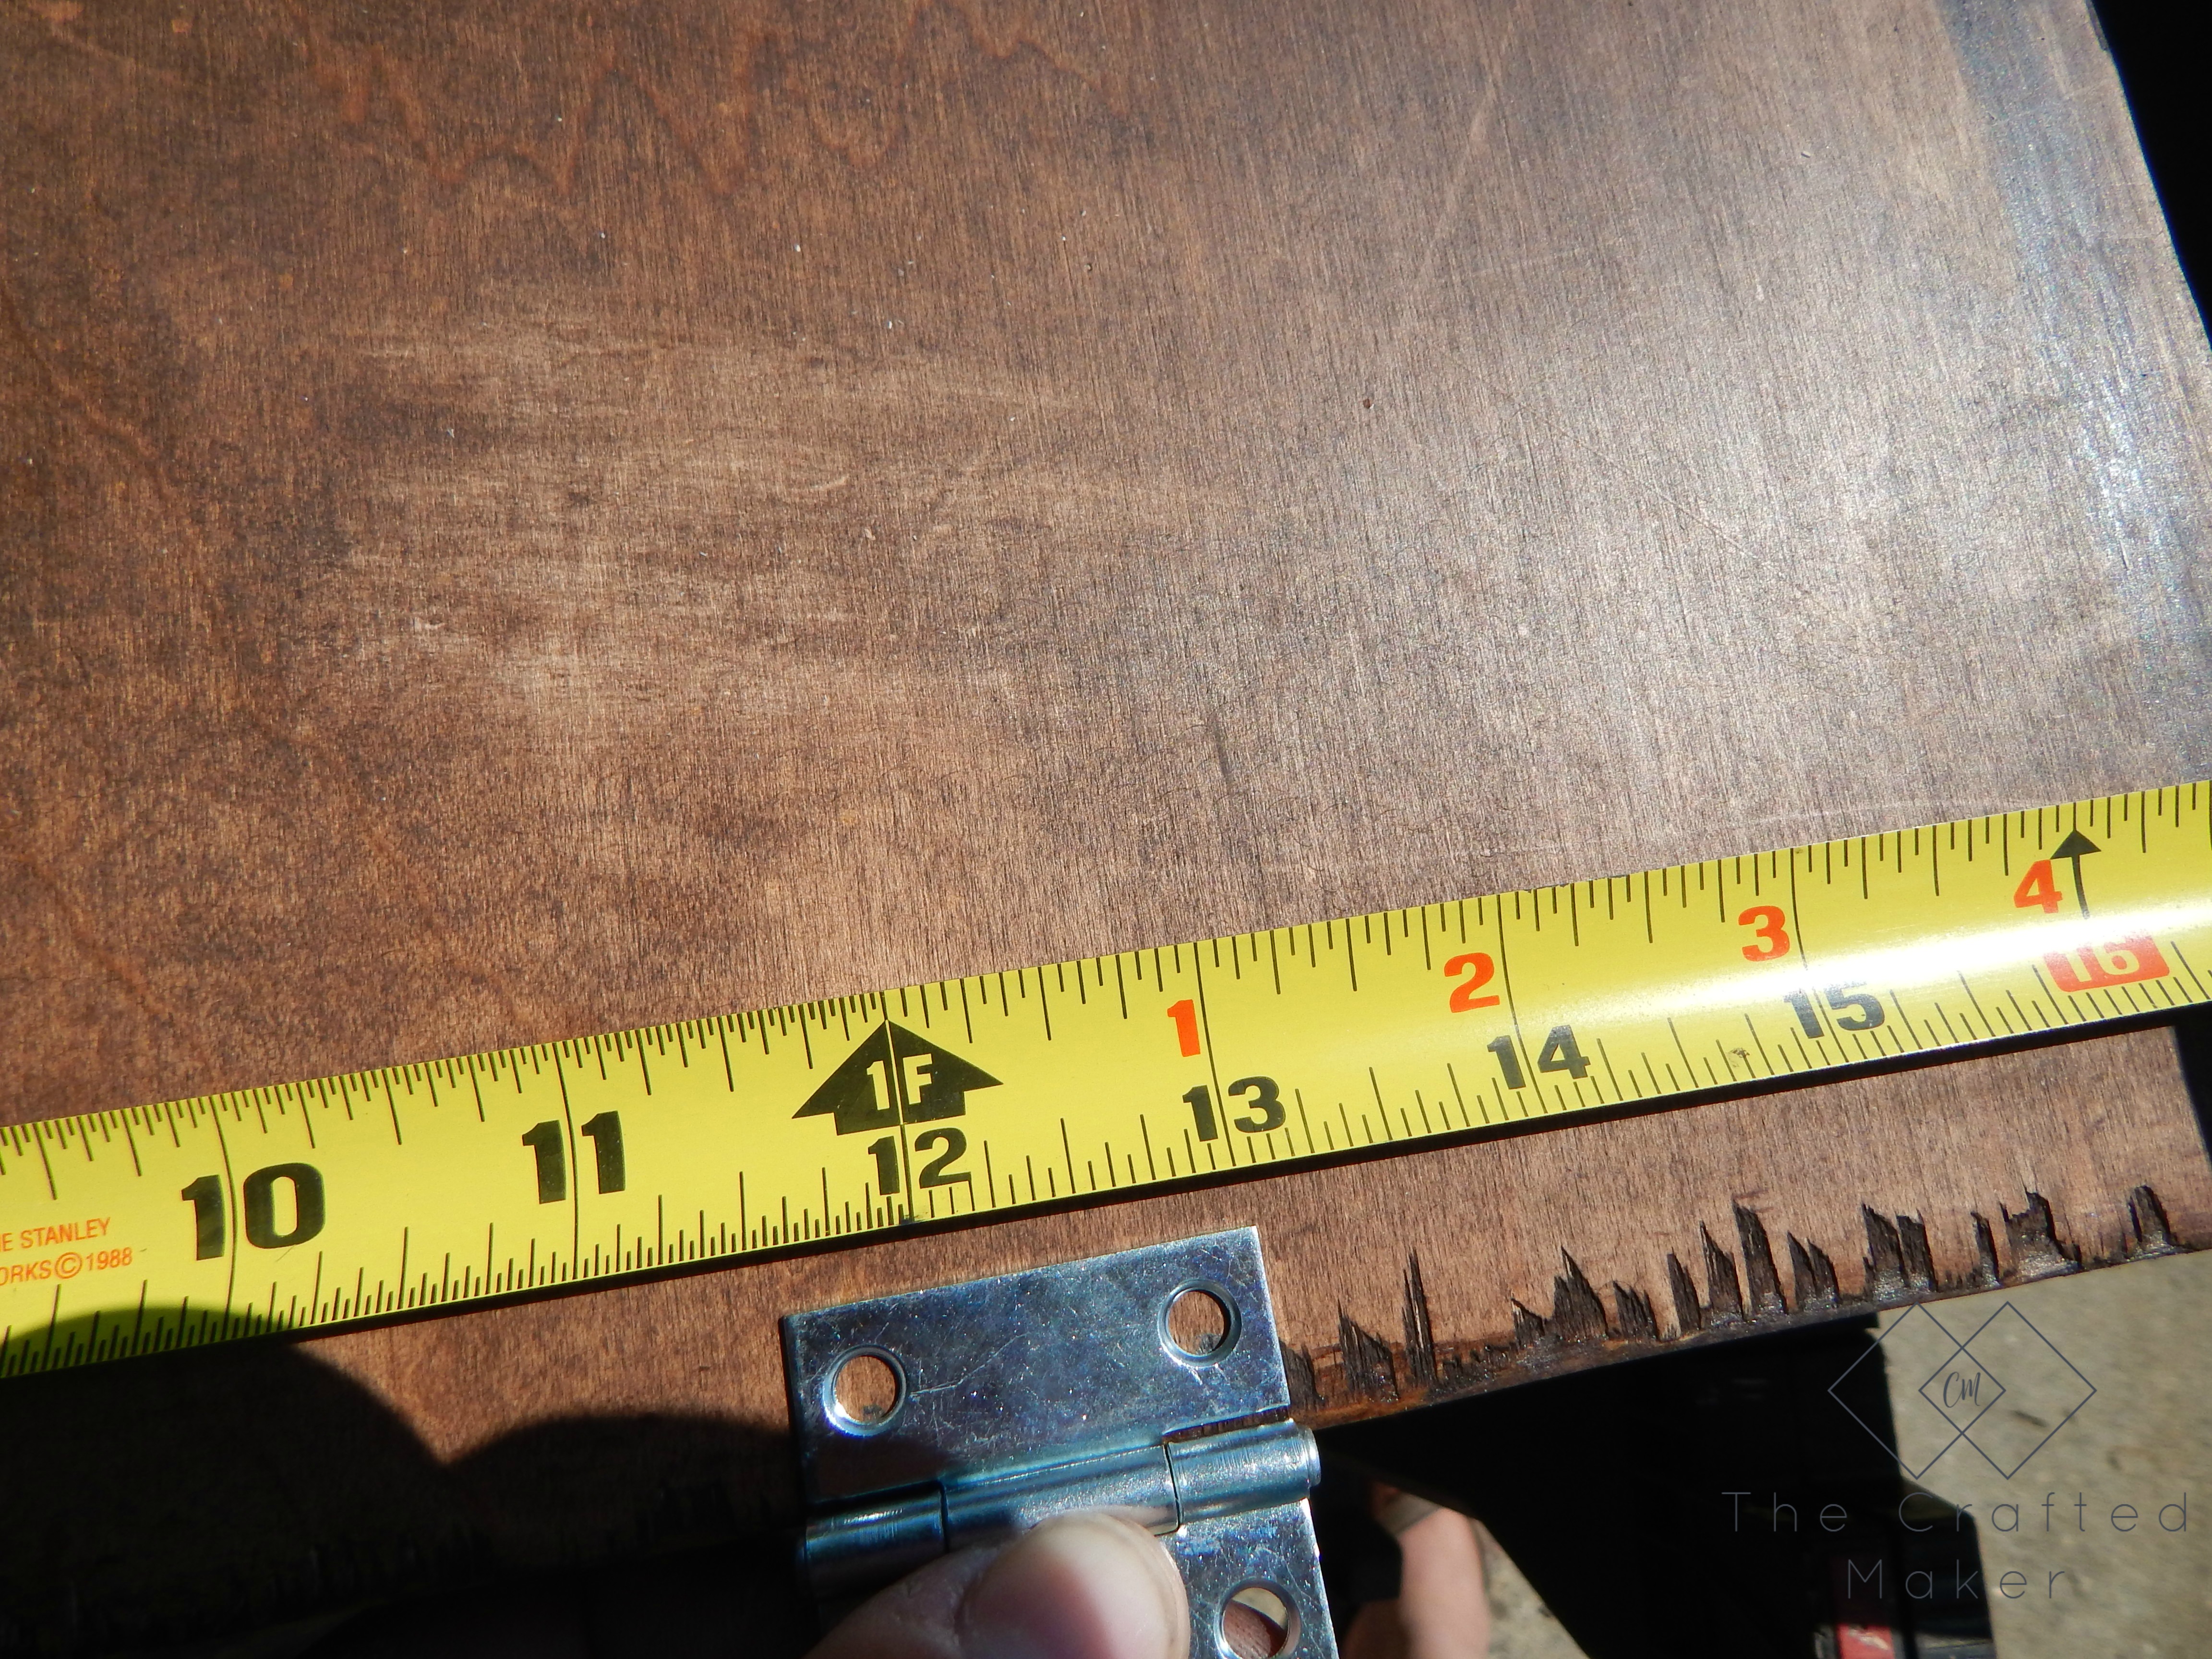
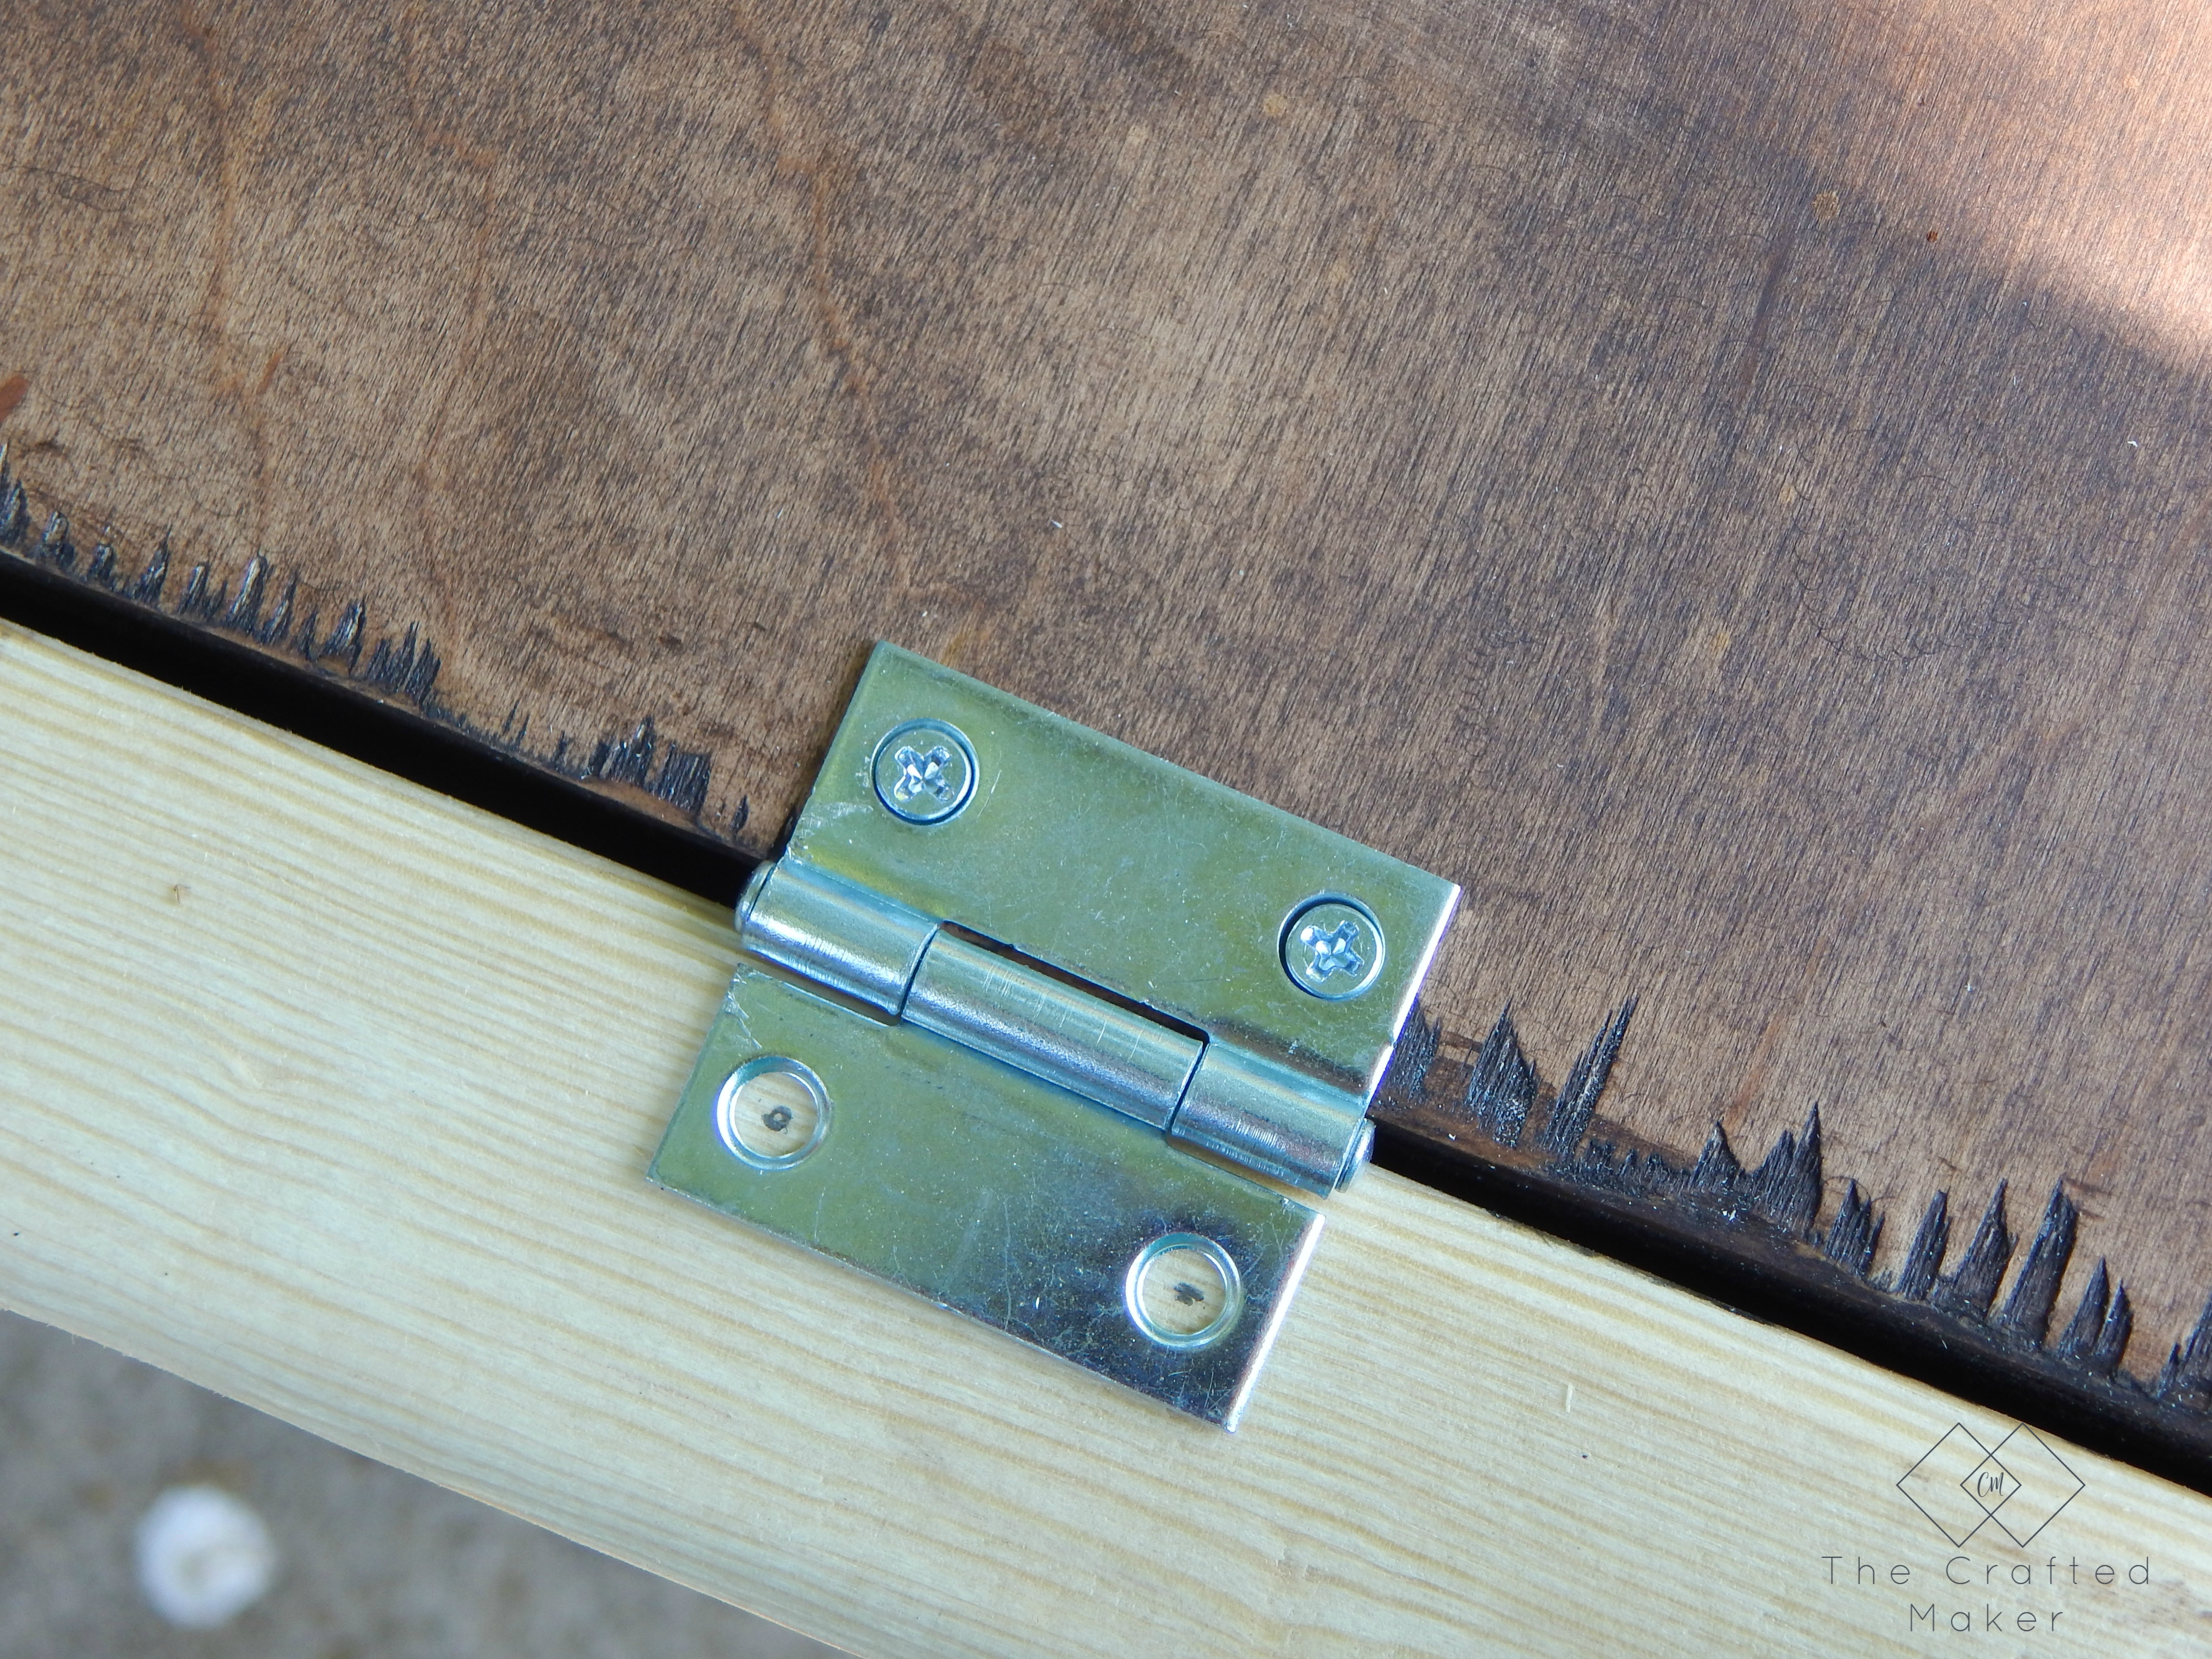
For the mounting of the doors, I used 1 1/2″ hinges. Place the hinges at 4″ and 11.5″. Look at that wood, the saw decided it was hungry today! Bad saw!

Once you have the hinges attached to the doors, place on the frame and attach. It is always best to drill pilot holes when working with this wood so it doesn’t split on you.
With the doors attached to the frame, close them together. Measure and attach your closure. I purchased this kit for screen doors from Lowe’s. It had the closure and the hinges for the top along with some other things I can use later. It was much cheaper than buying it all separate.


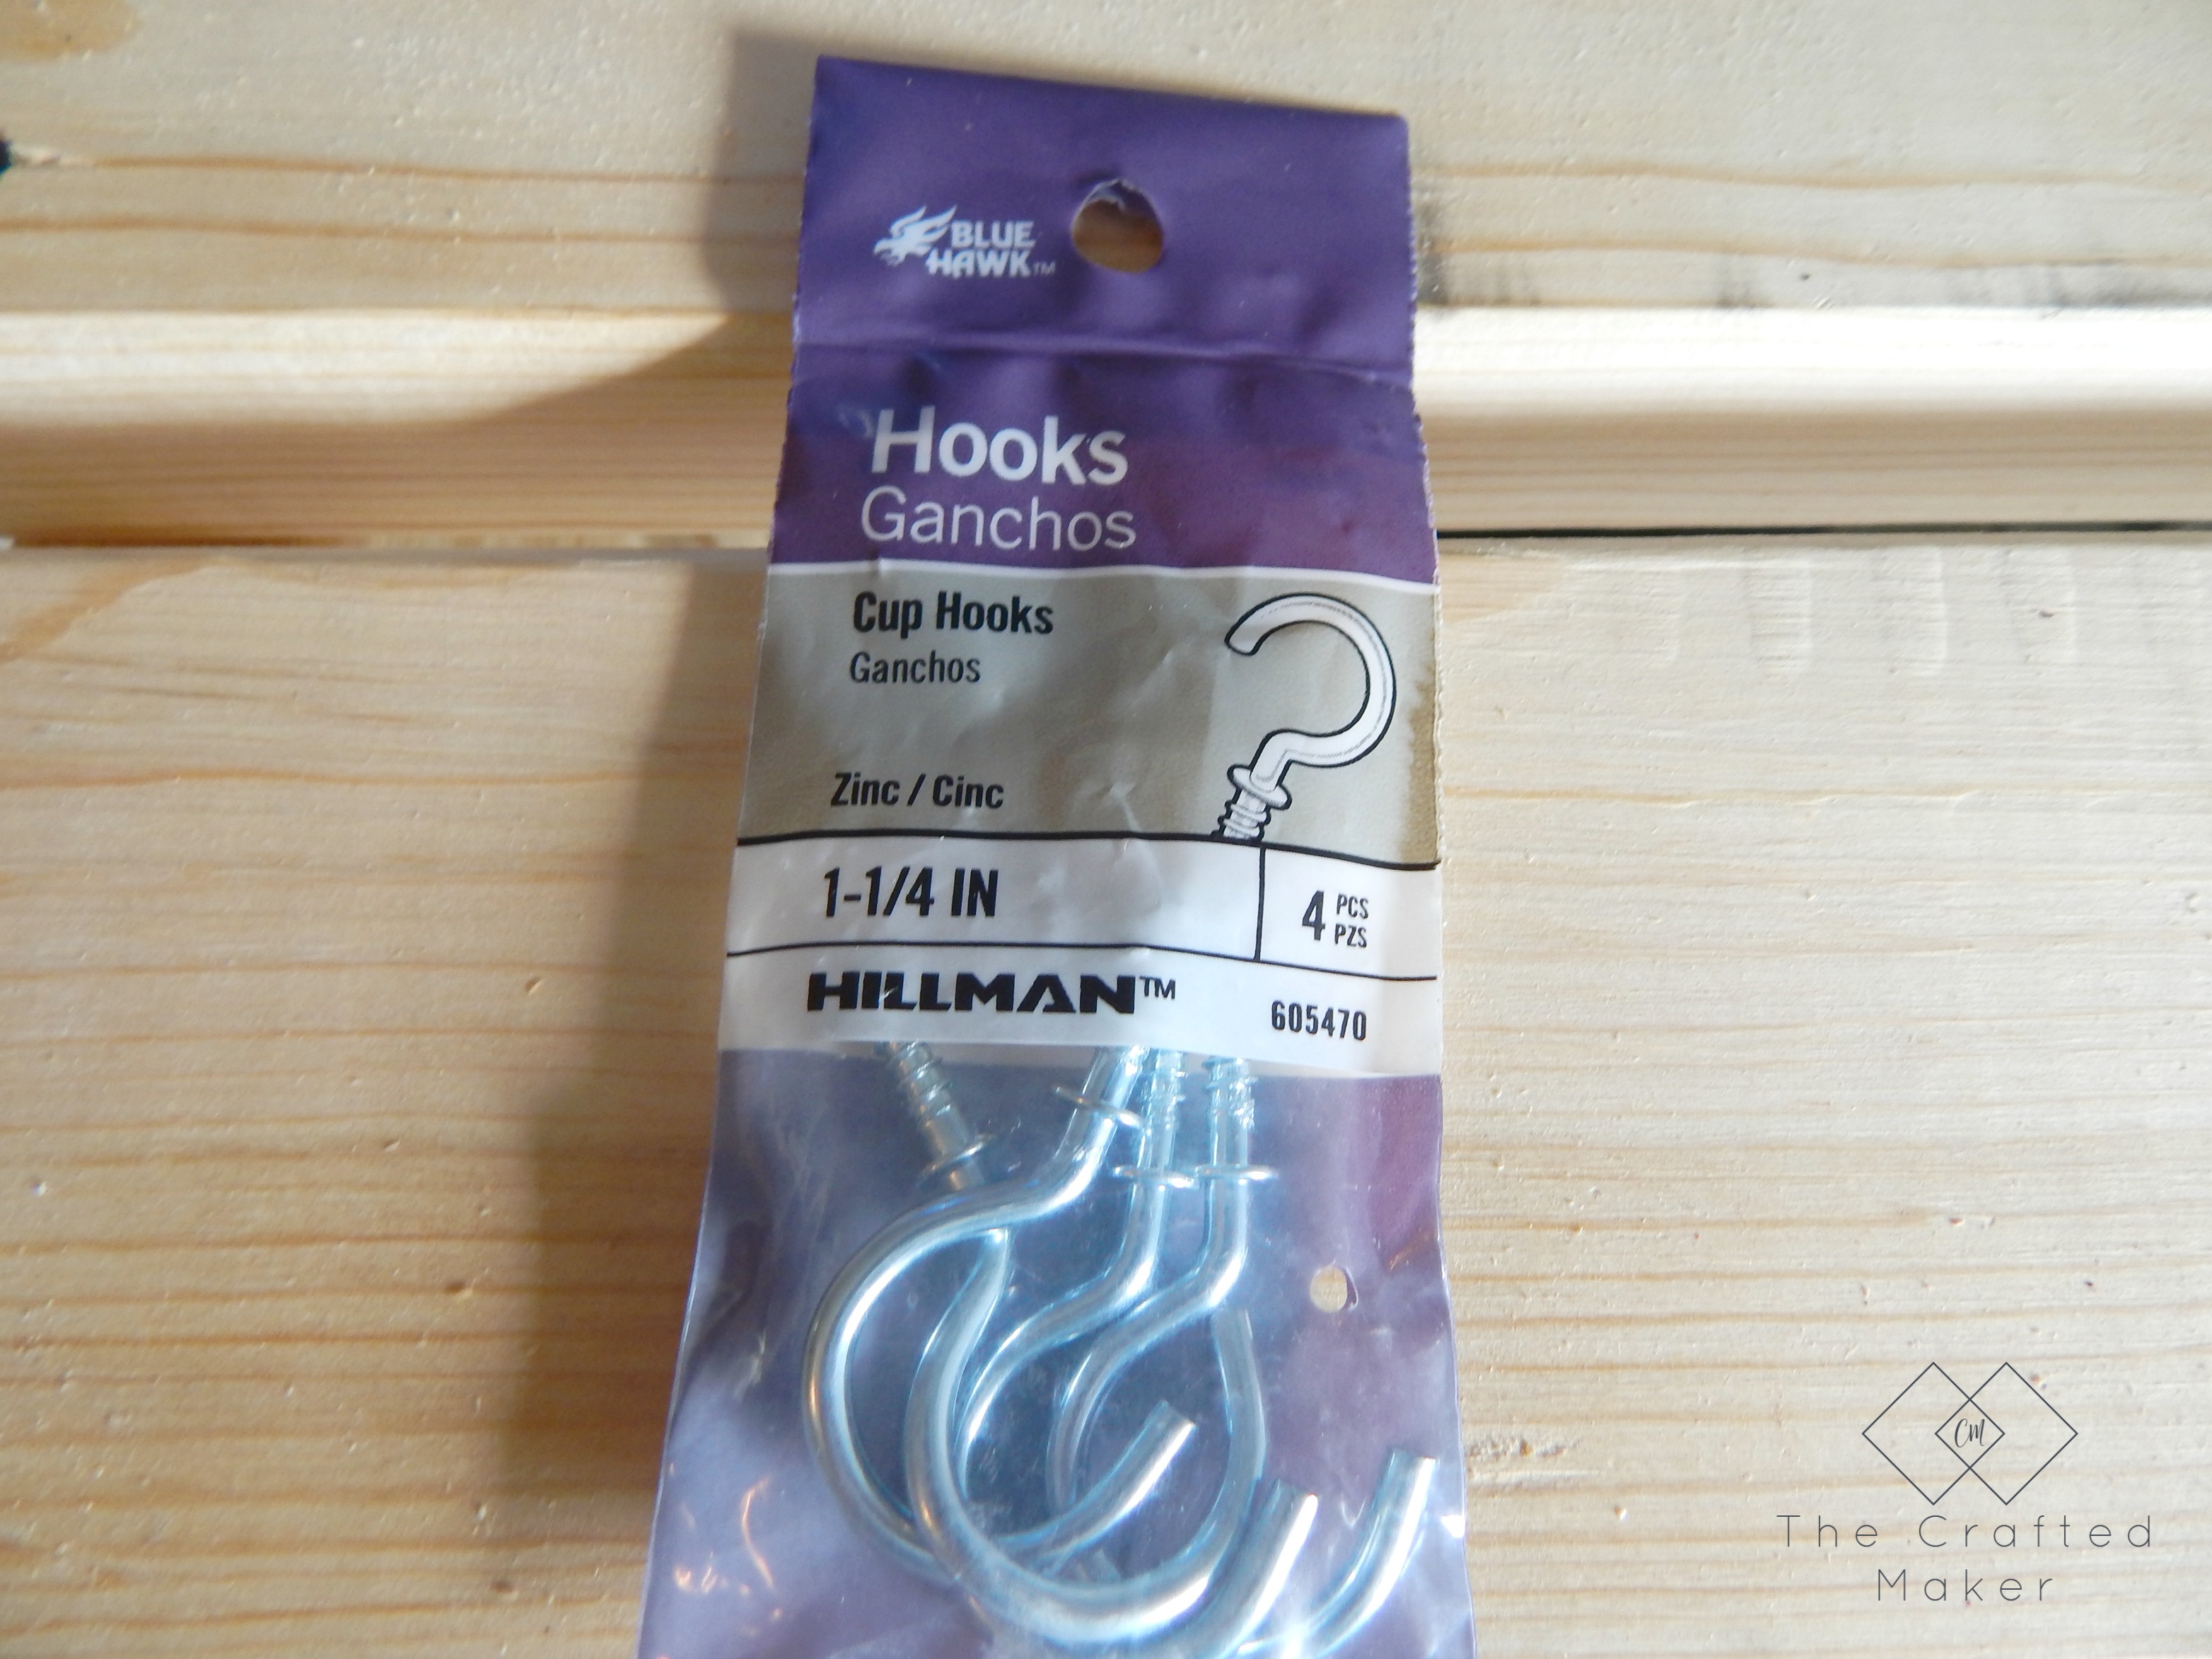
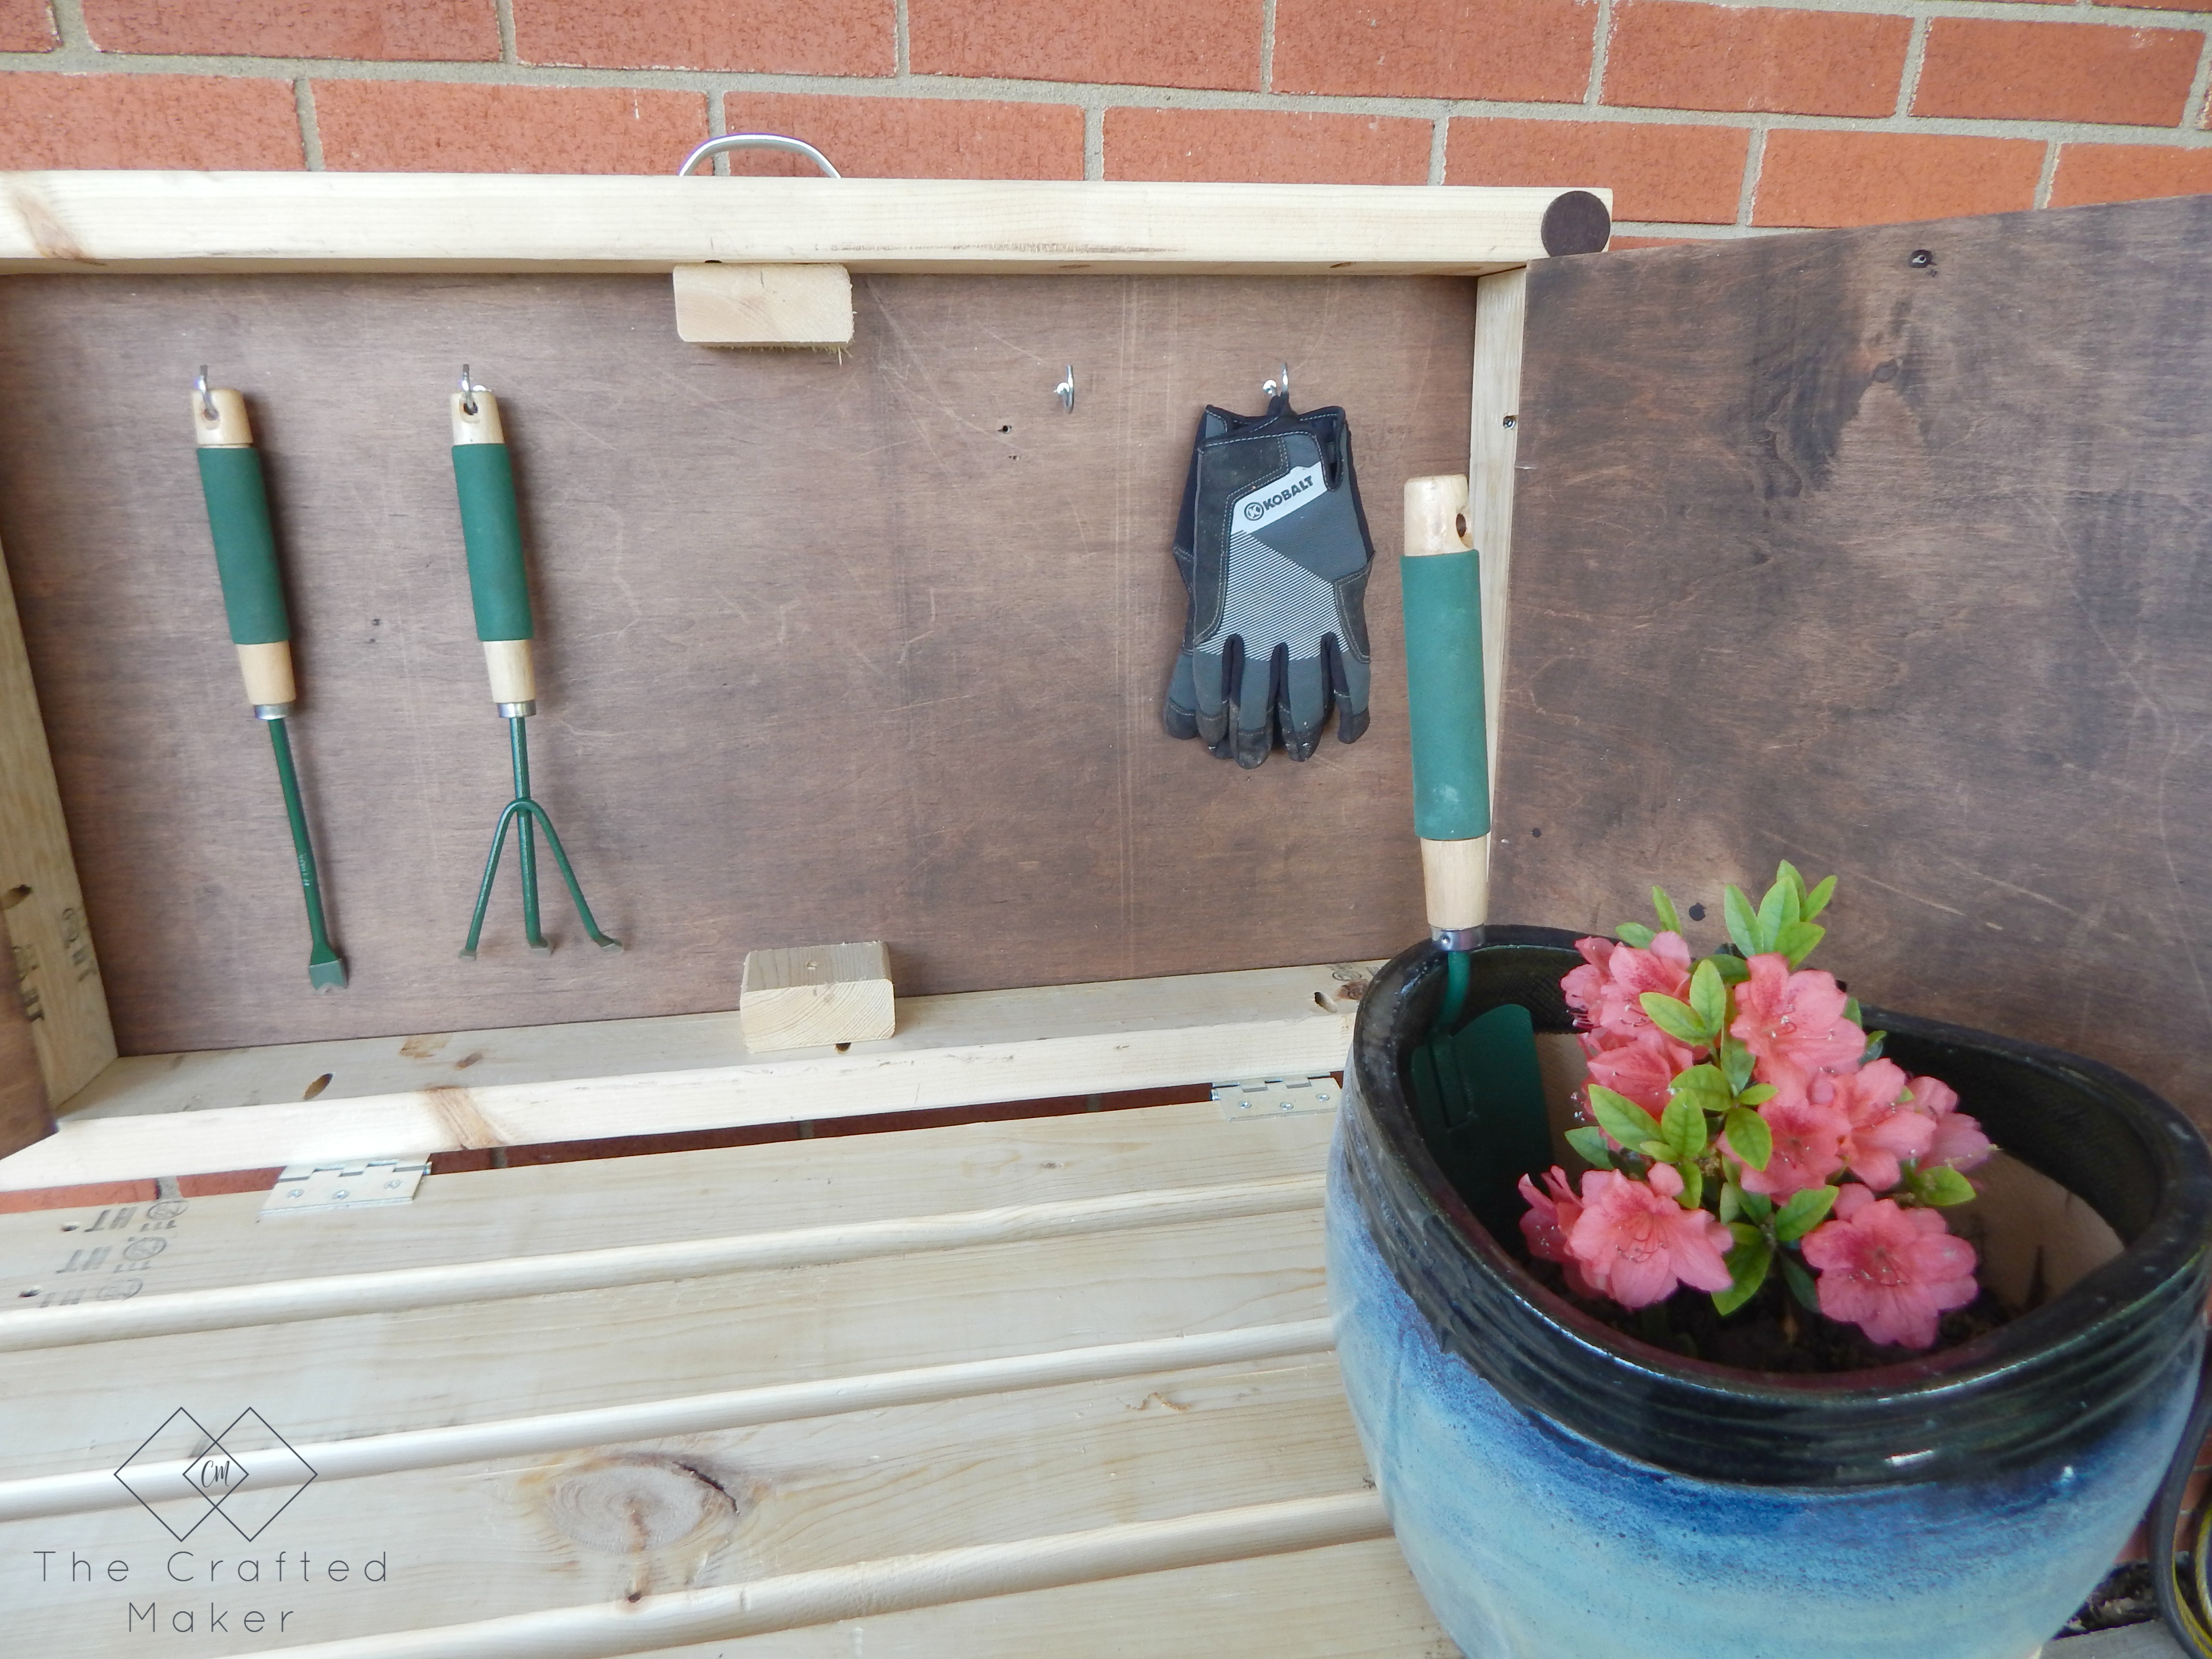
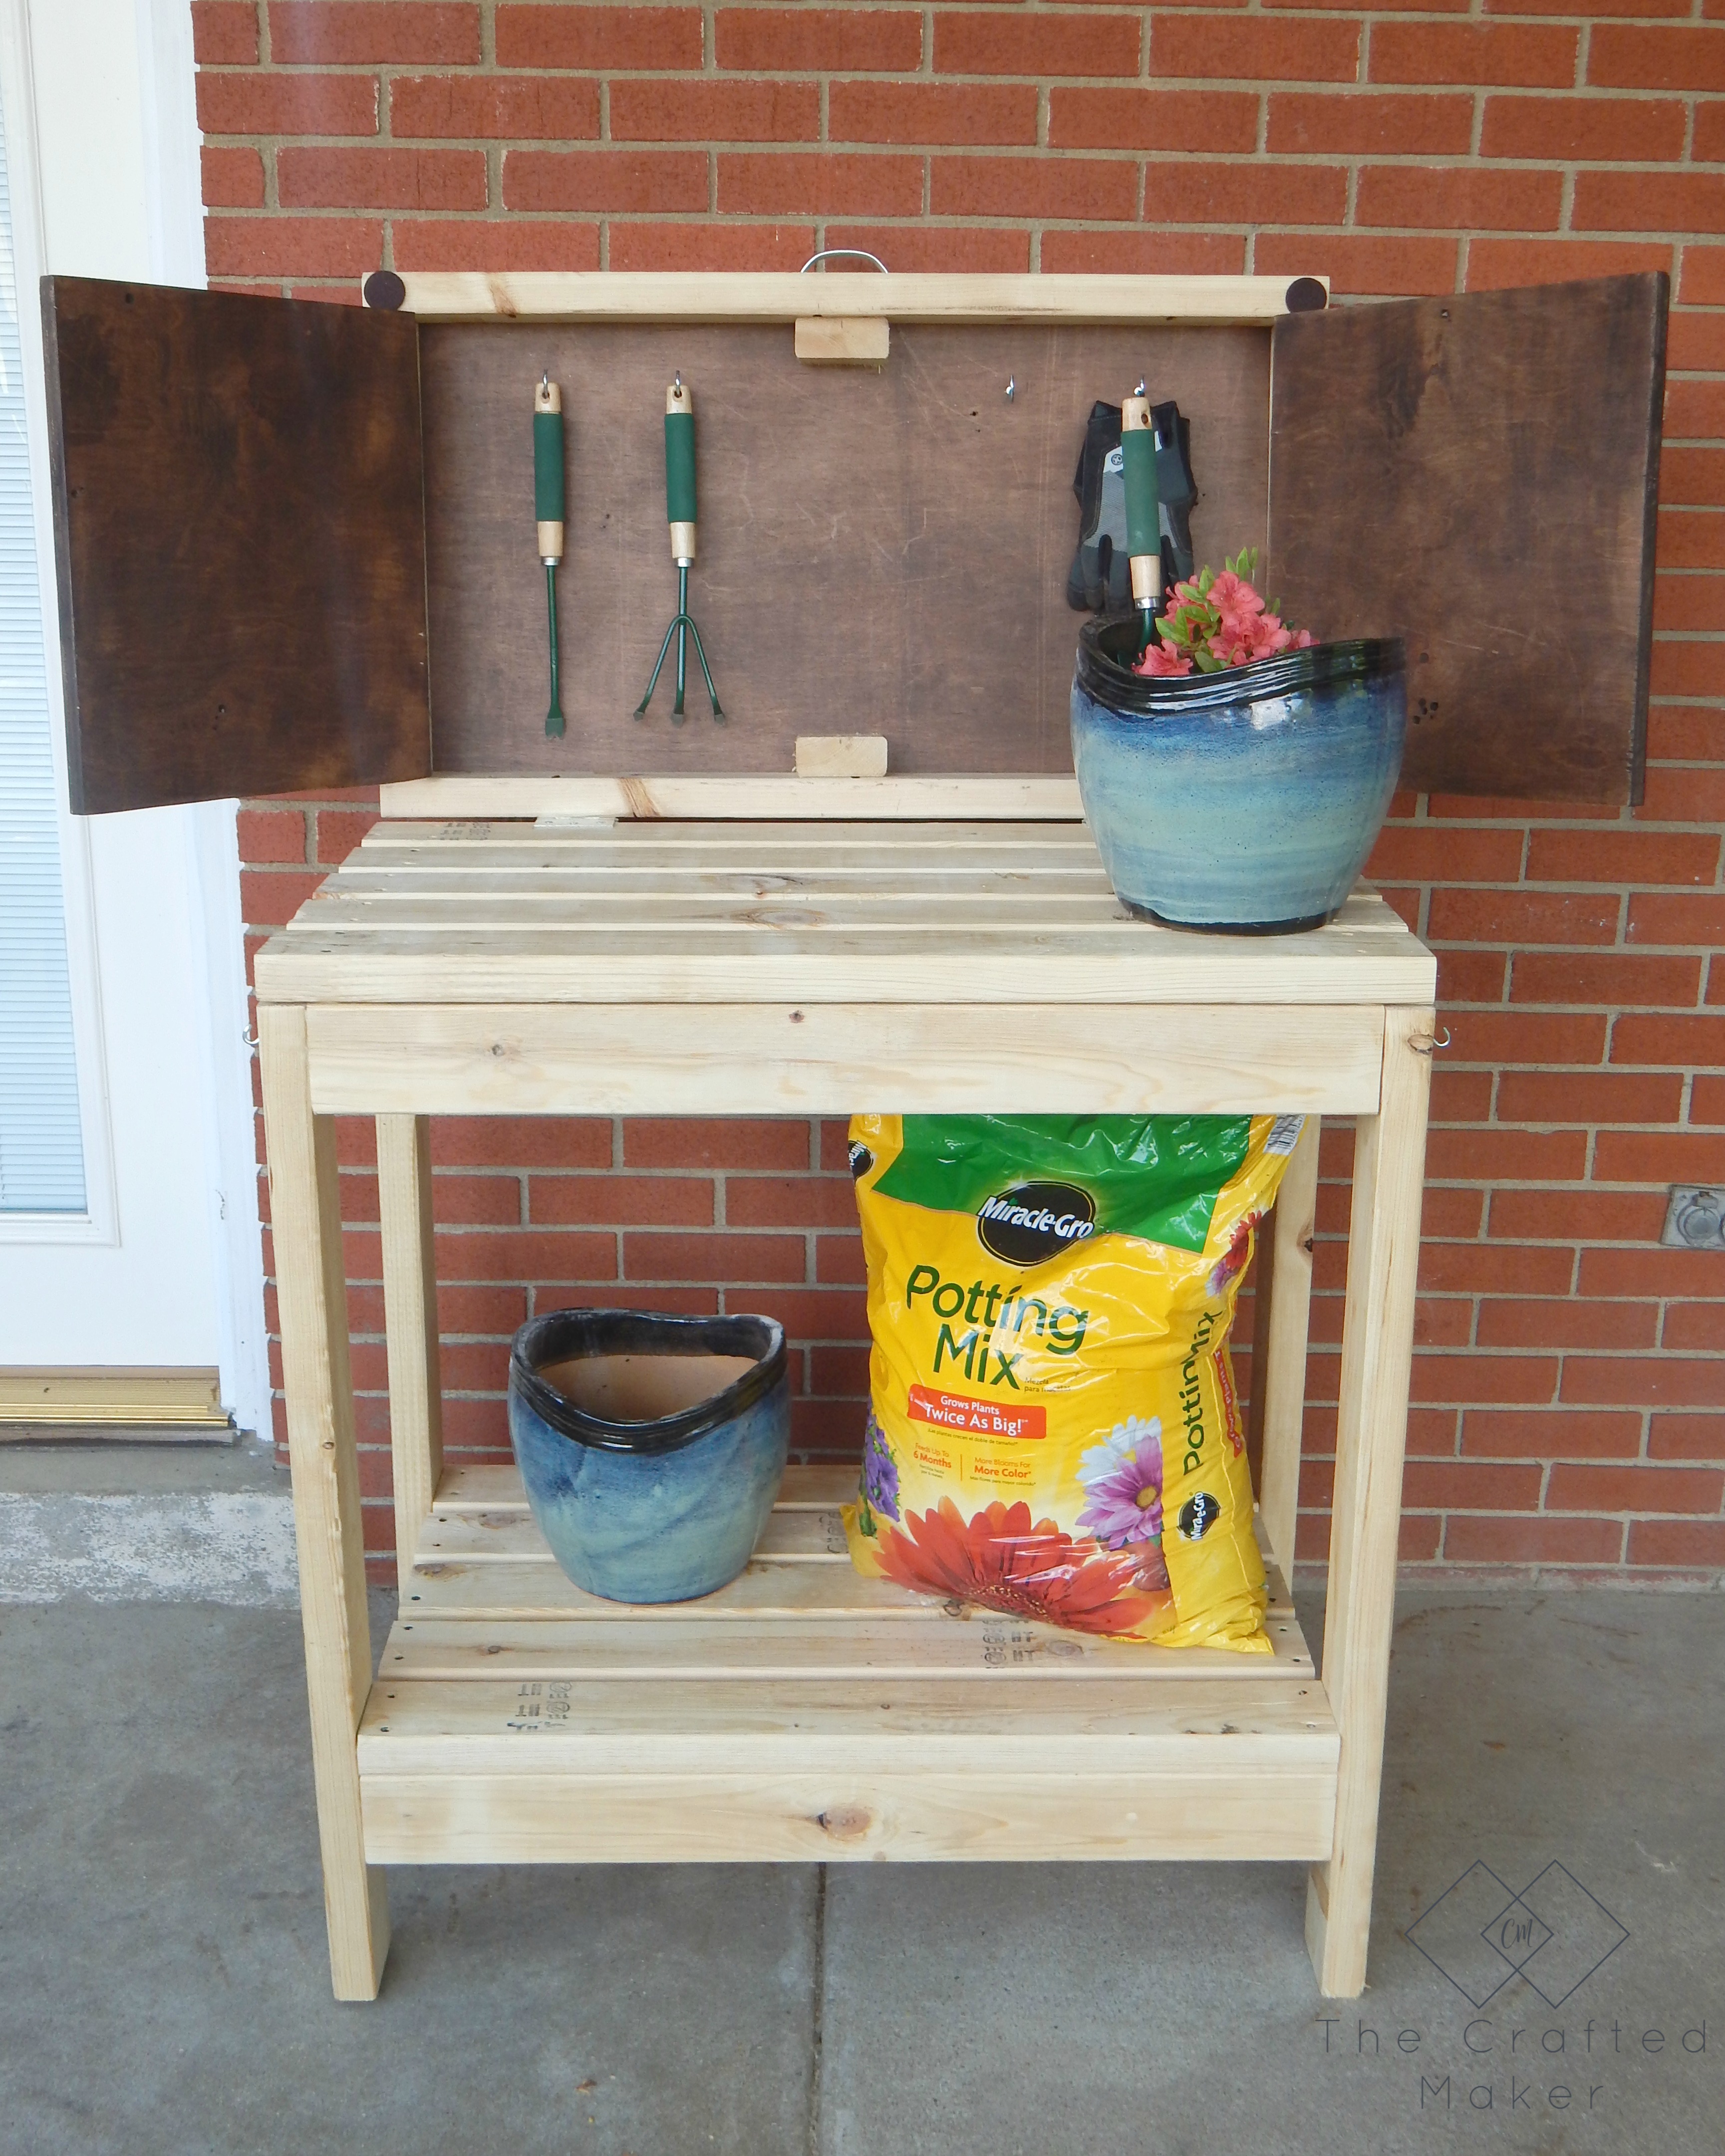
Since this is done, now would be a good time to add your hooks inside the doors for storing your gardening tools. I also attached a handle to the front of the frame to assist in lifting the top-up.
These are the hooks I used for the tools (the handle was in the screen kit).
The top is completely done at this point. Yay!!!
Take 2-3″ hinges and attach the whole top piece to the base you have already built. I placed the hinges 6″ from both sides.
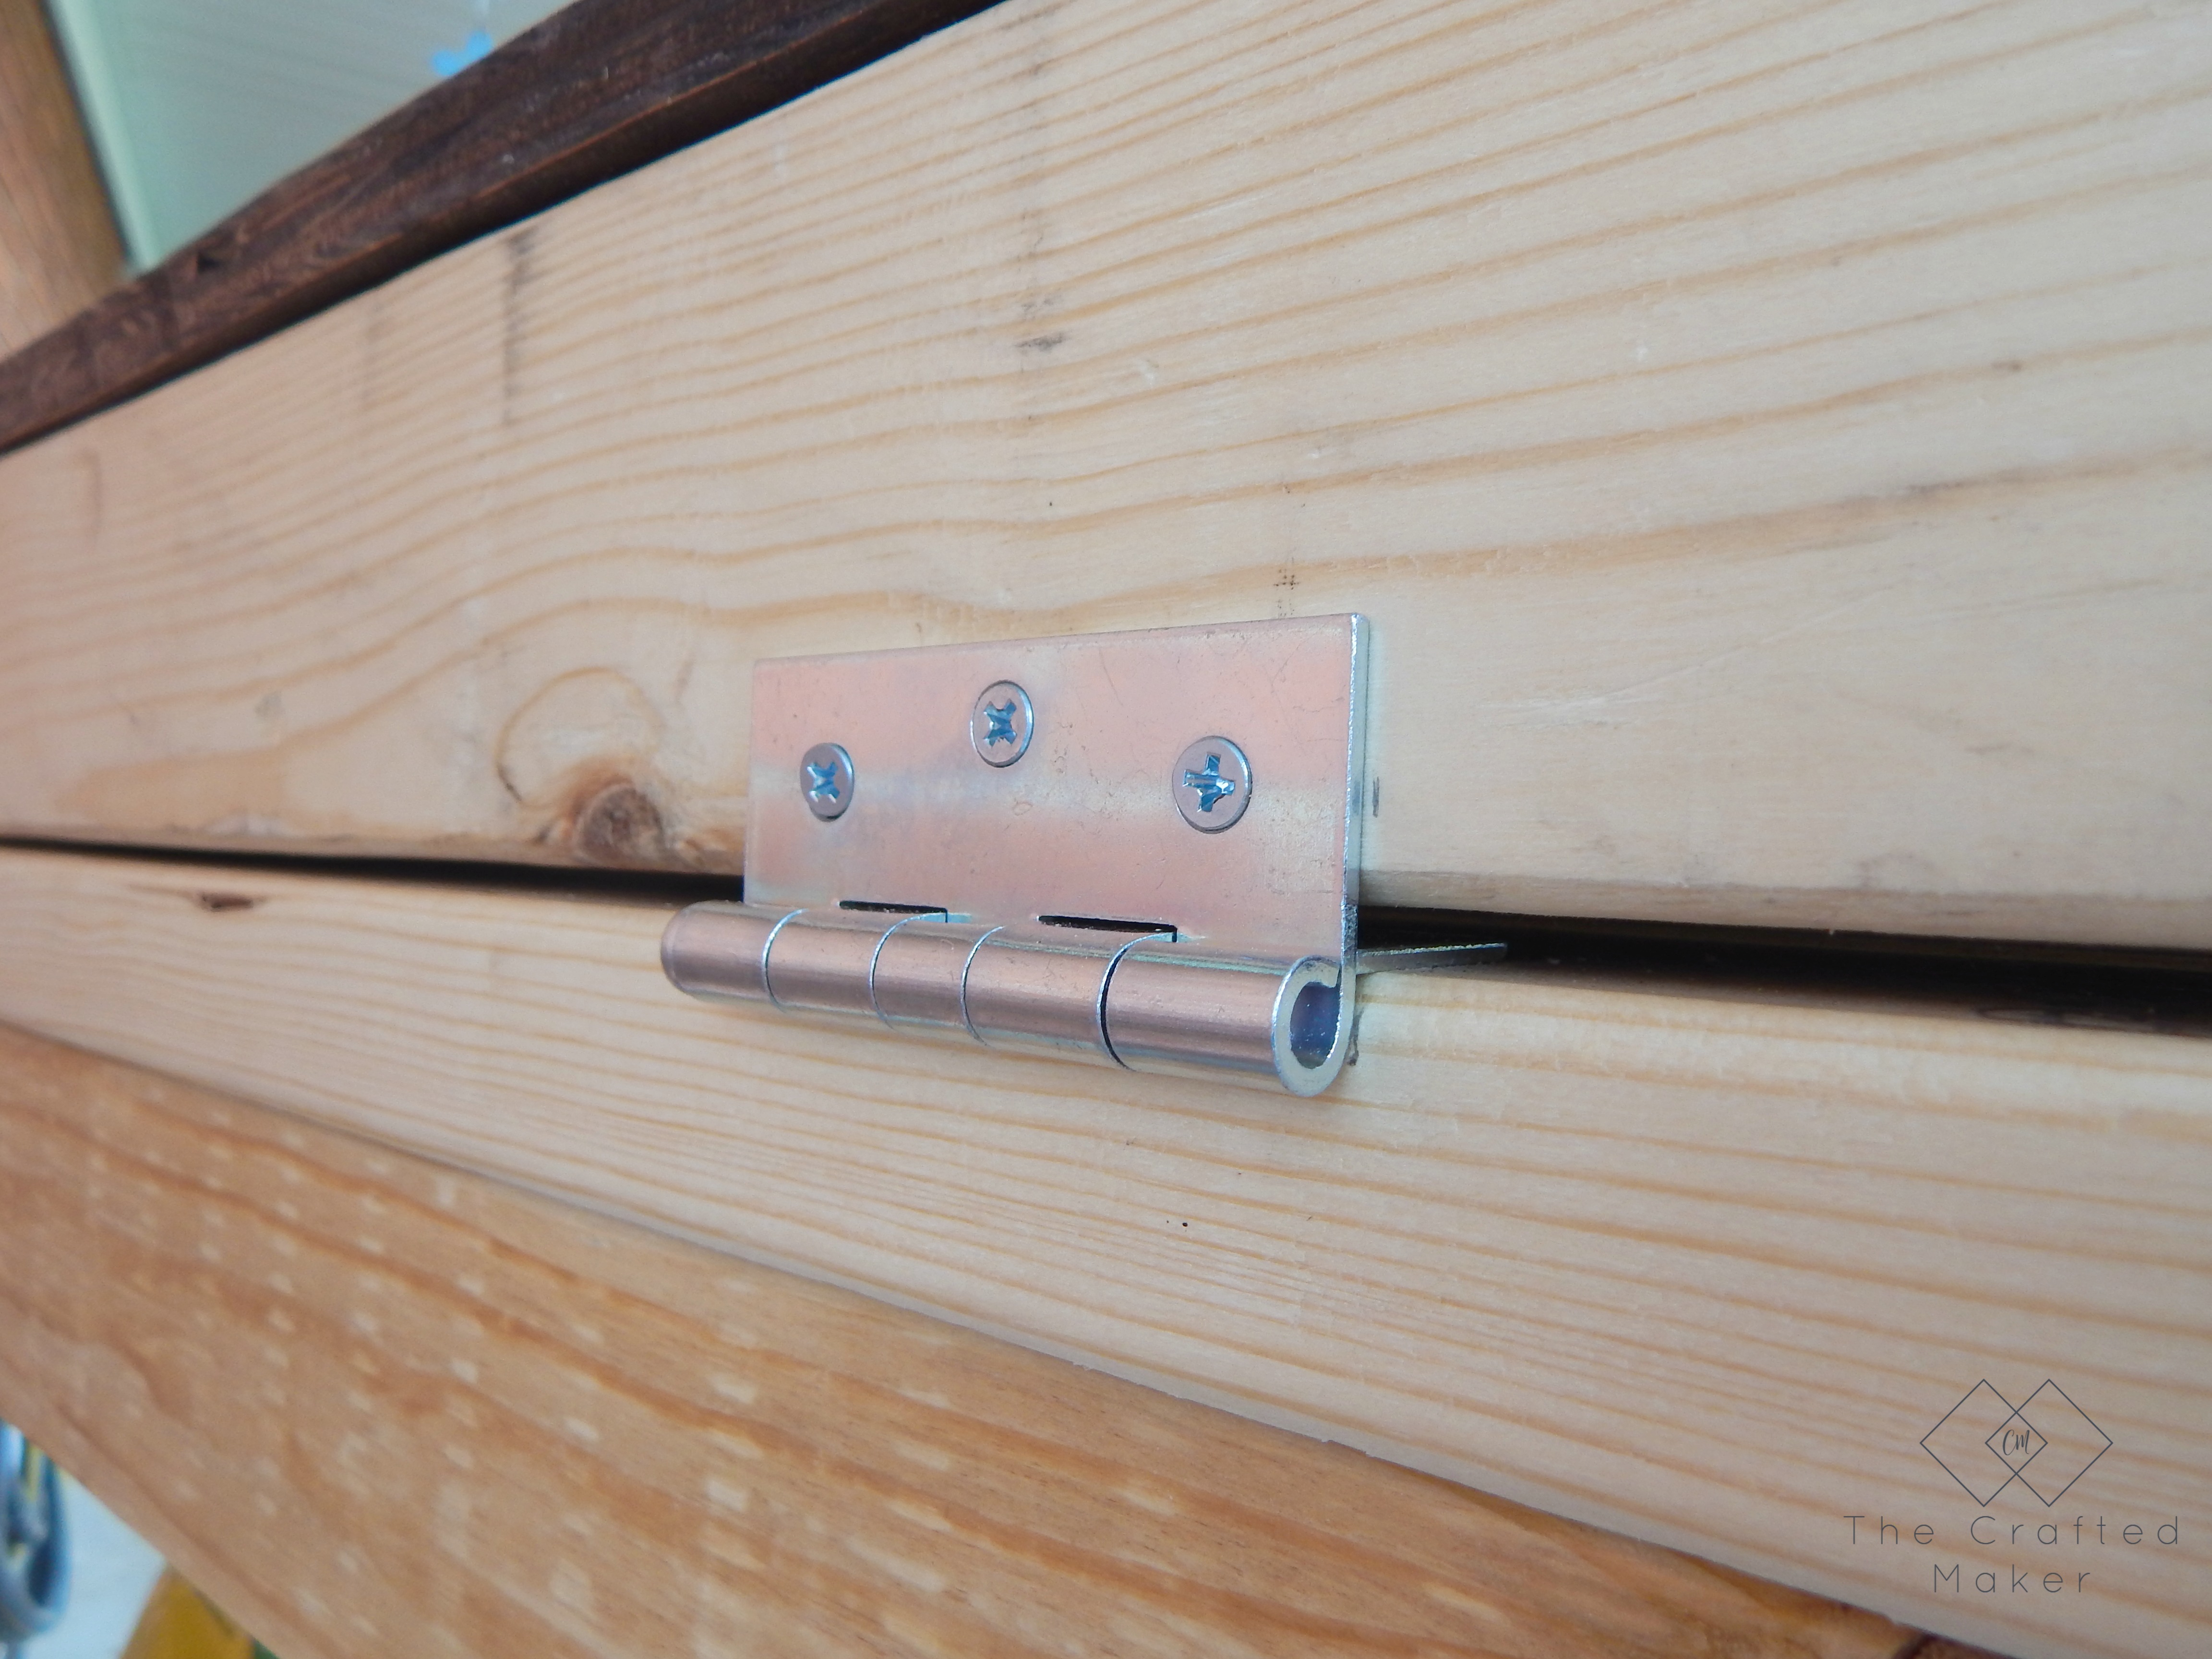
The hinges will allow the top to fall back if not up against a wall, so if you are planning on using this away from a wall, you might want to find a way to secure it from falling backward. Some rope tied to the top and the base might work for you.
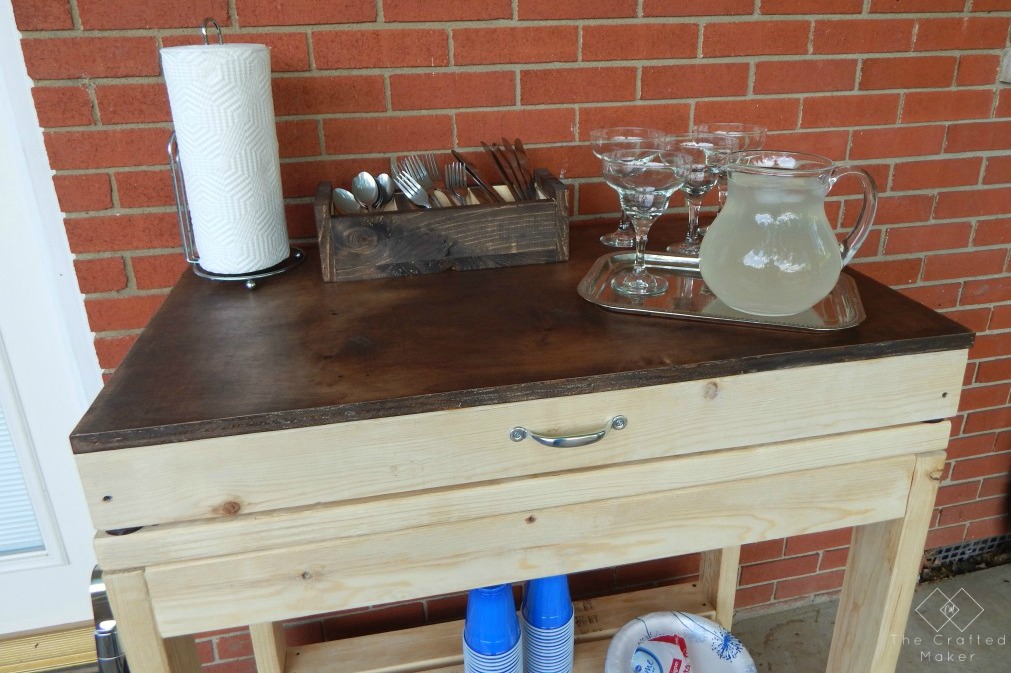
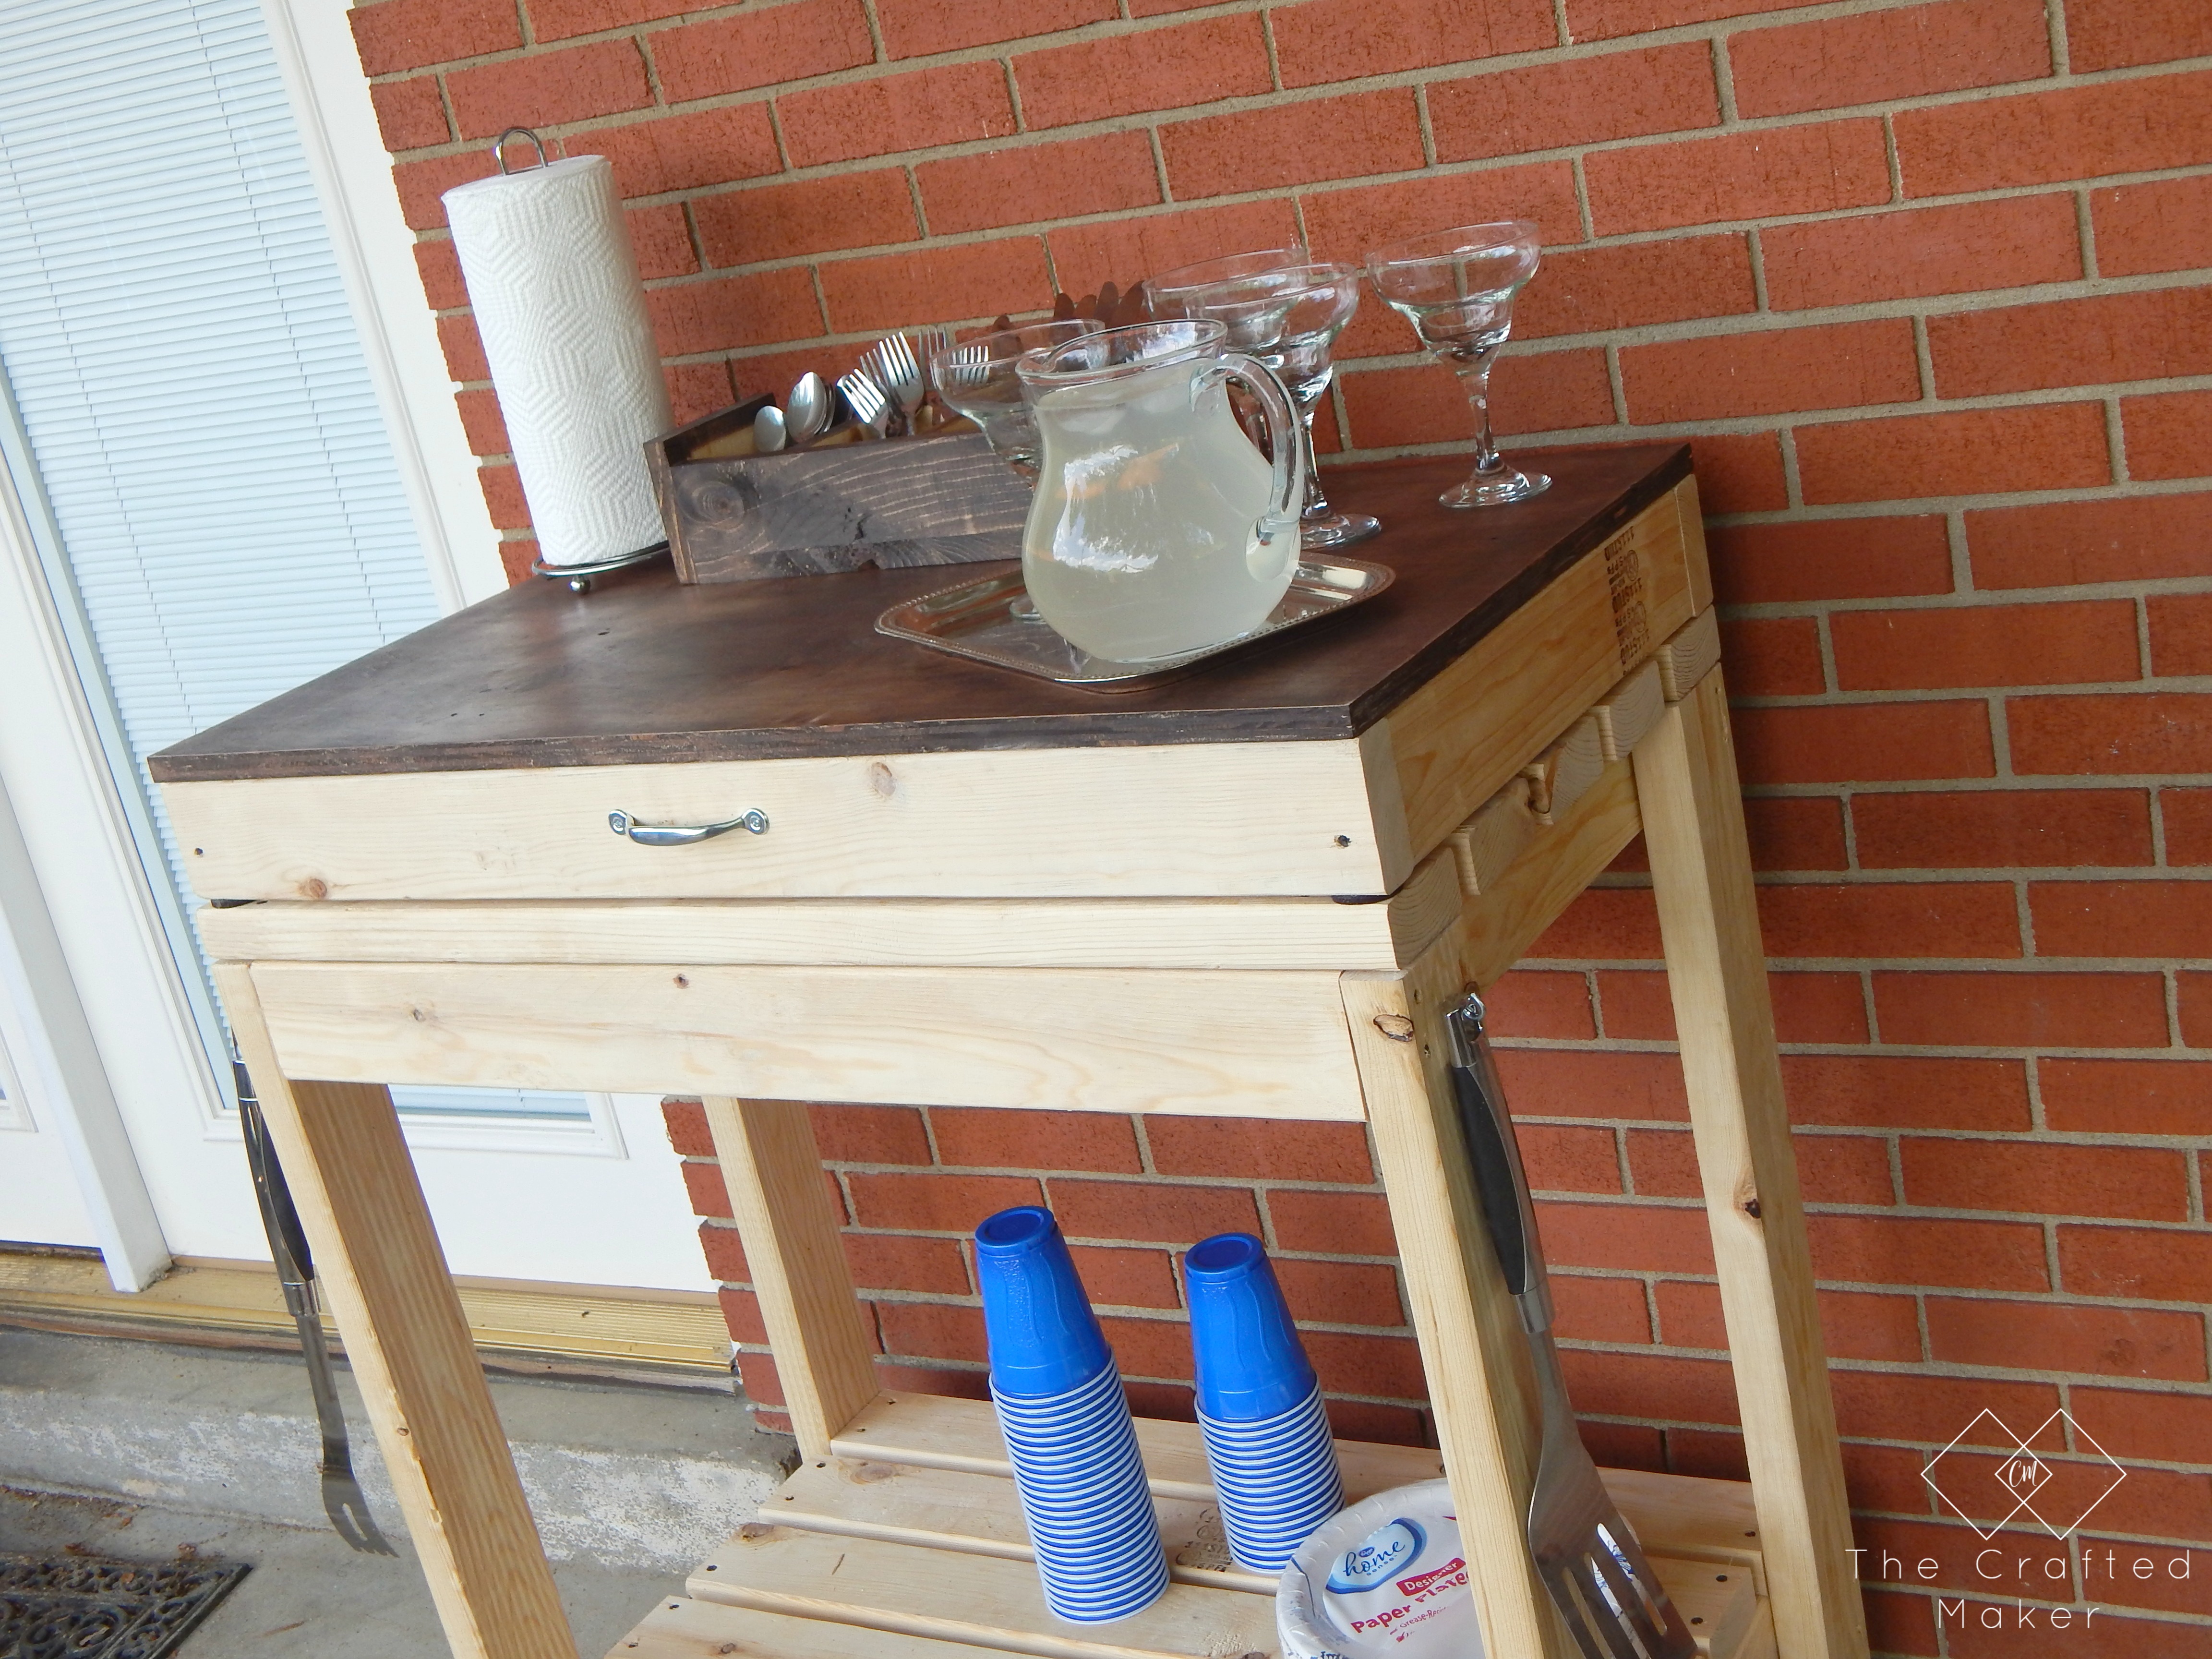
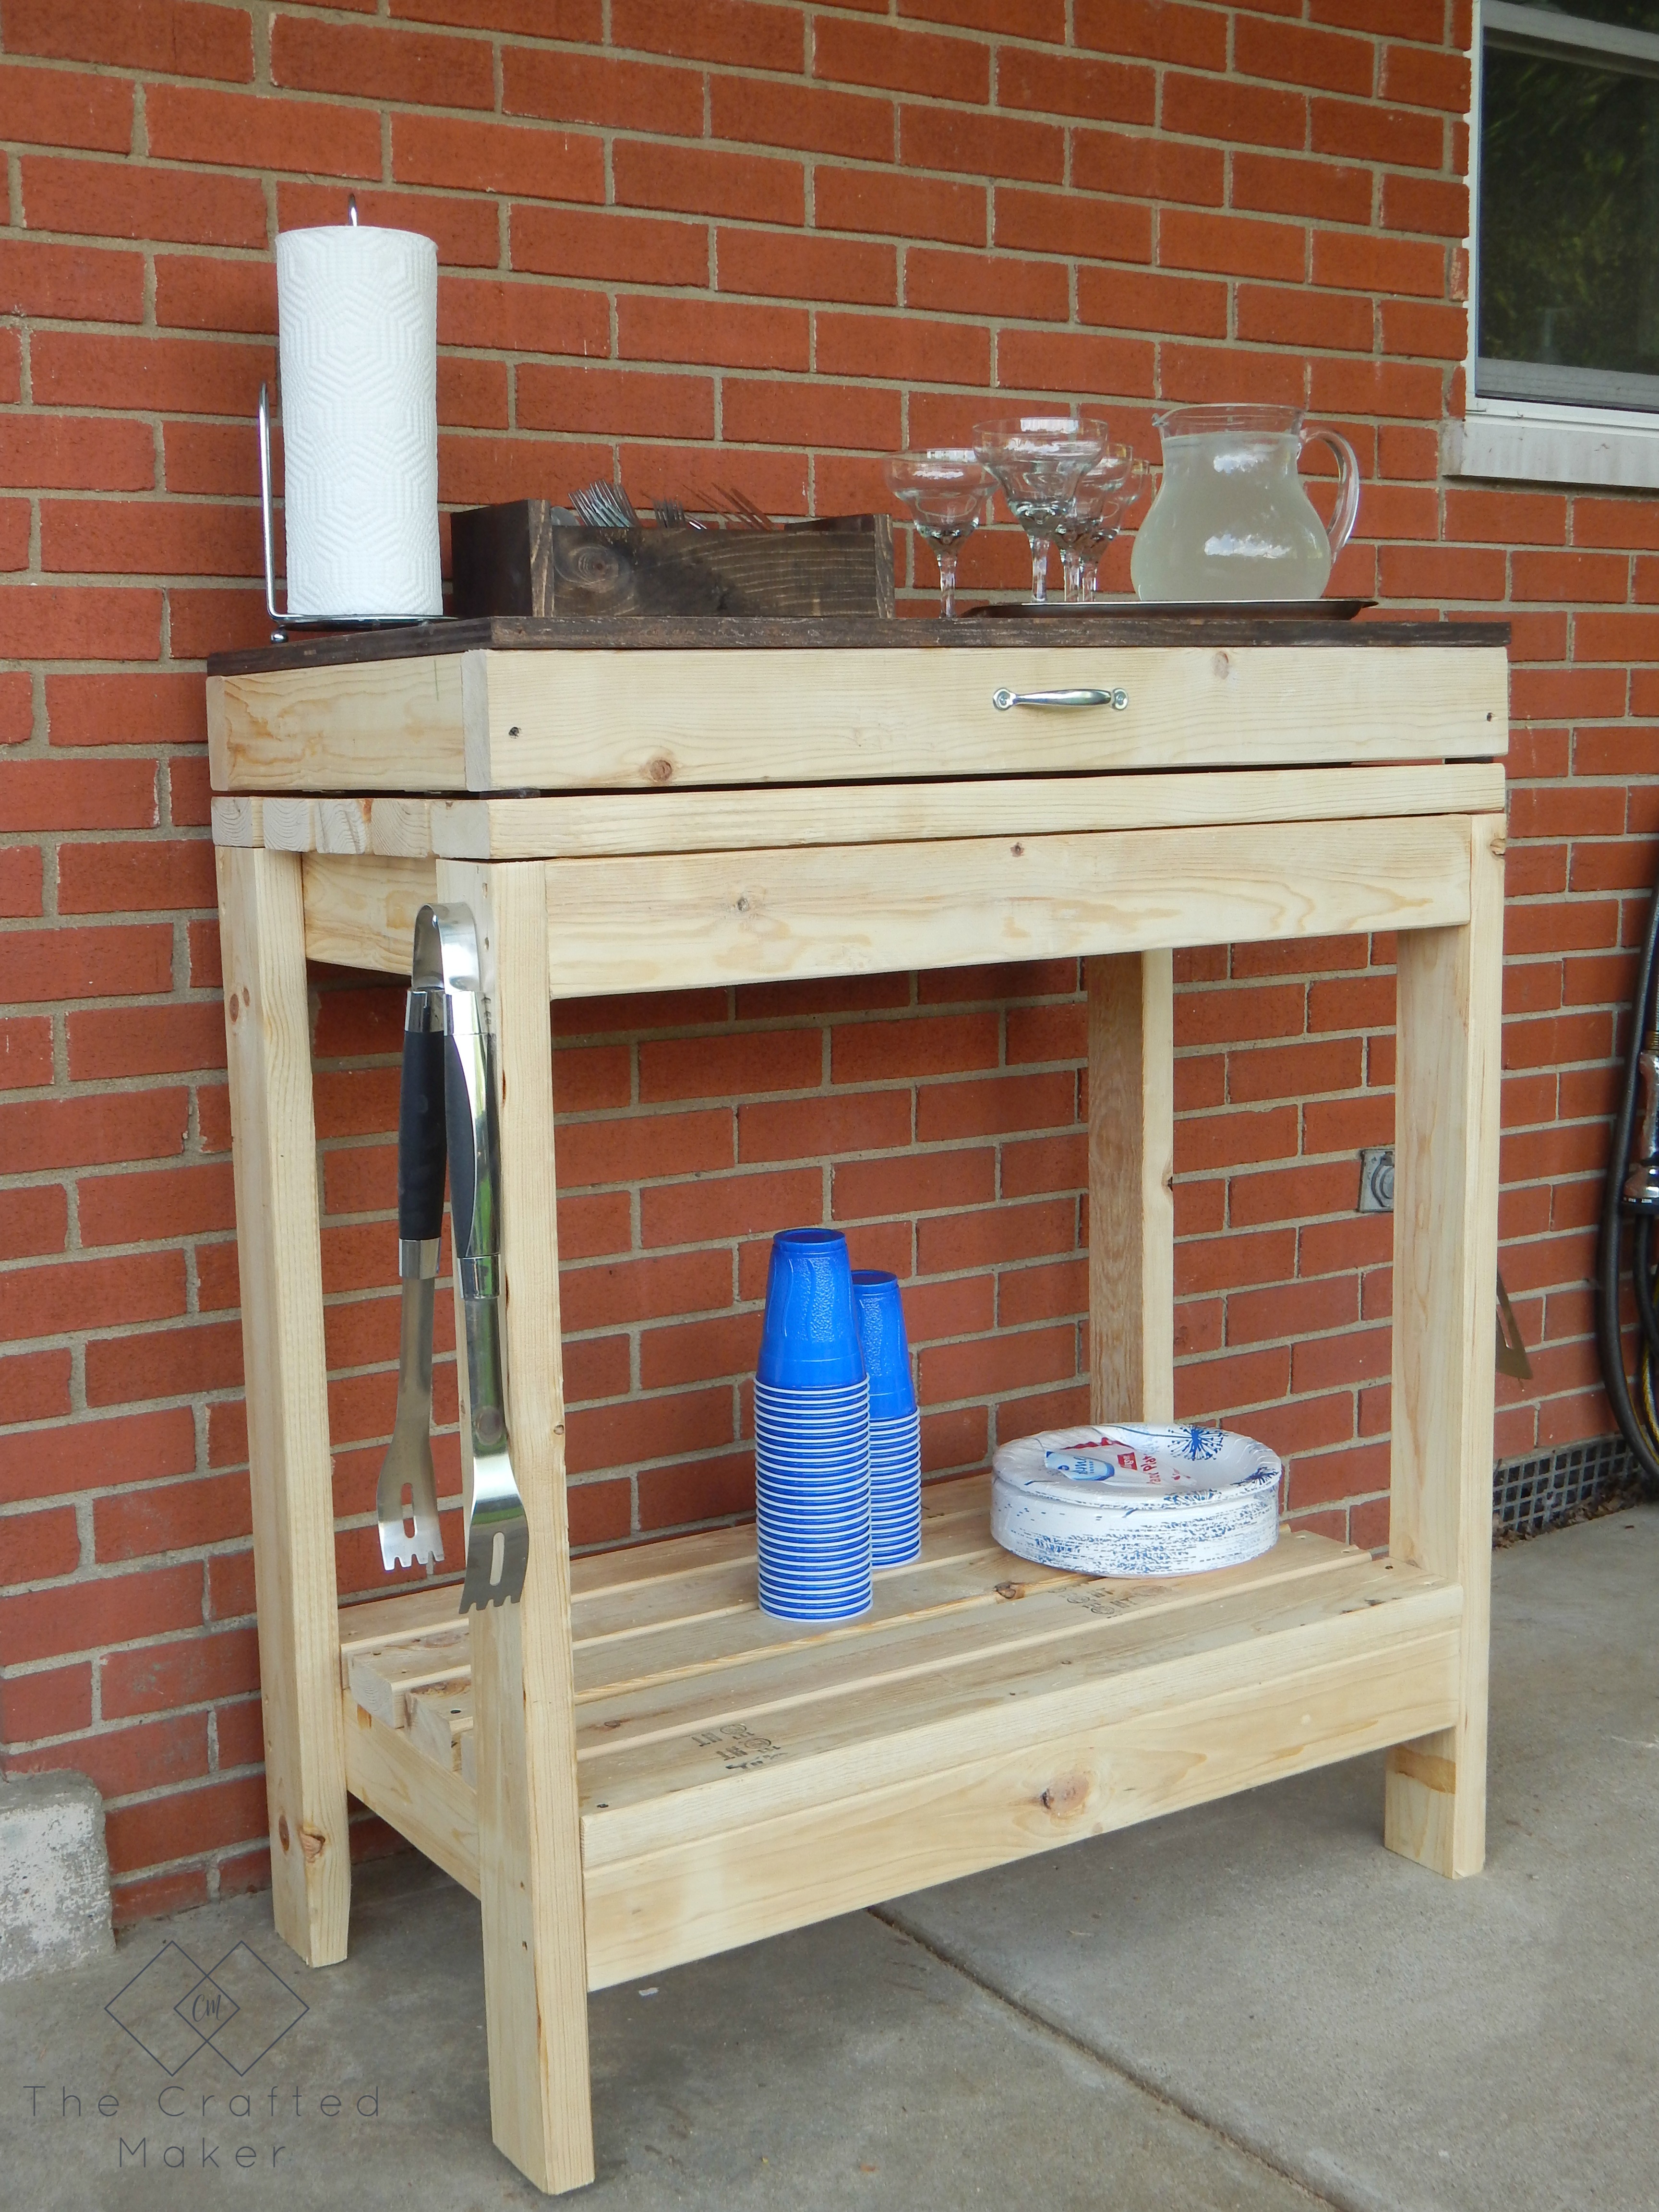
Now that the work is done, its time to stand back and take a look at your new party cart/potting bench. This build is going to get a lot of use!!
Here are some ways I have staged mine to give you an idea of how to use it.
Party Cart
Now flip that thing open and start your gardening…

Potting Bench

Well that all for today folks, I hope you enjoyed this post and will have fun making your own DIY party cart / potting bench. This one is going to my mom, so I just might have to make another one for myself!!
Happy early Mother’s Day to all the moms out there. Treat moms special, they are, after all, the reason we are all here.
Thanks for spending some time with me today.
Until next time…

Pinning is always appreciated!!

Hi Crissie,
We just found your page, it looks great! Loving all of your projects and tutorials, thank you for sharing! You potting bench/party cart is the “Brag Post of the Day” on our Facebook page, keep up the great work!
Thank you so much! That means the world to me. Ana you are an inspiration to all women who build and your talent is beyond amazing! You have just made my week. Thanks for sharing!
love the potting bench
Thank you Anita! I’m glad you enjoyed it.