Hey everybody!! I have been working on my home for the last couple of weeks and I finally did a project I have wanted to complete for a couple of years now. I painted my old ugly red/orange brick WHITE!! I love the way the new paint makes the house look. It is still crazy to me every time I pull into the driveway, it looks like someone else’s home. With some time and a few hundred dollars, I now feel like I have a brand new home. This is what my house looked like before. It’s surprising how much different a bit of paint makes!

I have three large trees that completely cover my house, so even when the sun was shining, because of the color of the brick, it always seemed dark around my house.
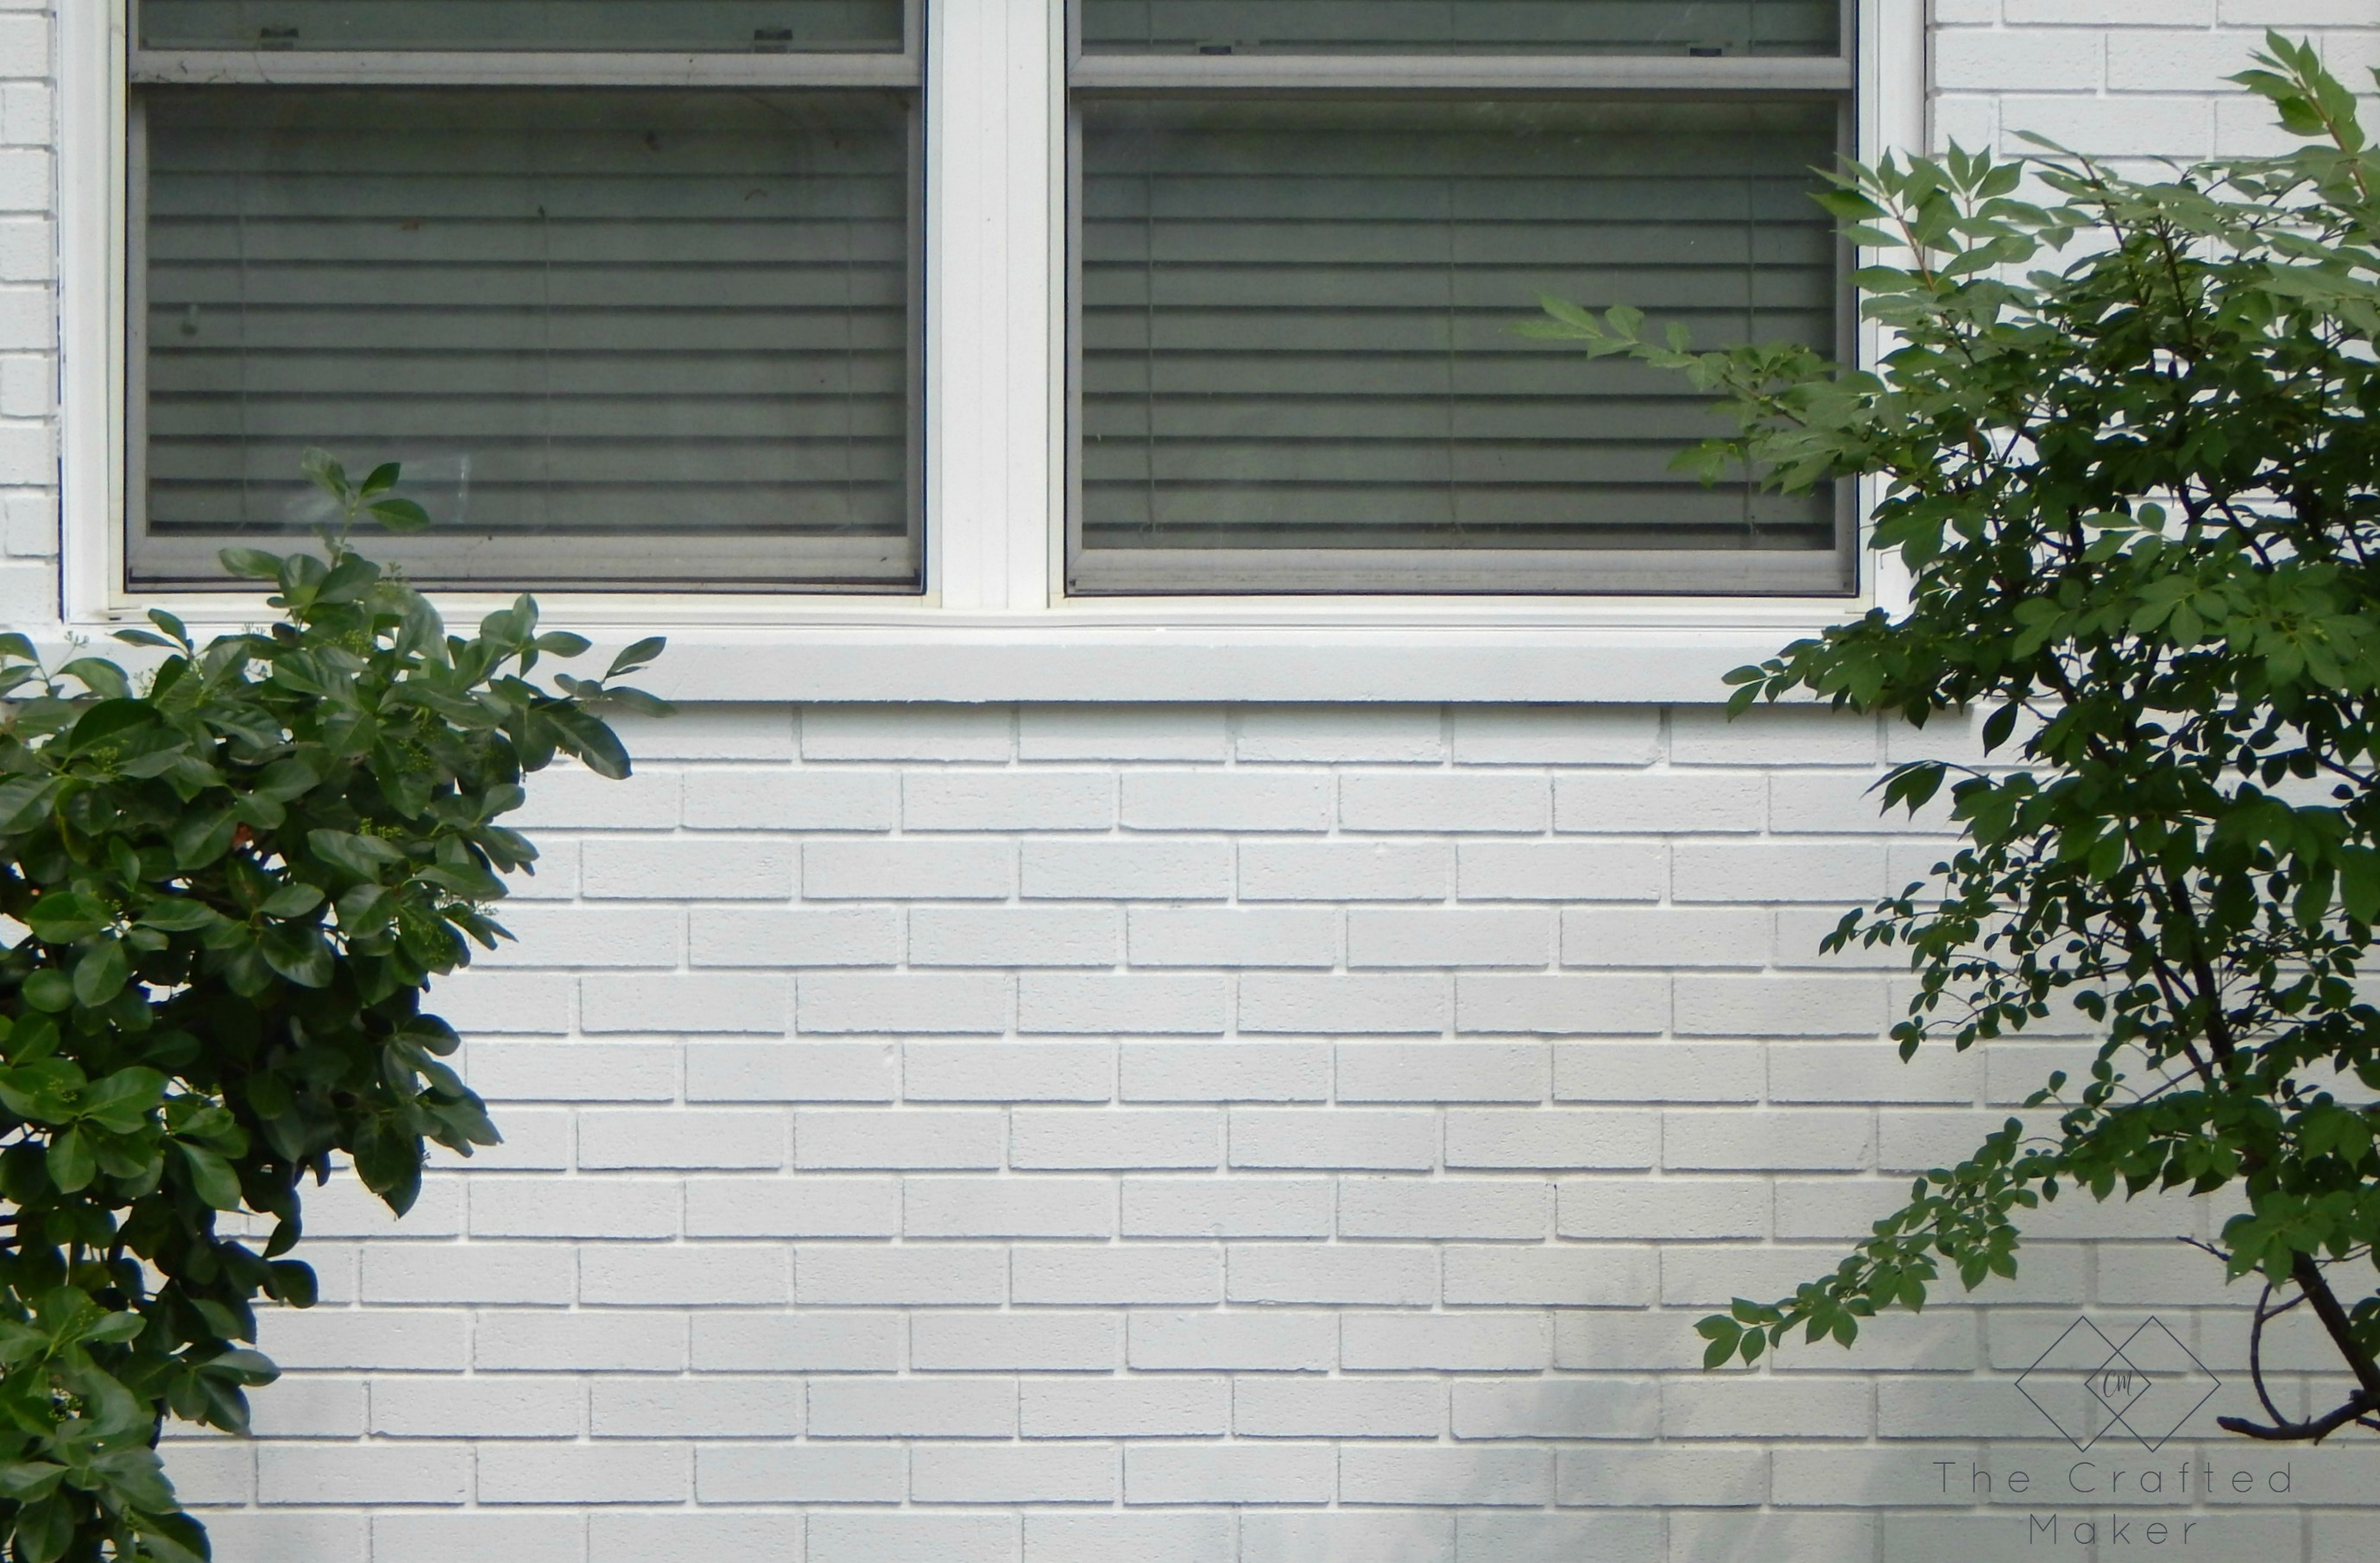
This is what my house looks like now!!
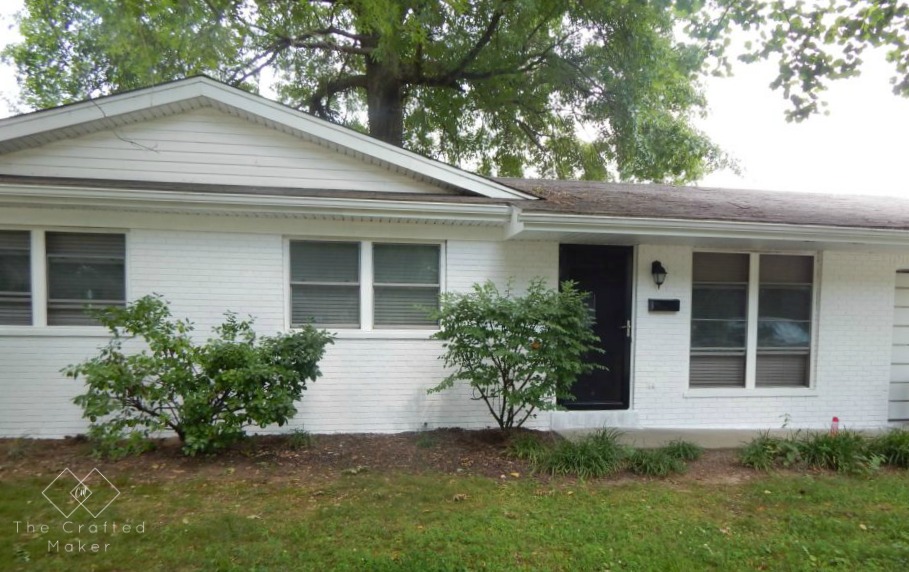
Notice how bright and open it seems!?! The paint also made my home appear to be bigger than before, which is never a bad thing. Here is how I did it…
*affiliate links used. See disclosure here
Paint a Brick Home
Prep
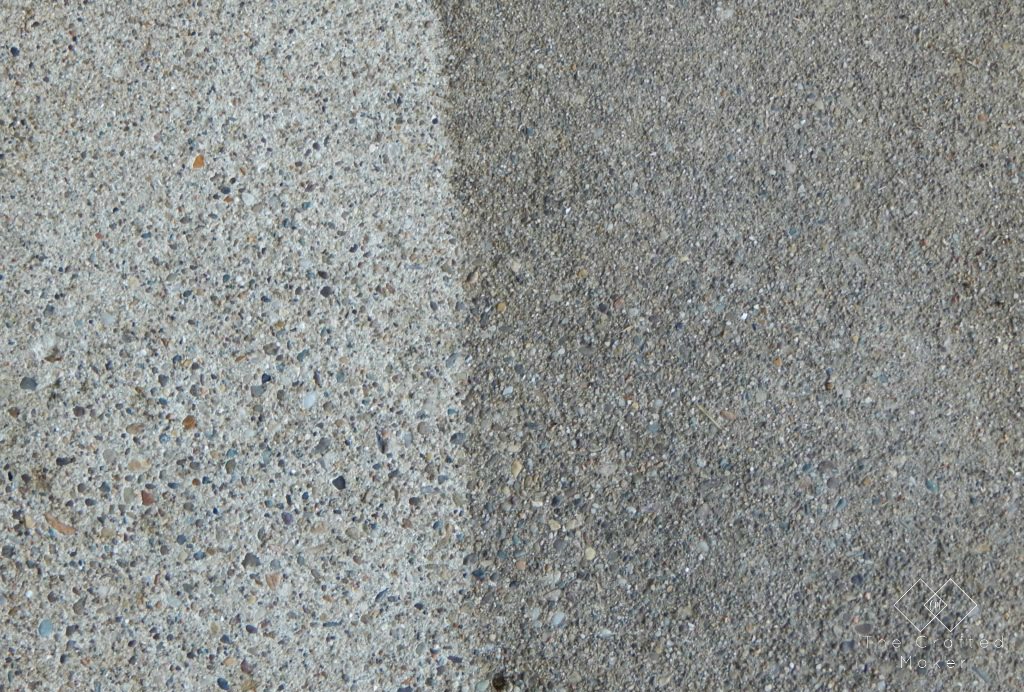
The first thing I did was give my house a good washing. I used a pressure washer to get all of the dirt and grime off of the brick. This is an essential step when painting. The brick needs to be really clean for the primer to stick properly. After I washed the house, since I already had the machine out, I decided to pressure wash the concrete surrounding the house. I did not realize just how dirty concrete gets over time from walking on it and the elements. The next picture really shows how powerful pressure washers are.
Now that the house was good and clean, I needed to protect the exterior items I did not want to paint (doors, windows, and light fixtures). I started out using contractor paper, thinking that this would cover the surface and tape nicely. Was I wrong! Using the paper was just taking too much time, so I eventually switched to plastic.
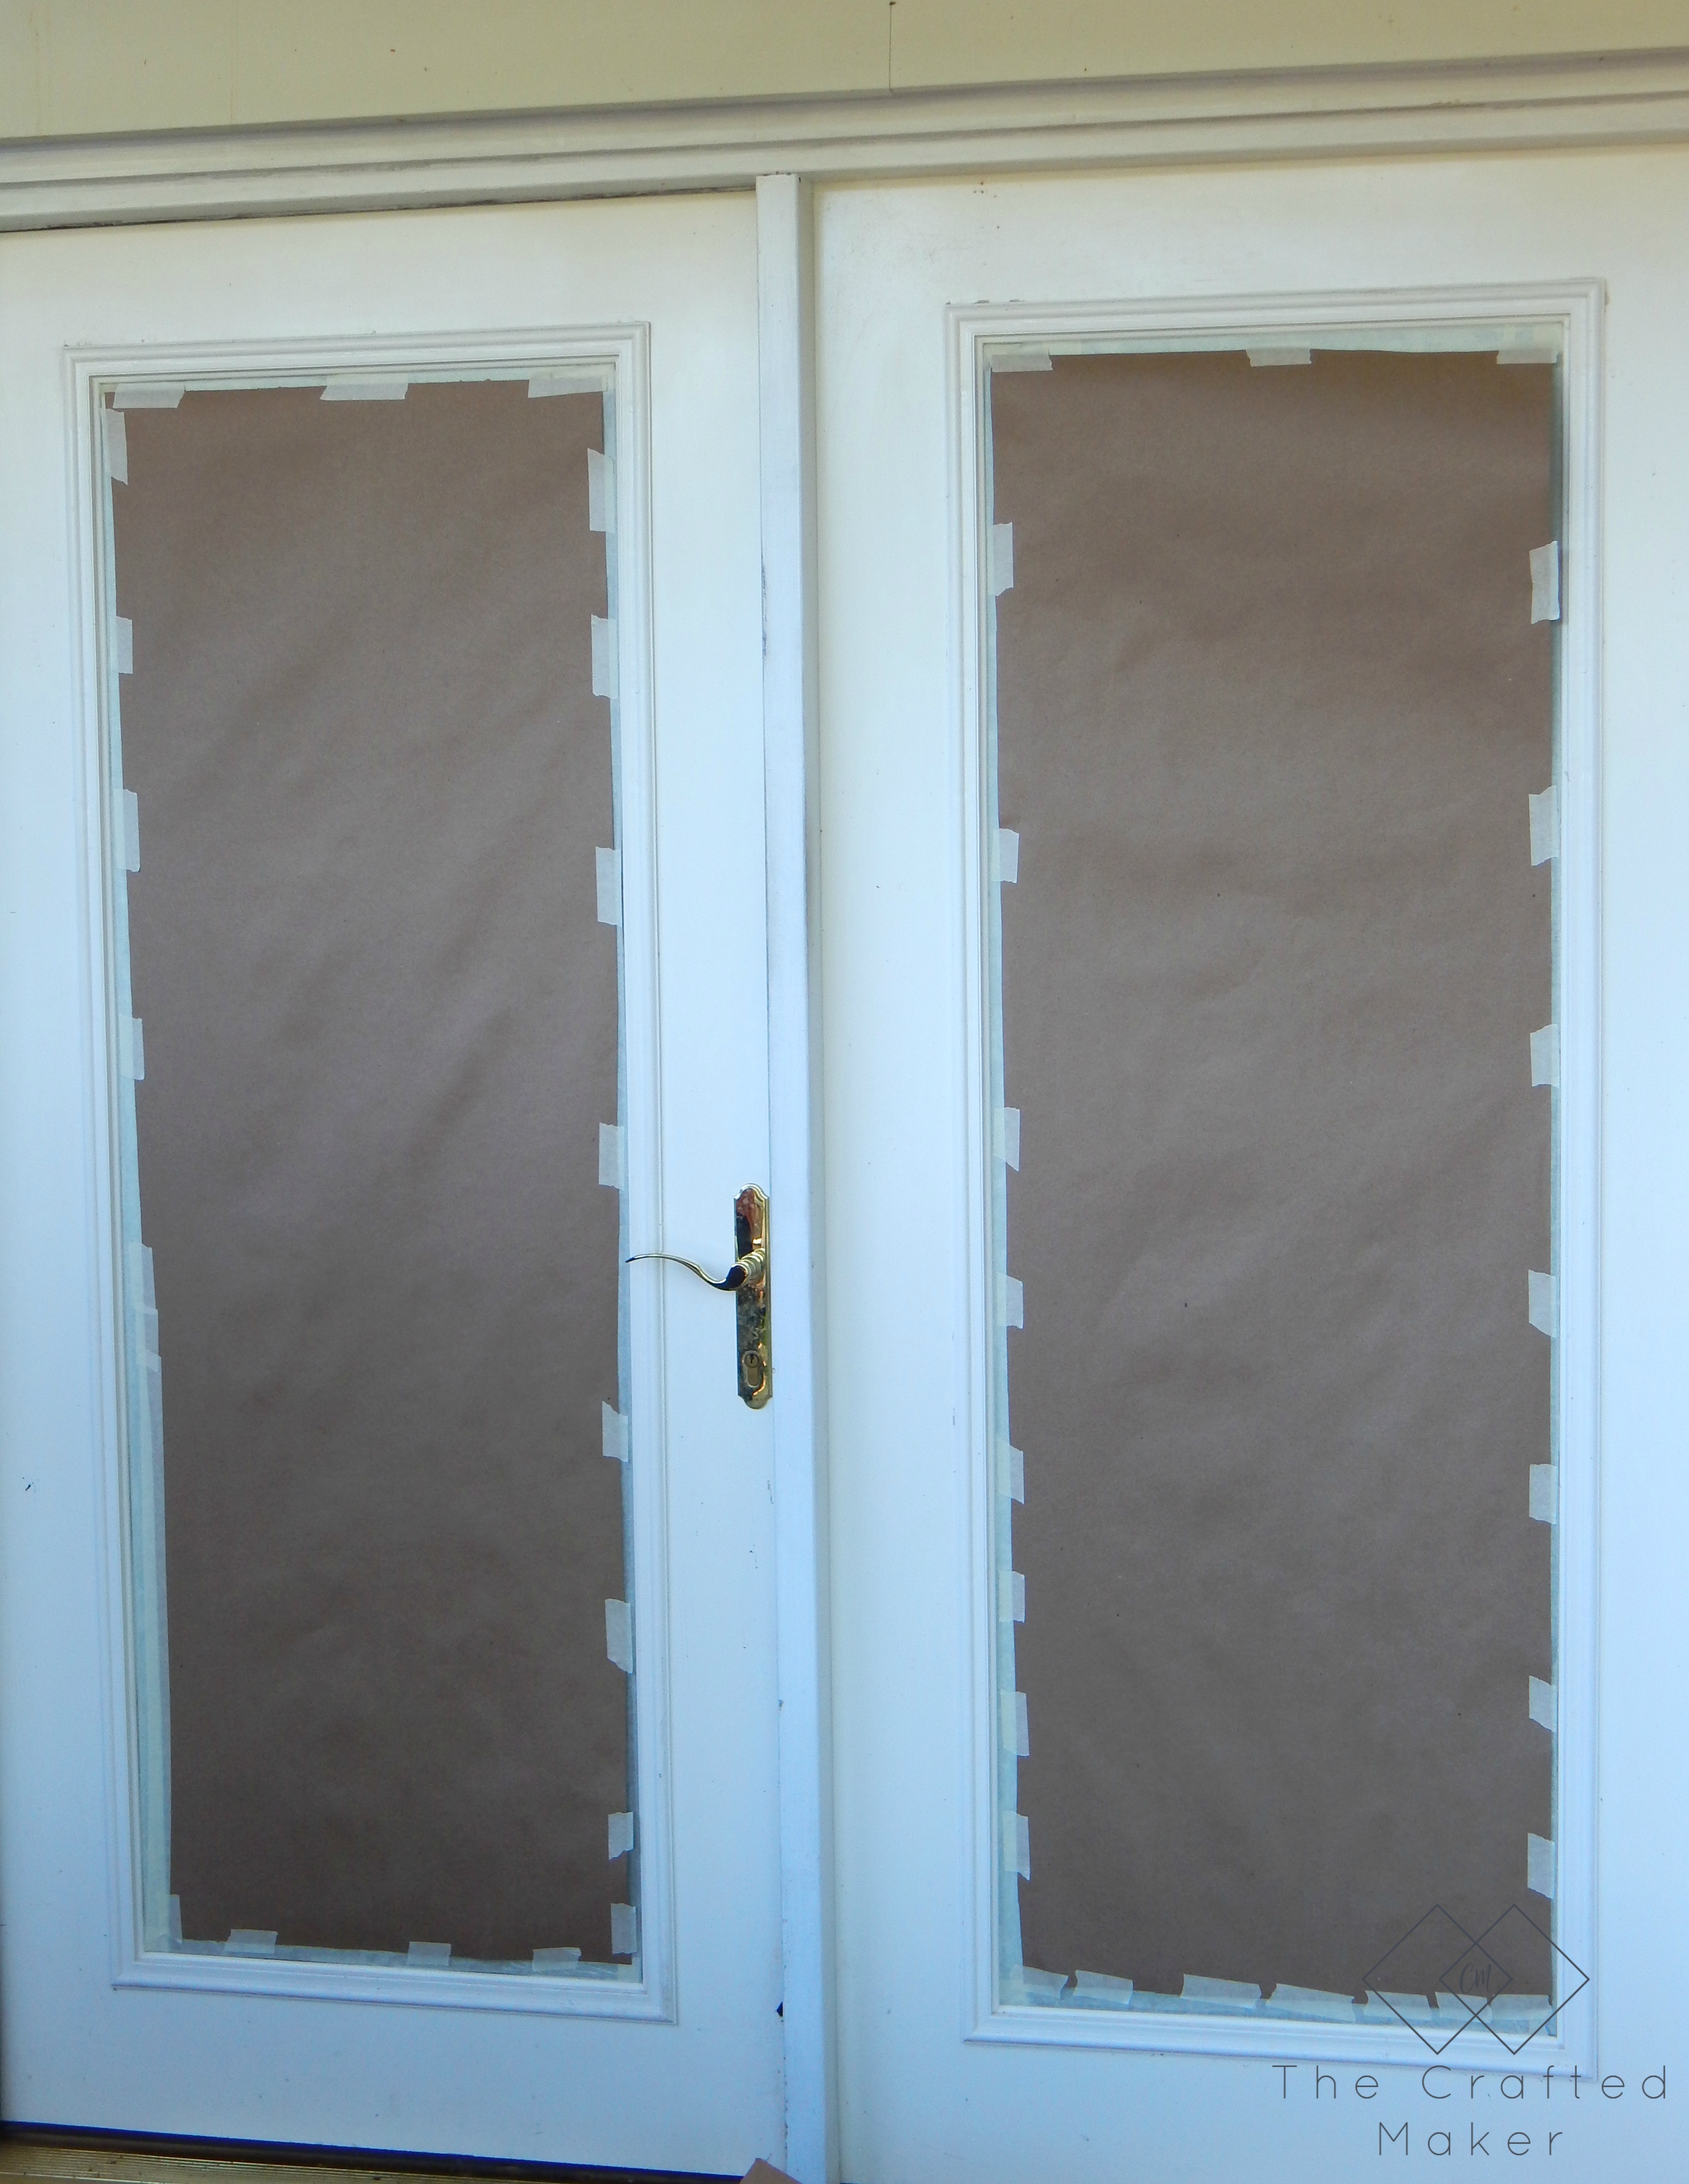
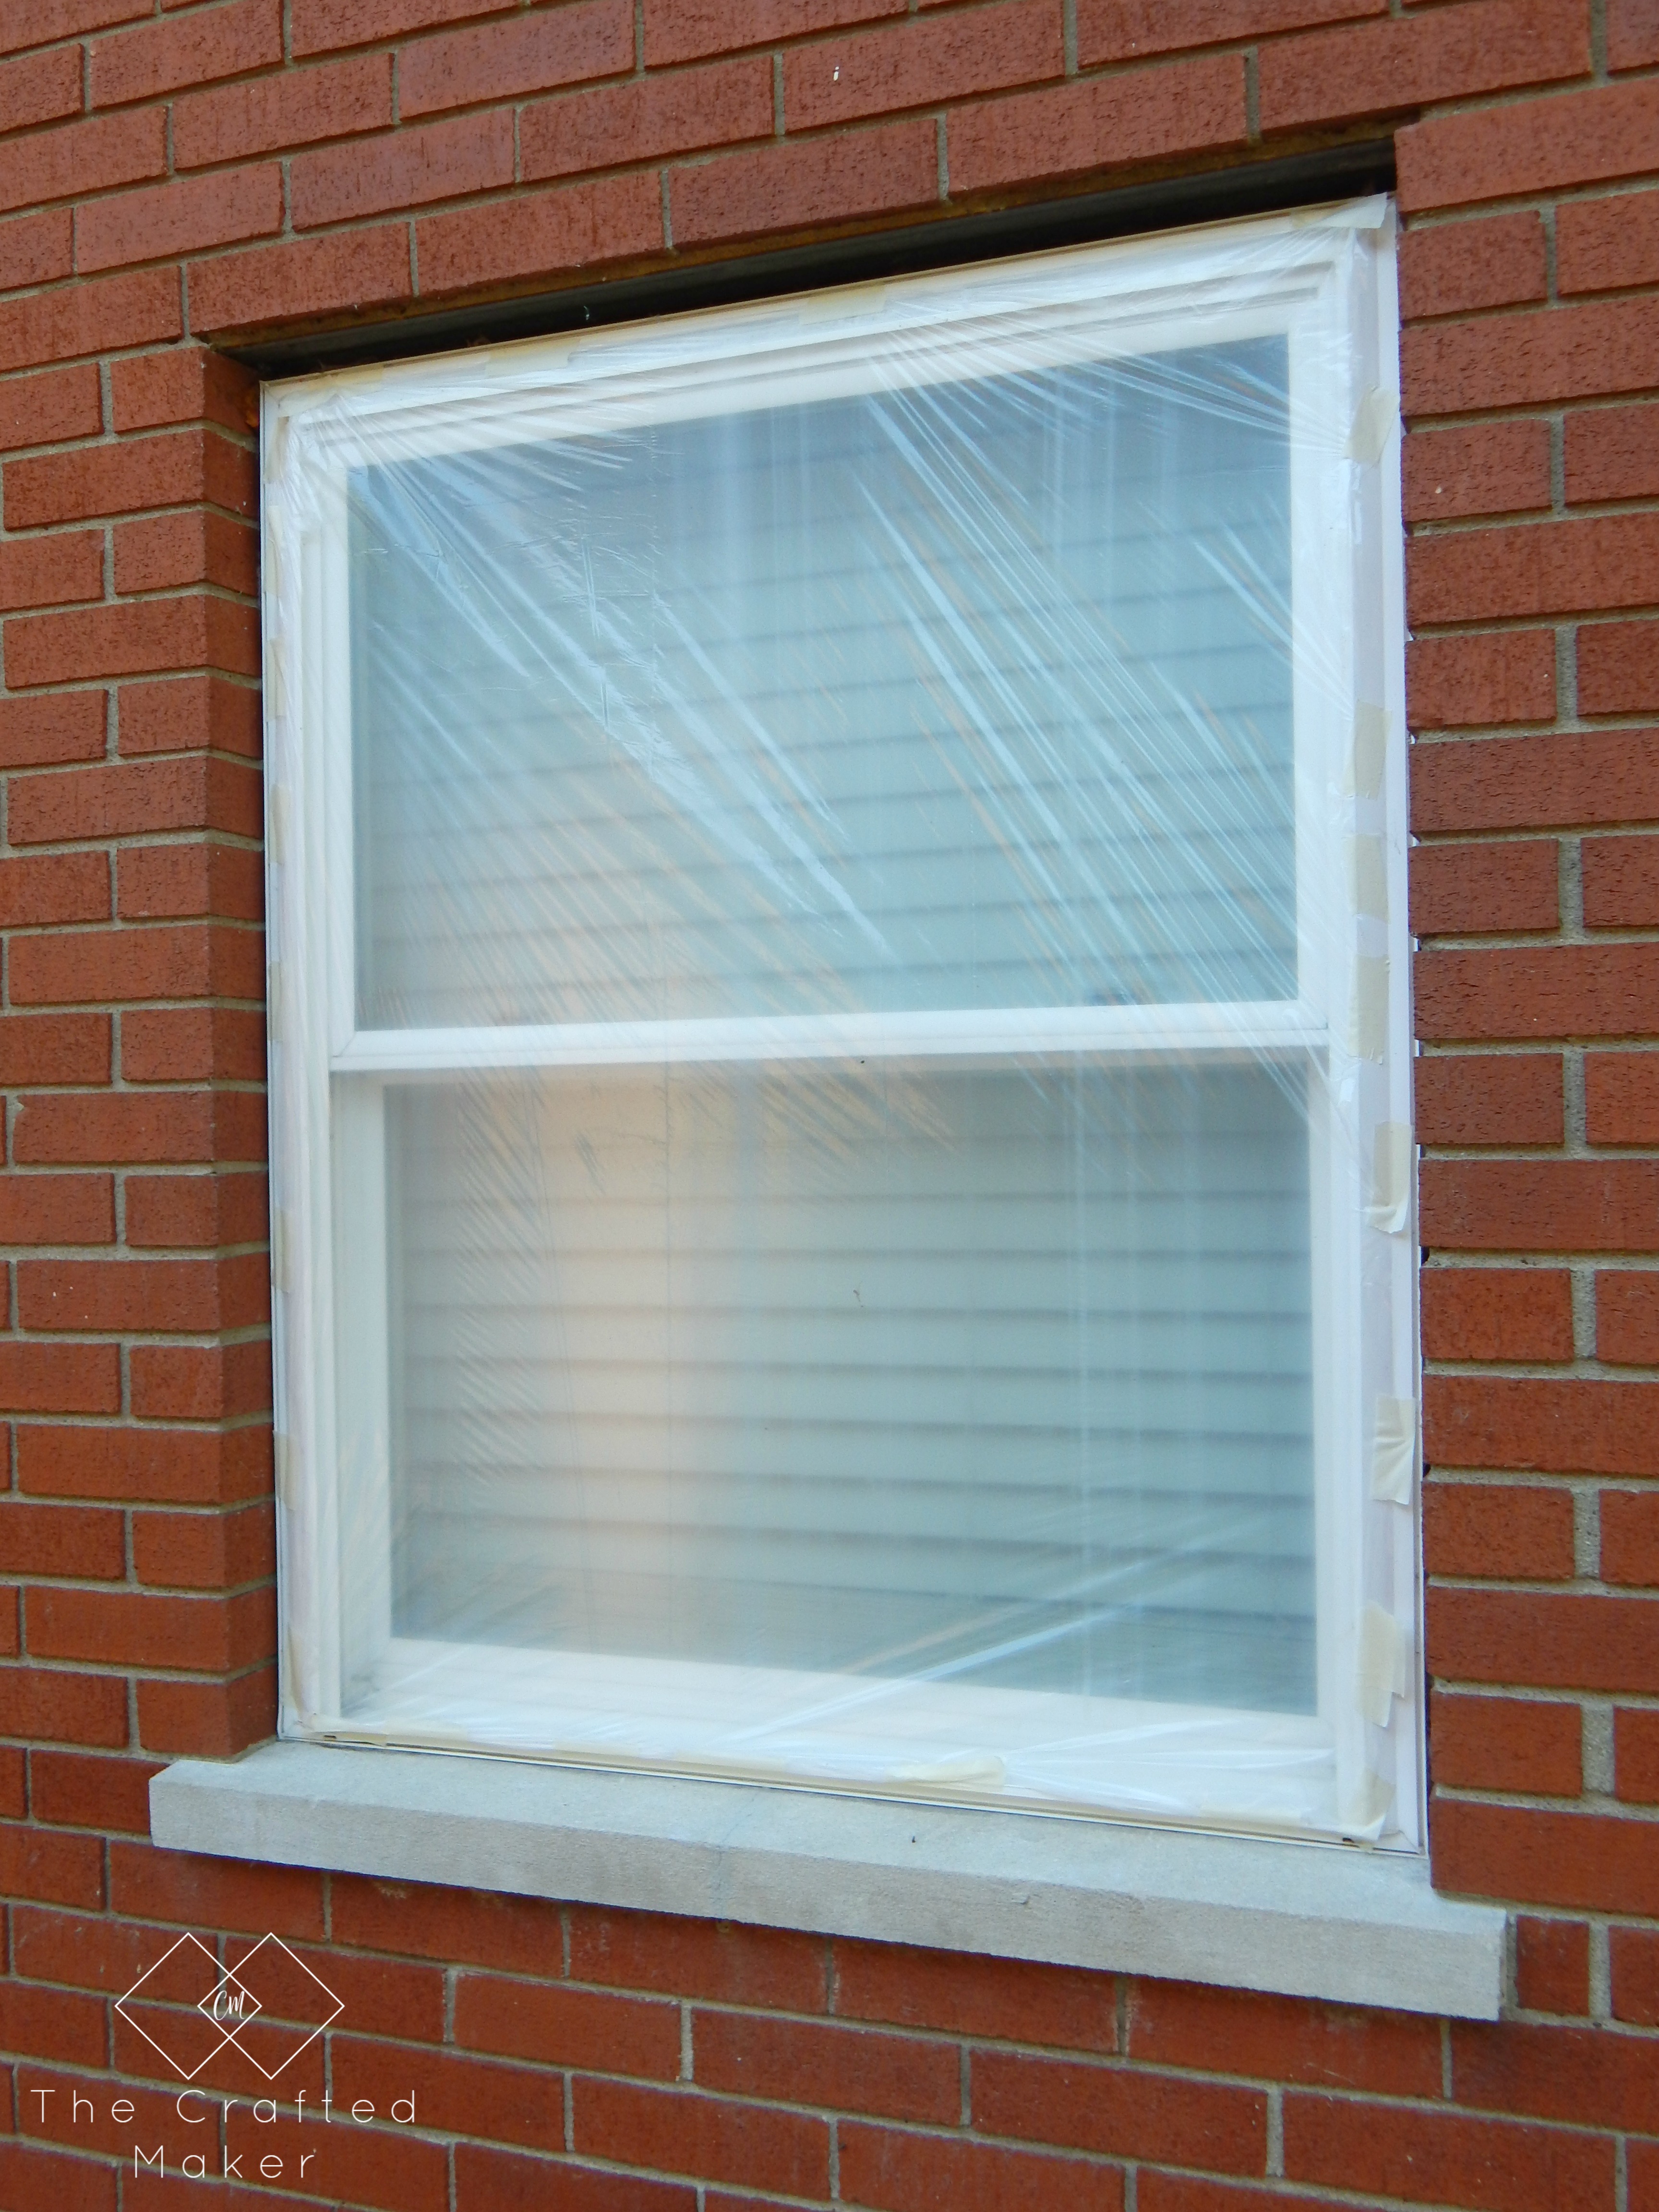
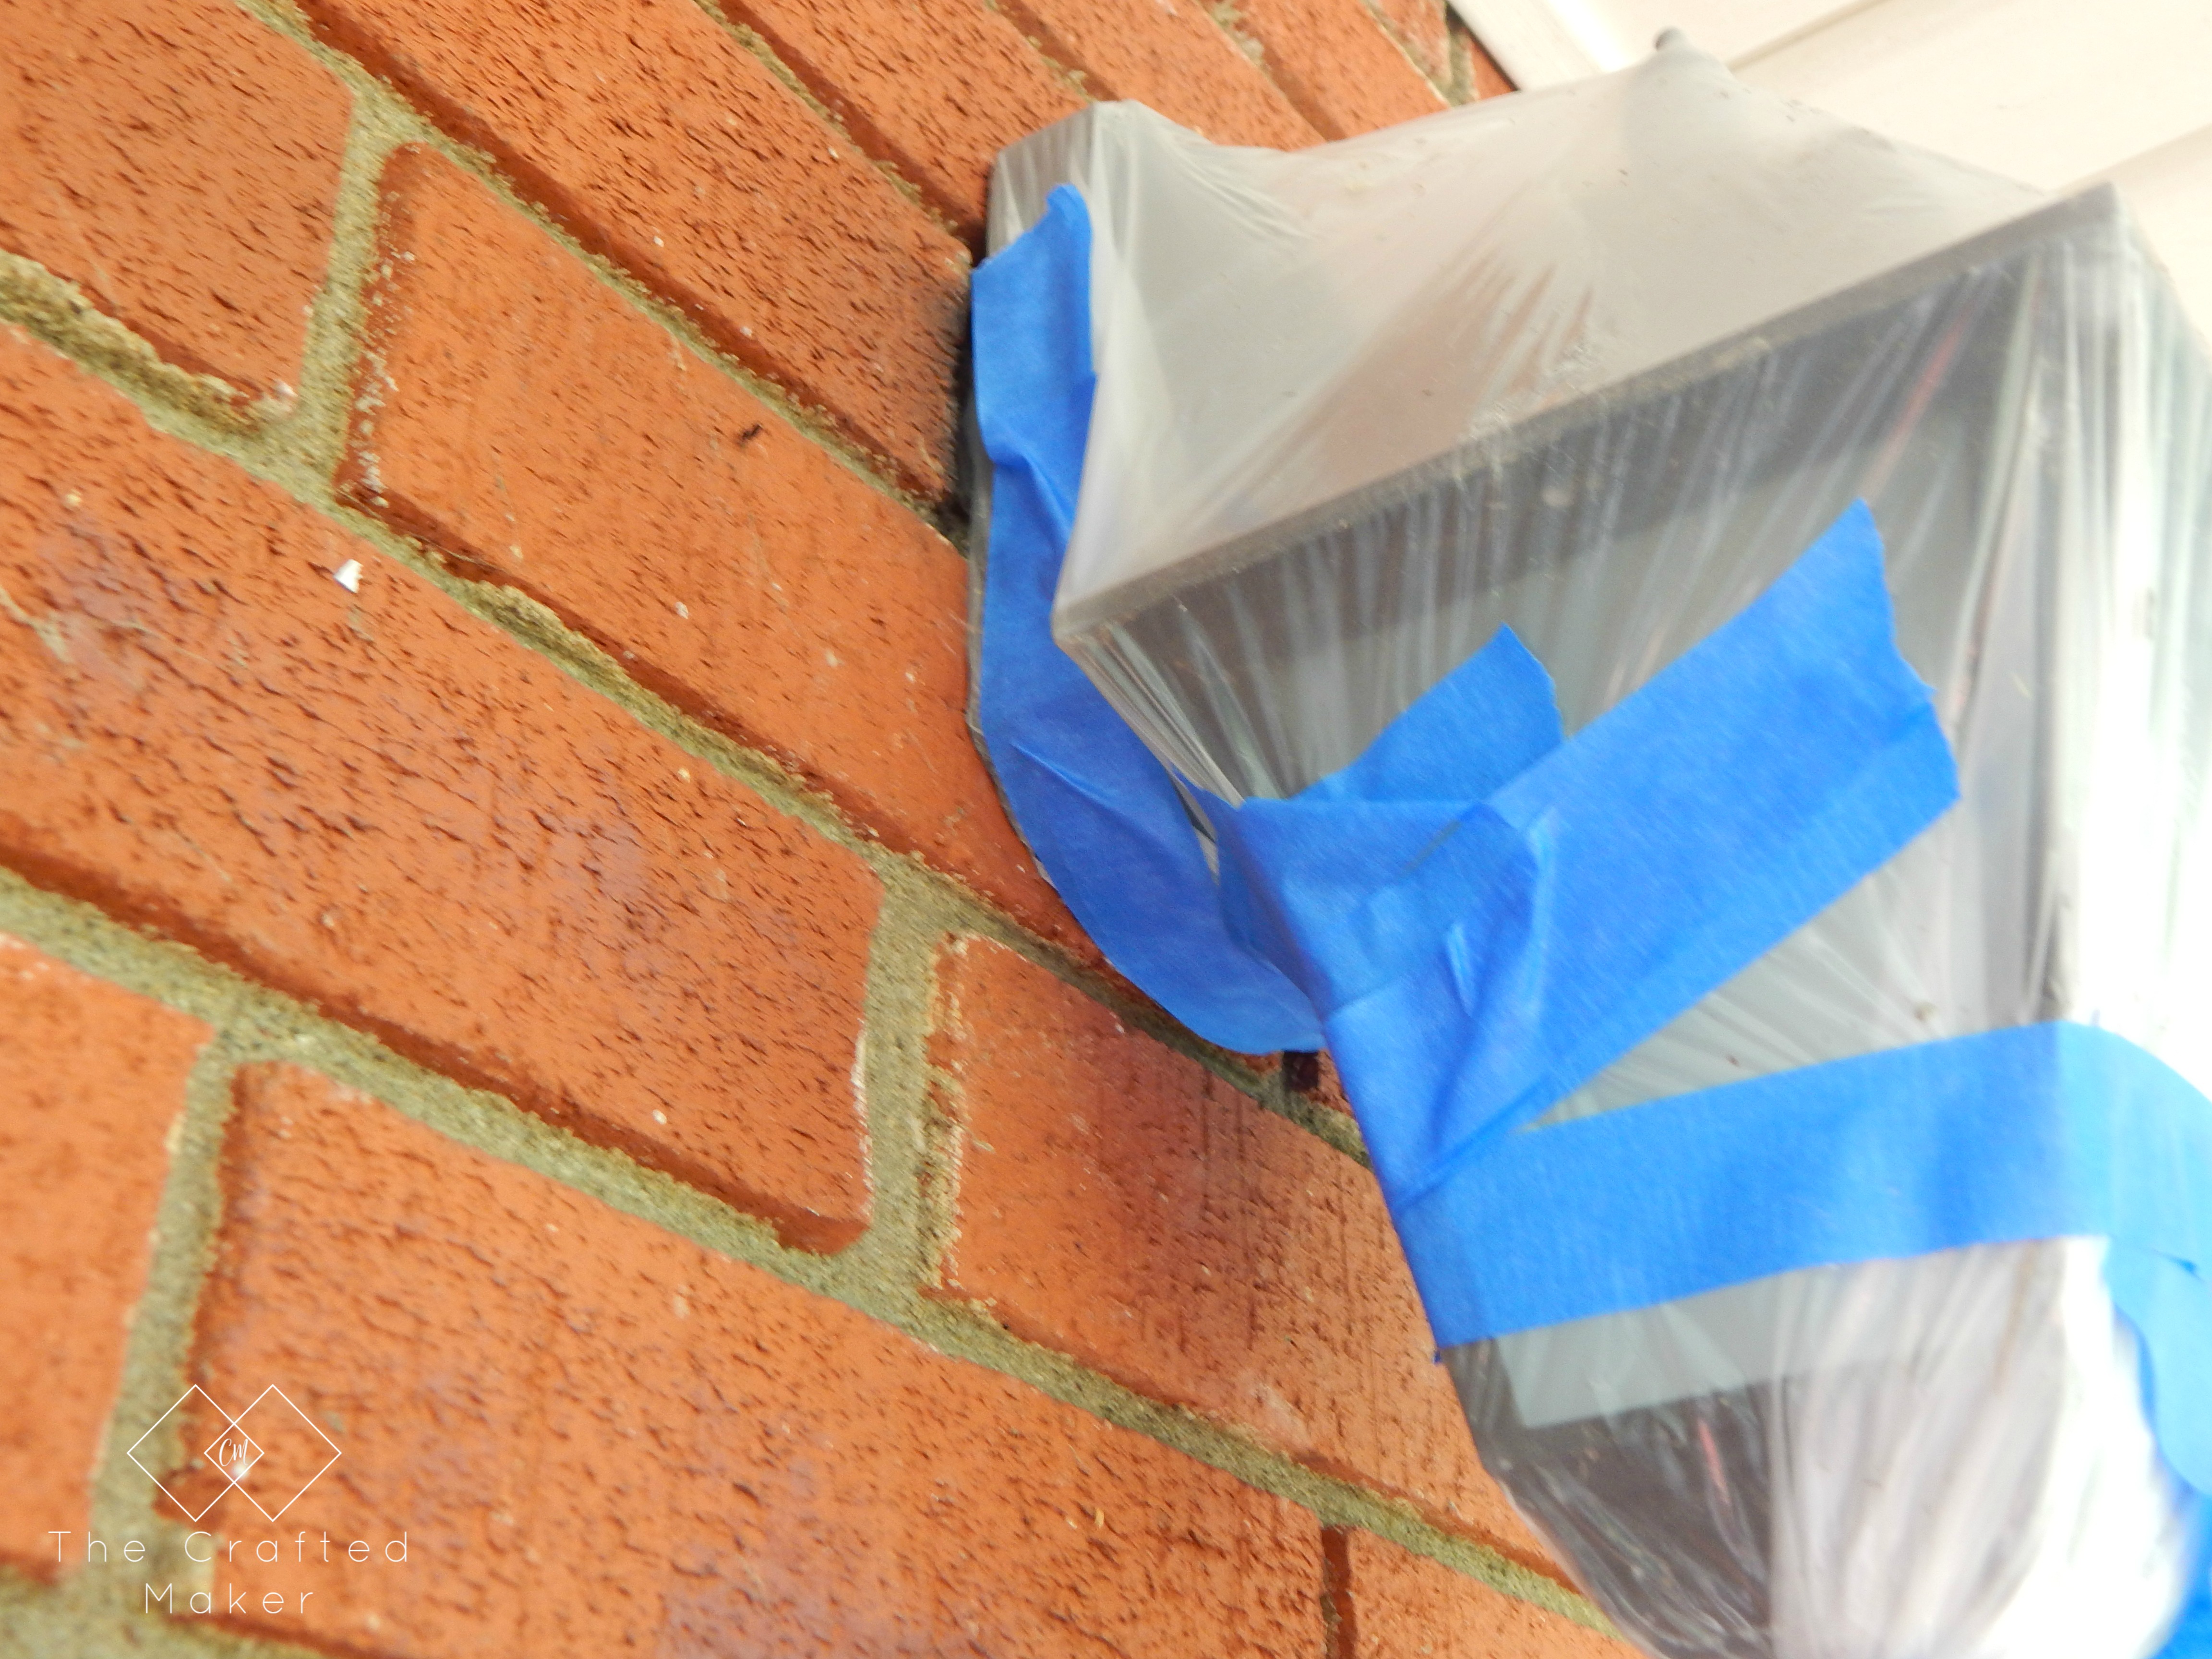
I covered the light on the front with plastic, but now that the job is done, I wish I would have just removed it. I had to touch up some spots with a brush that the plastic was covering. Rookie mistake! At least now I know for the next time I paint a house. DIY is always a learning opportunity….
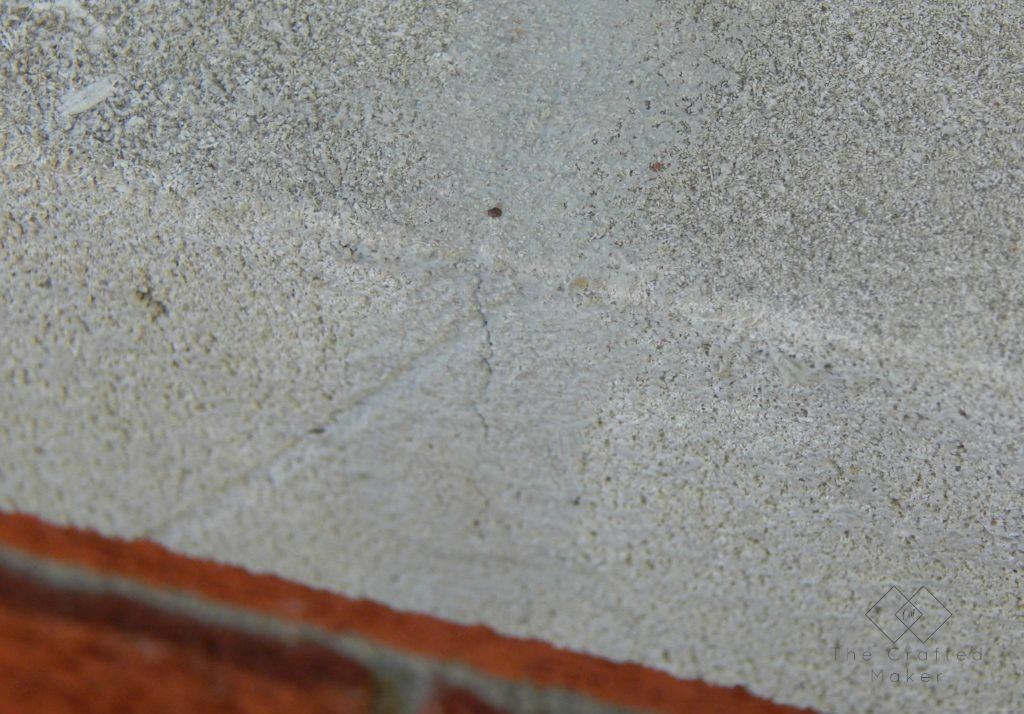
Repair Cracks
After everything is protected from the paint sprayer, now is a good time to look over your home and repair any cracks in the brick itself or window sills. I noticed a couple of cracks in my concrete window sills, so I used exterior caulking to fill in the holes. If you have repairs to make to concrete sills that are not getting painted, make sure you color match the caulking to the best of your ability. The wrong color could stick out like a sore thumb.
Applying the Primer
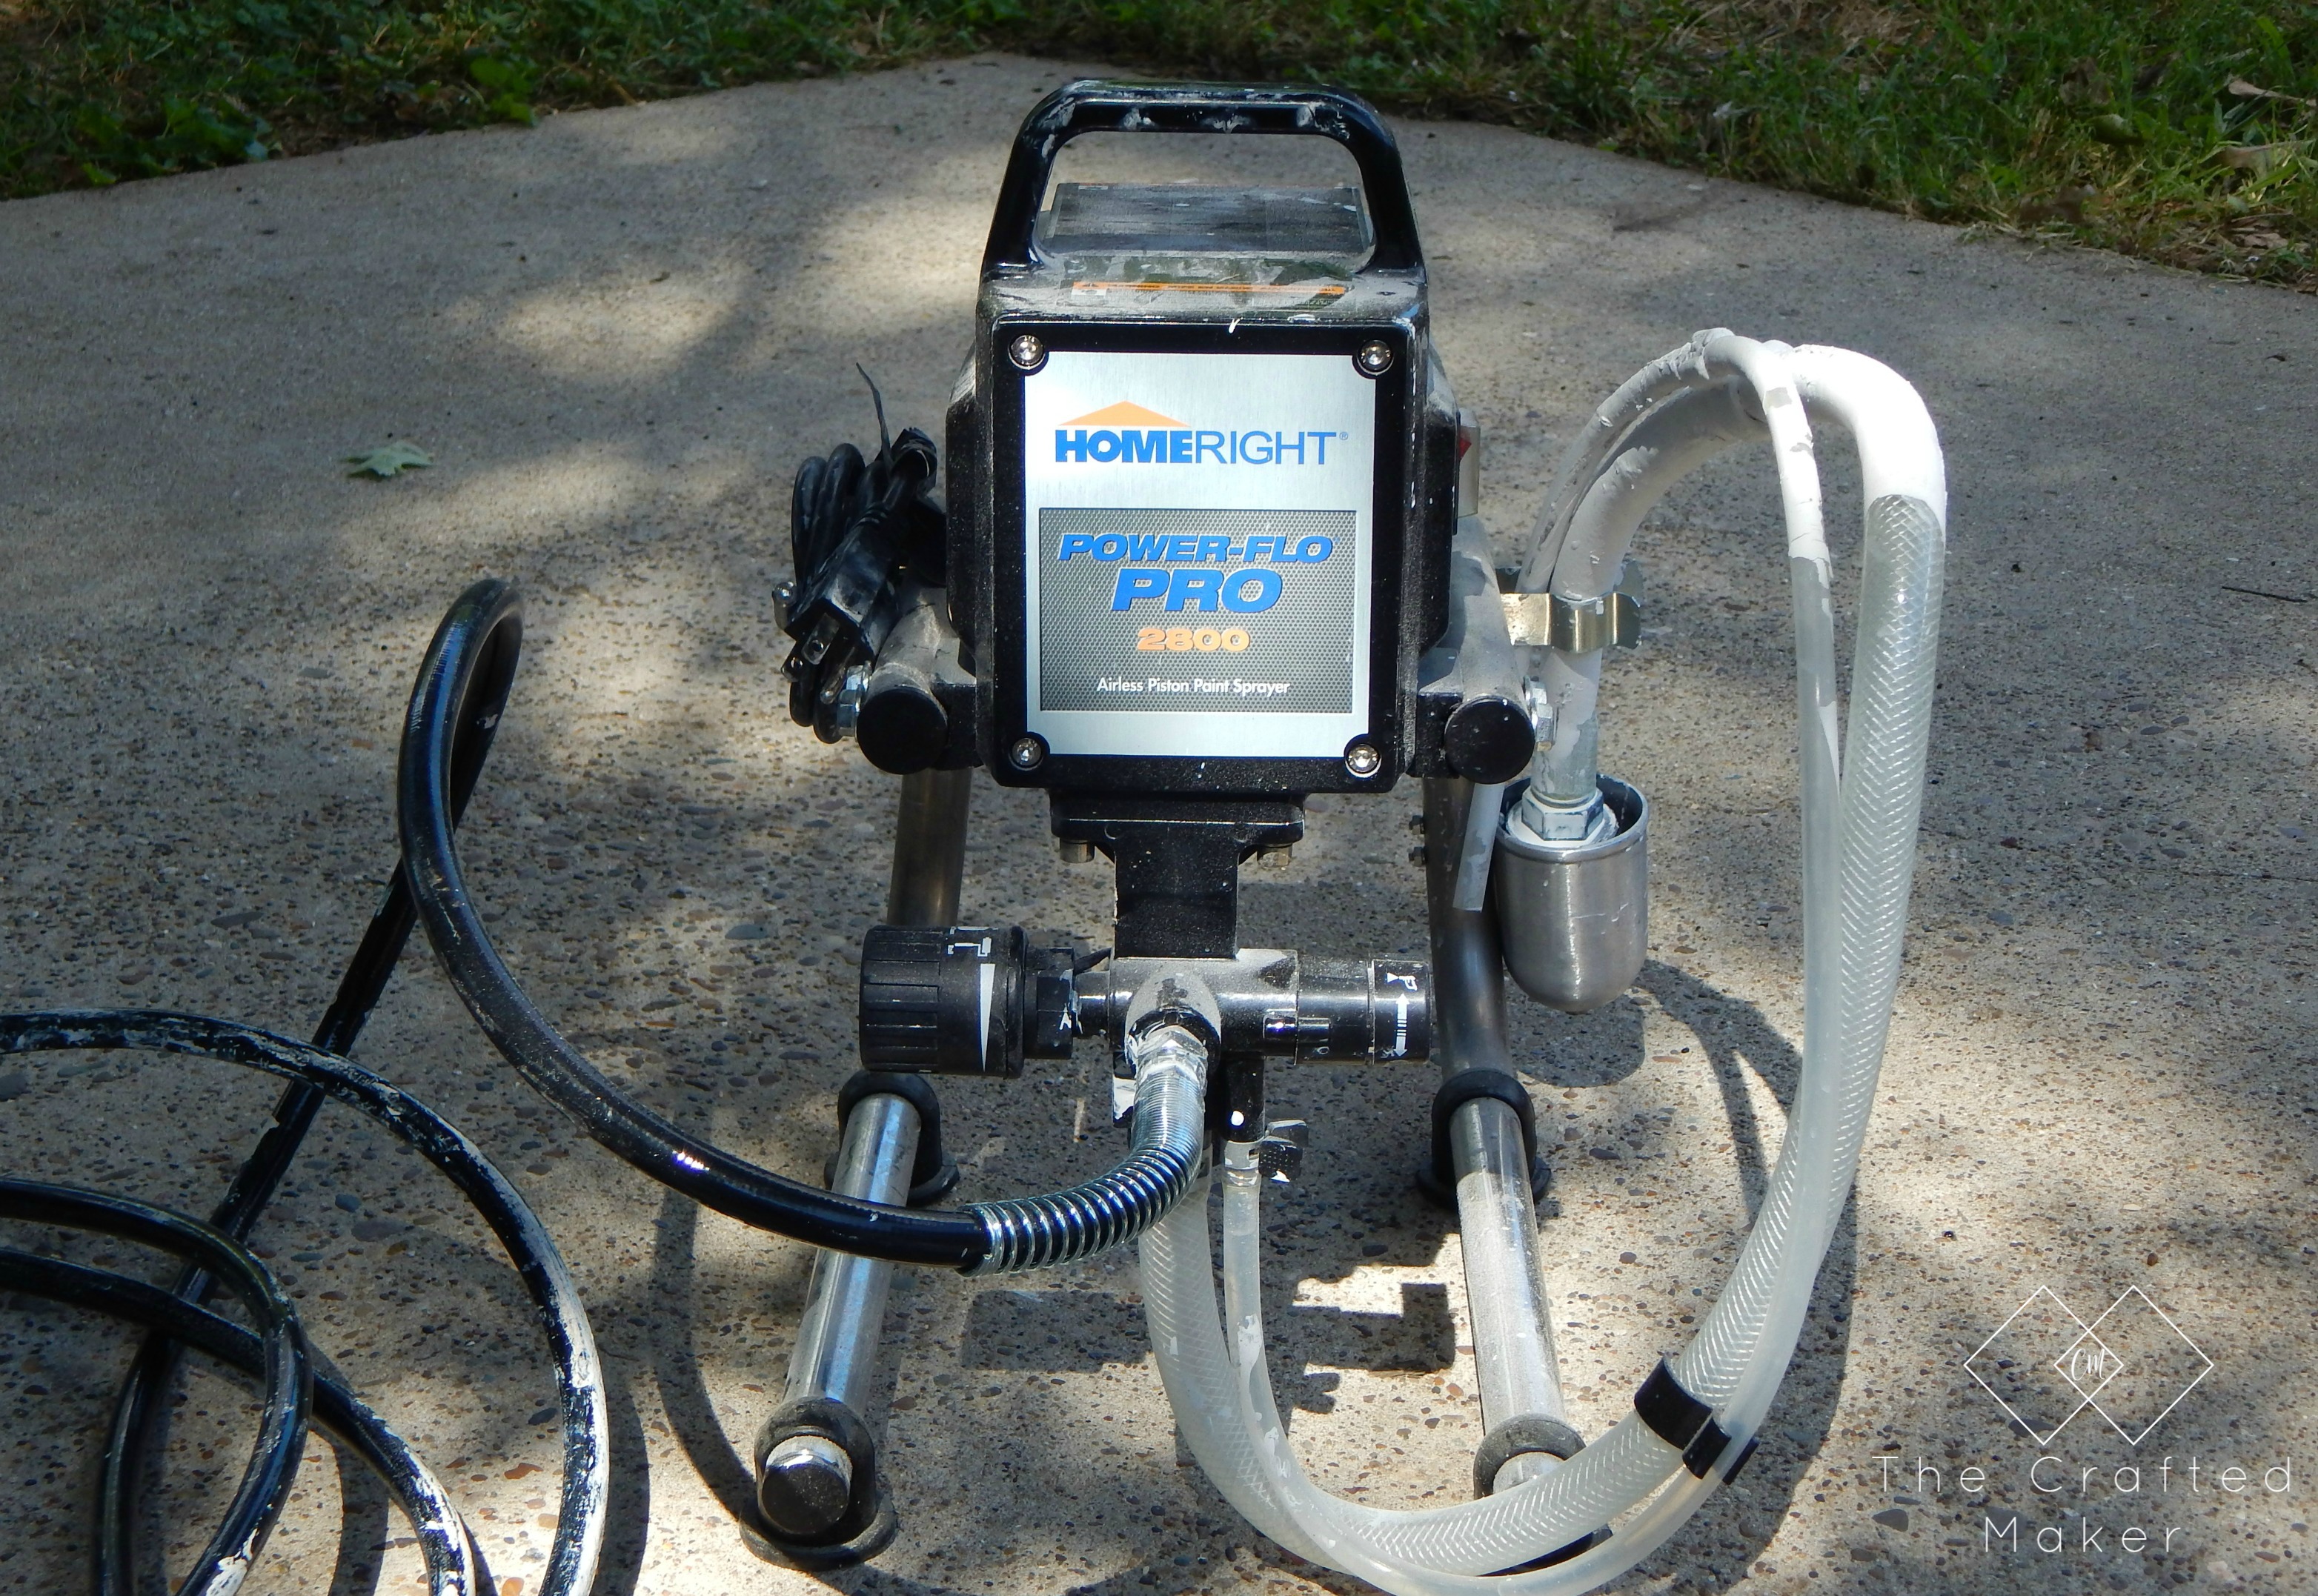
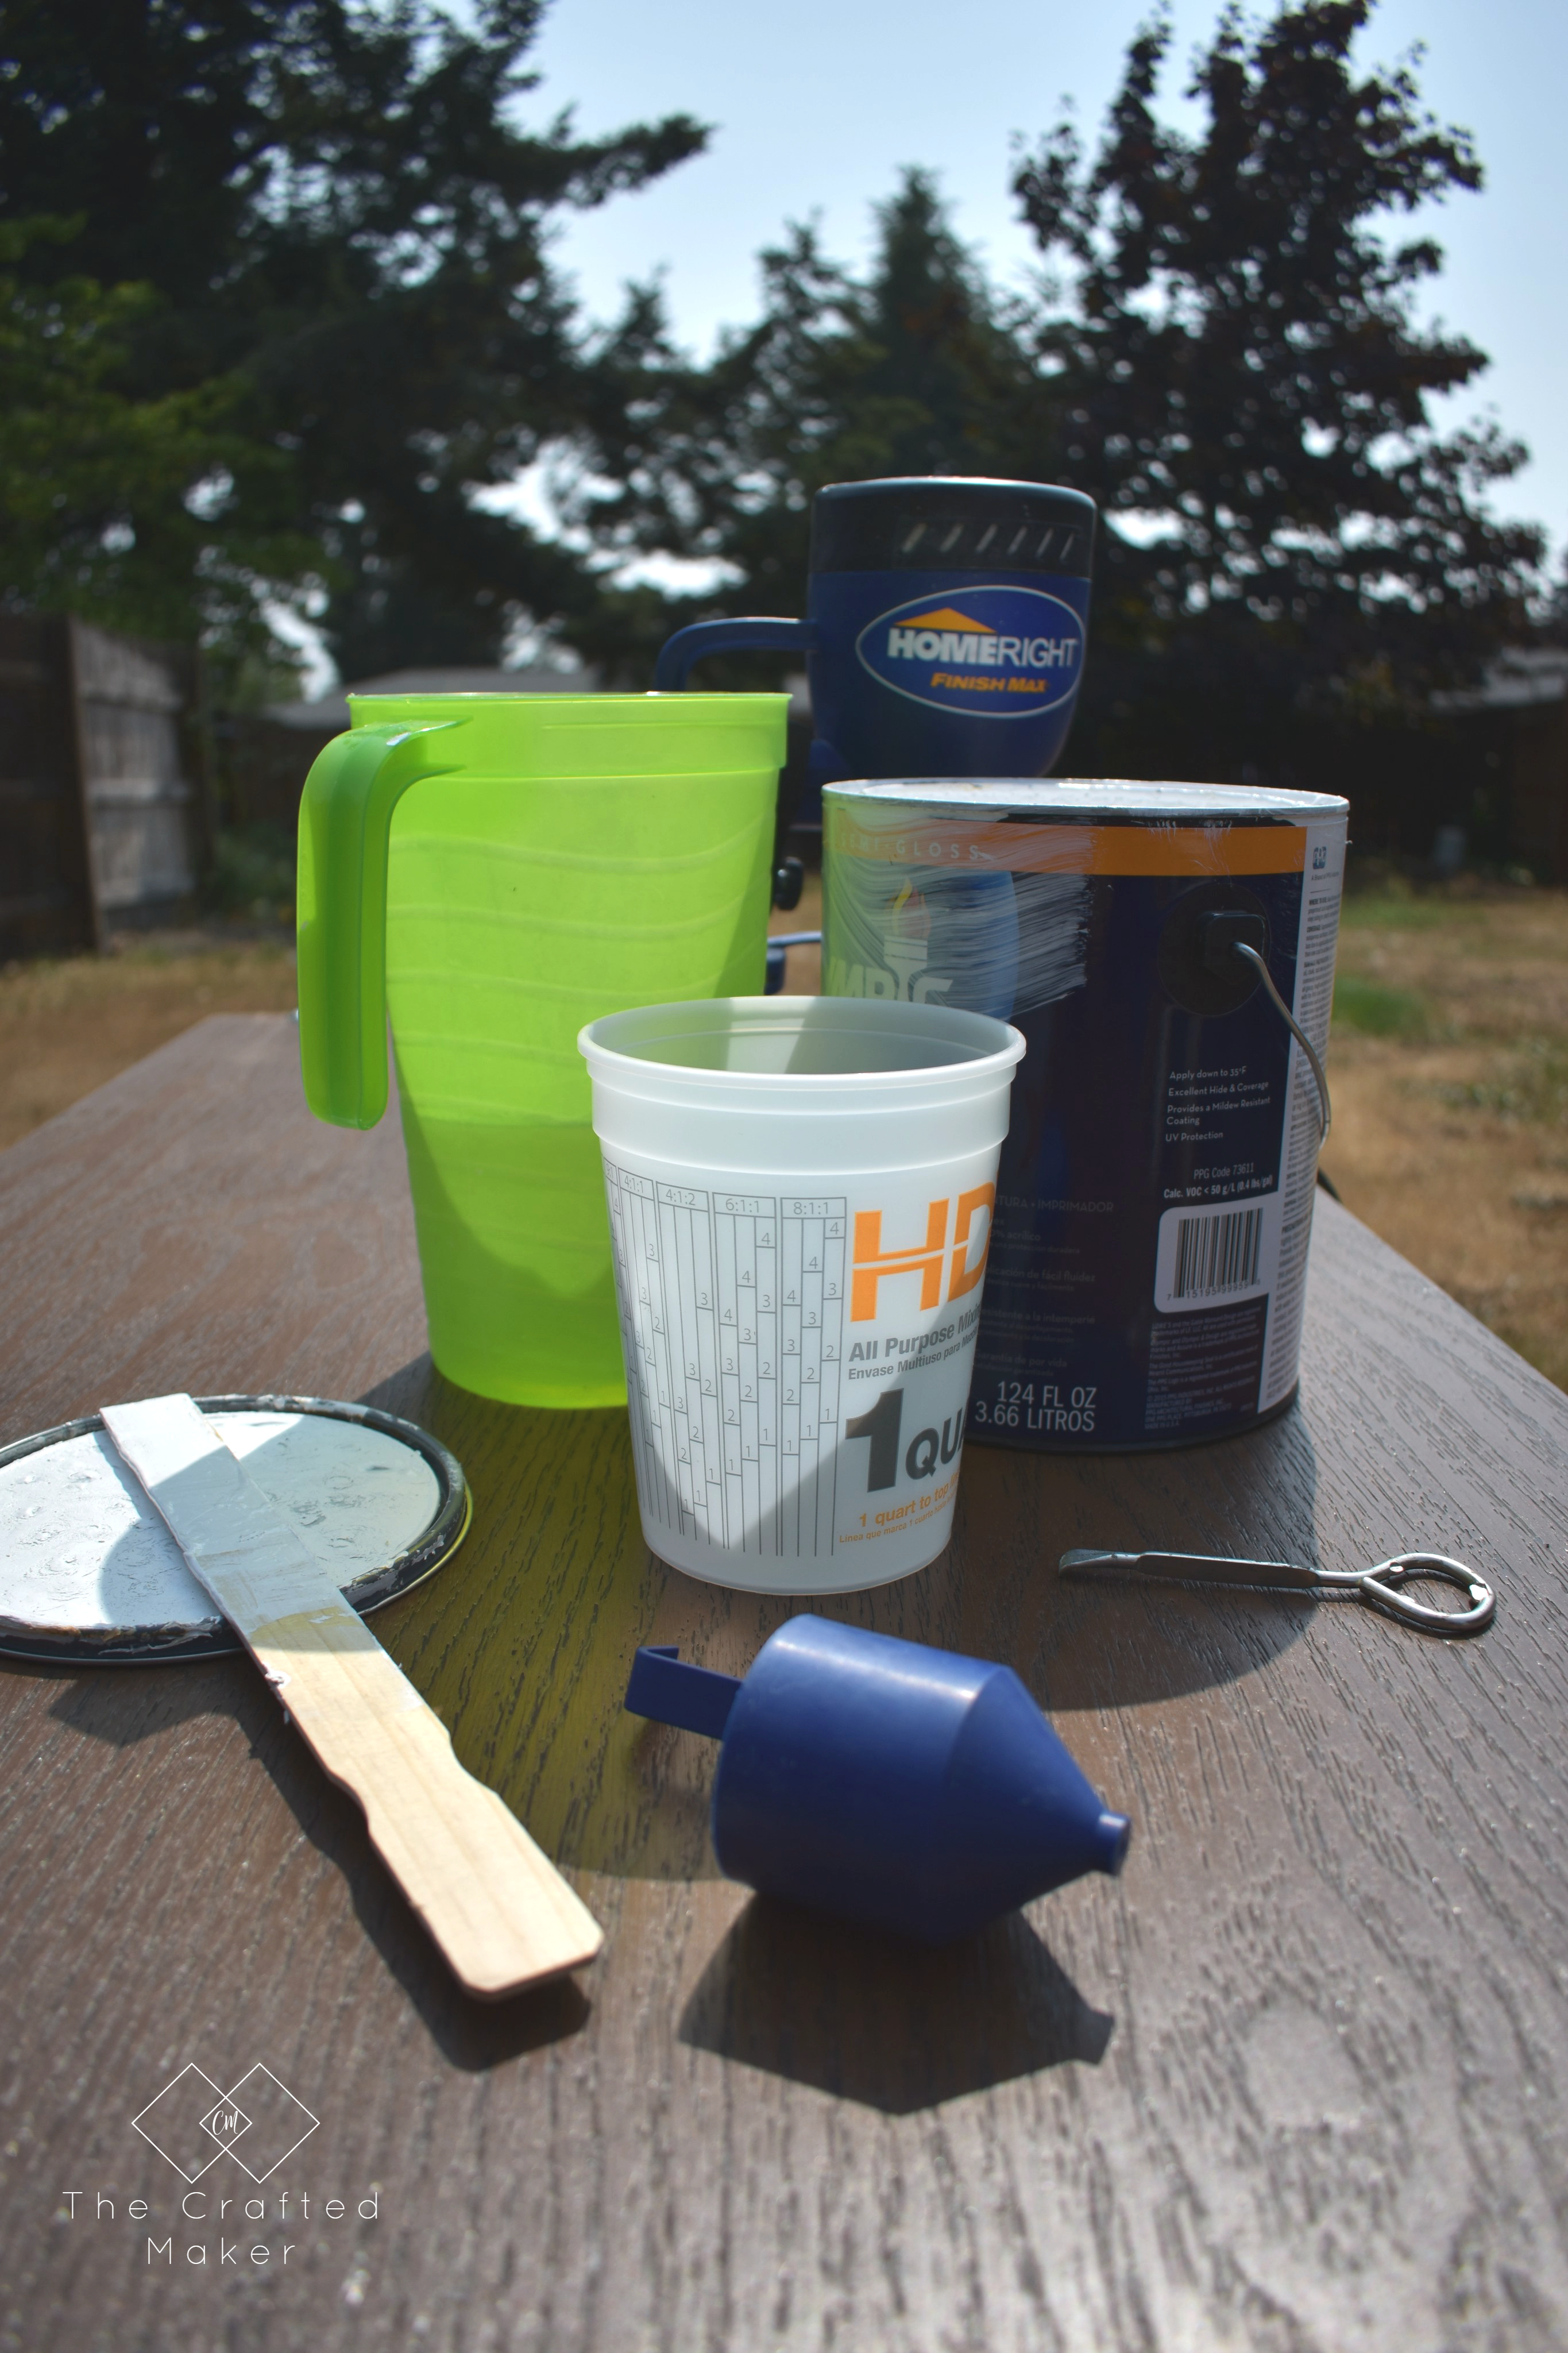
Since brick is such a porous surface, the primer has to be applied. If this step is missed, the brick will just soak up all of your paint, and you will need like ten thousand coats (over exaggeration, but you get my point). I teamed up with HomeRight for this project and they sent me a Power Flo Pro 2800 to spray on the primer and paint. This was my first time using a sprayer this big and powerful. I think I’m in love!
HomeRight Power-Flo Pro 2800
I used a primer made by Zinsser called Bulls Eye 123. This particular primer is made to stick to any surface without sanding, it blocks stains, and it is mold resistant. Since my home is going to be exposed to the elements, mold, and mildew resistant is definitely a plus!! Also, it has a one-hour dry time. This was a major bonus for me. When the only time you can paint is after getting home from your day job, you love when things dry fast. I gave my house a total of two coats. One coat would have covered it, but my brick was already so dark, I wanted to make sure it covered really well. I used four 2 gallon buckets of primer.

After the primer was fully sprayed on, I stopped and let this dry overnight. Even though there is a one-hour dry time, I figured better safe than sorry.
Painting
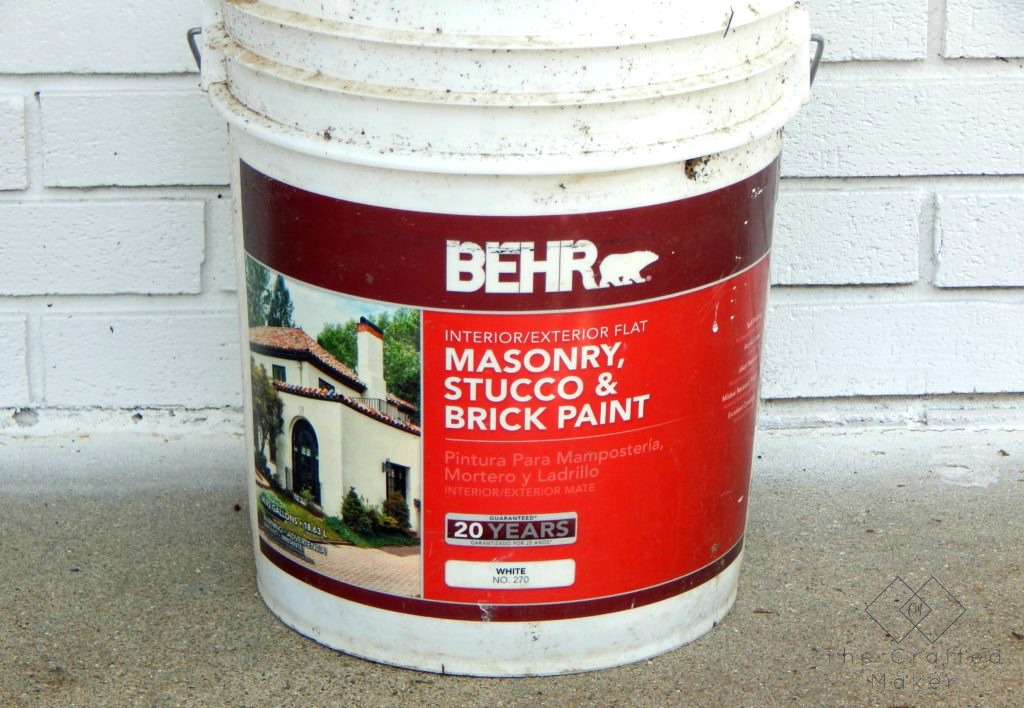
Now on the good stuff!! The primer was dry and now it is time to paint… I chose a masonry, stucco, and brick paint from Behr. Since the house was primed with two coats, I could have used a regular exterior grade paint, but like the primer, better safe than sorry. This paint is made for materials like brick. The only thing my local hardware store offered this paint in was flat. I had my concerns at first but was assured by a customer service associate that the flat paint will wash off dirt and grime just like a semi-gloss would. She said the only difference was the sheen. (I have taken a hose to the outside of my house since this project, and the dirt does just wash away… Whew!).
Like the primer, I gave my house two coats of the exterior paint. I used a total of three five gallon buckets of paint. I applied this a little thicker than the primer. That is why I used more of the actual paint than the primer. I probably could have used two five gallon buckets of paint, but this was my first time, and I was just going with the flow. Some spots I actually got a little to paint happy with. Cleaning out running paint from brick mortar is not fun!
I gave this paint a couple of days to fully cure and looked for any touch ups I needed to make. At this point, I was ready to take off the plastic and contractors paper from the windows, doors, and light fixtures. I had a few minor touch-ups, like the light fixture to fix with a brush, but now I had a white house instead of orange brick. SUCCESS!!
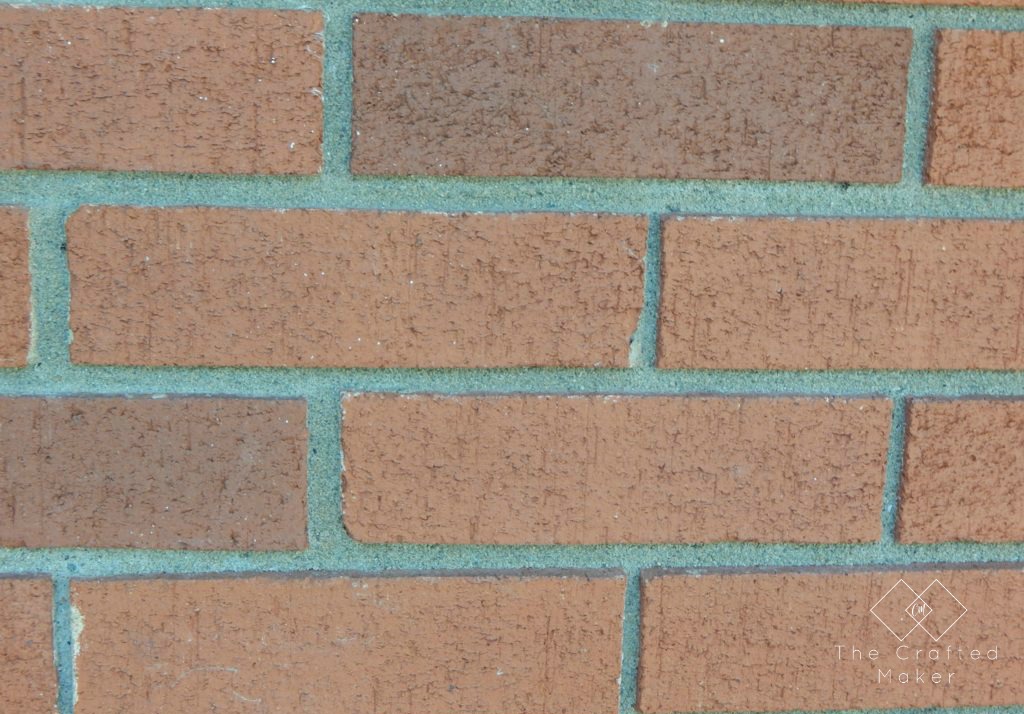
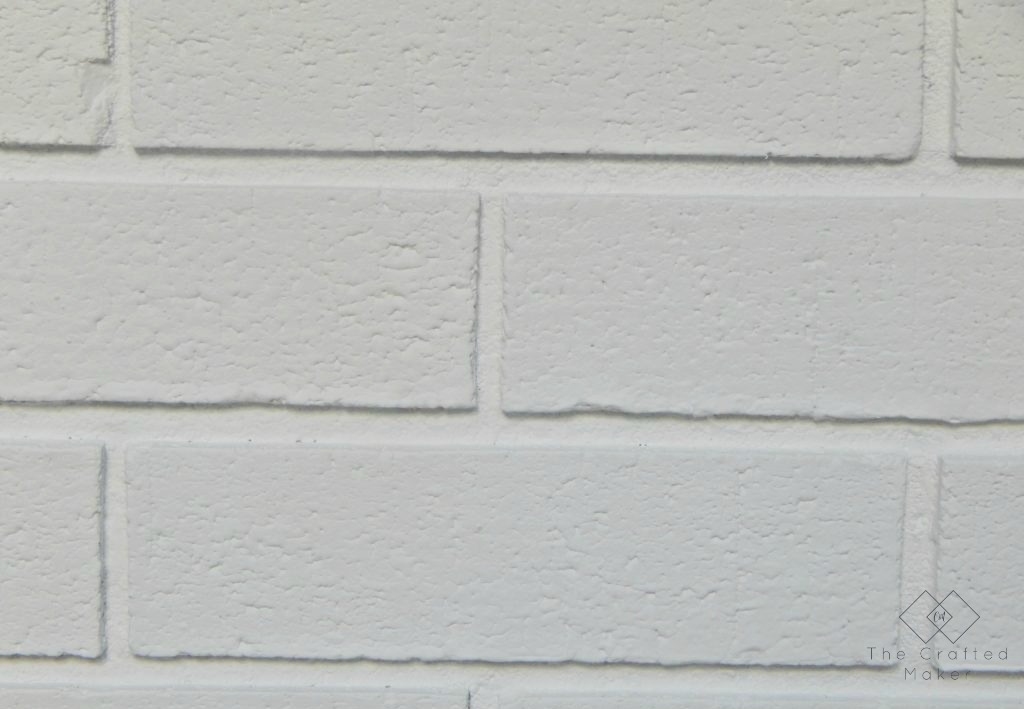
To really see the difference this made, here are some close-up shots of the before and after. I am loving how bright and vibrant the white paint makes my brick look.
Before
After
Crazy right?!? Just a couple of nights after work, and I now have a completely different home. I love DIY and the results you can get when you add a little elbow grease to amazing products and tools.
I really hope this tutorial on how to paint a brick home was useful to you all. If any of you decide to take on this project, feel free to send me some pics of the finished results. I love to see what you all are working on. It just makes me happy!!
The next thing to tackle is that landscaping!! We will save that for another post. Thanks so much for sticking around on this rather longer than normal post with me. Until next time…

To see behind the scenes pics of the projects I am working on, or just to say hi, come follow along with me on Instagram and Pinterest.
Pinning is always appreciated!!


You did an amazing job!!! If you would like to come paint mine you are so very welcome to come on down and do it. You are so talented in your DIY projects. Love you and Shauna so much, Tim said you do a great job on everything!!!
I would be down in a heartbeat if I could! Love you guys too. Tell Tim thanks!
a amazing transformation i love it and the details on how to is suberb
Thank you Carol! I’m glad you enjoyed the post. It really was a transformation.
What color white did you use? It’s really lovely
Thanks Dani! I used masonry, stucco, and brick paint by Behr in white No. 270.