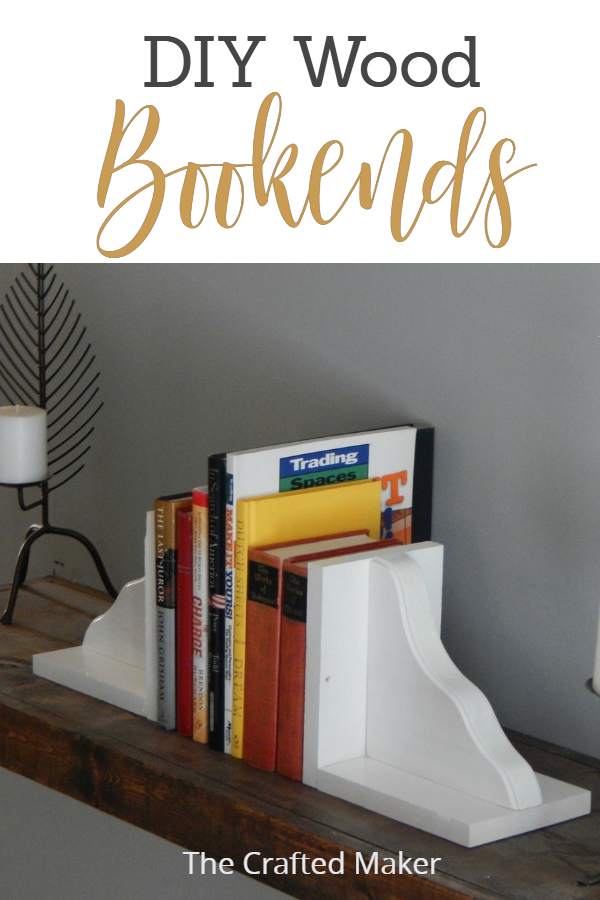
Happy Wednesday everybody! Today I am going to share with you a very easy project. About a year ago I purchased a set of wood shelf brackets on clearance at Lowe’s. Imagine that, me shopping the clearance section! I have been looking for a reason to use them for a while now, so I decided to make some DIY wood bookends. They have a great use in the home and are very cute at the same time. Let’s get to building!
Supplies
2 Wood Shelf Brackets (mine were 7 in.x 7 1/2 in.)
1X6 Board (for this I used a total of 30.5 in.) If you do not have scrap wood, the project can be completed with a 4 ft. board.
Pocket Hole Screws
Spray paint (color of your choice)
Nails for nailer (I used a nailer hooked up to my air compressor)
Sealer
Sandpaper
Kreg Drill Bit
Tools to Use Cut List
Miter Saw 2 1×6 @ 7 3/4 in.
Tape Measure 2 1×6 @ 7 1/2 in.
Nailer
Drill
Wood shelf brackets.

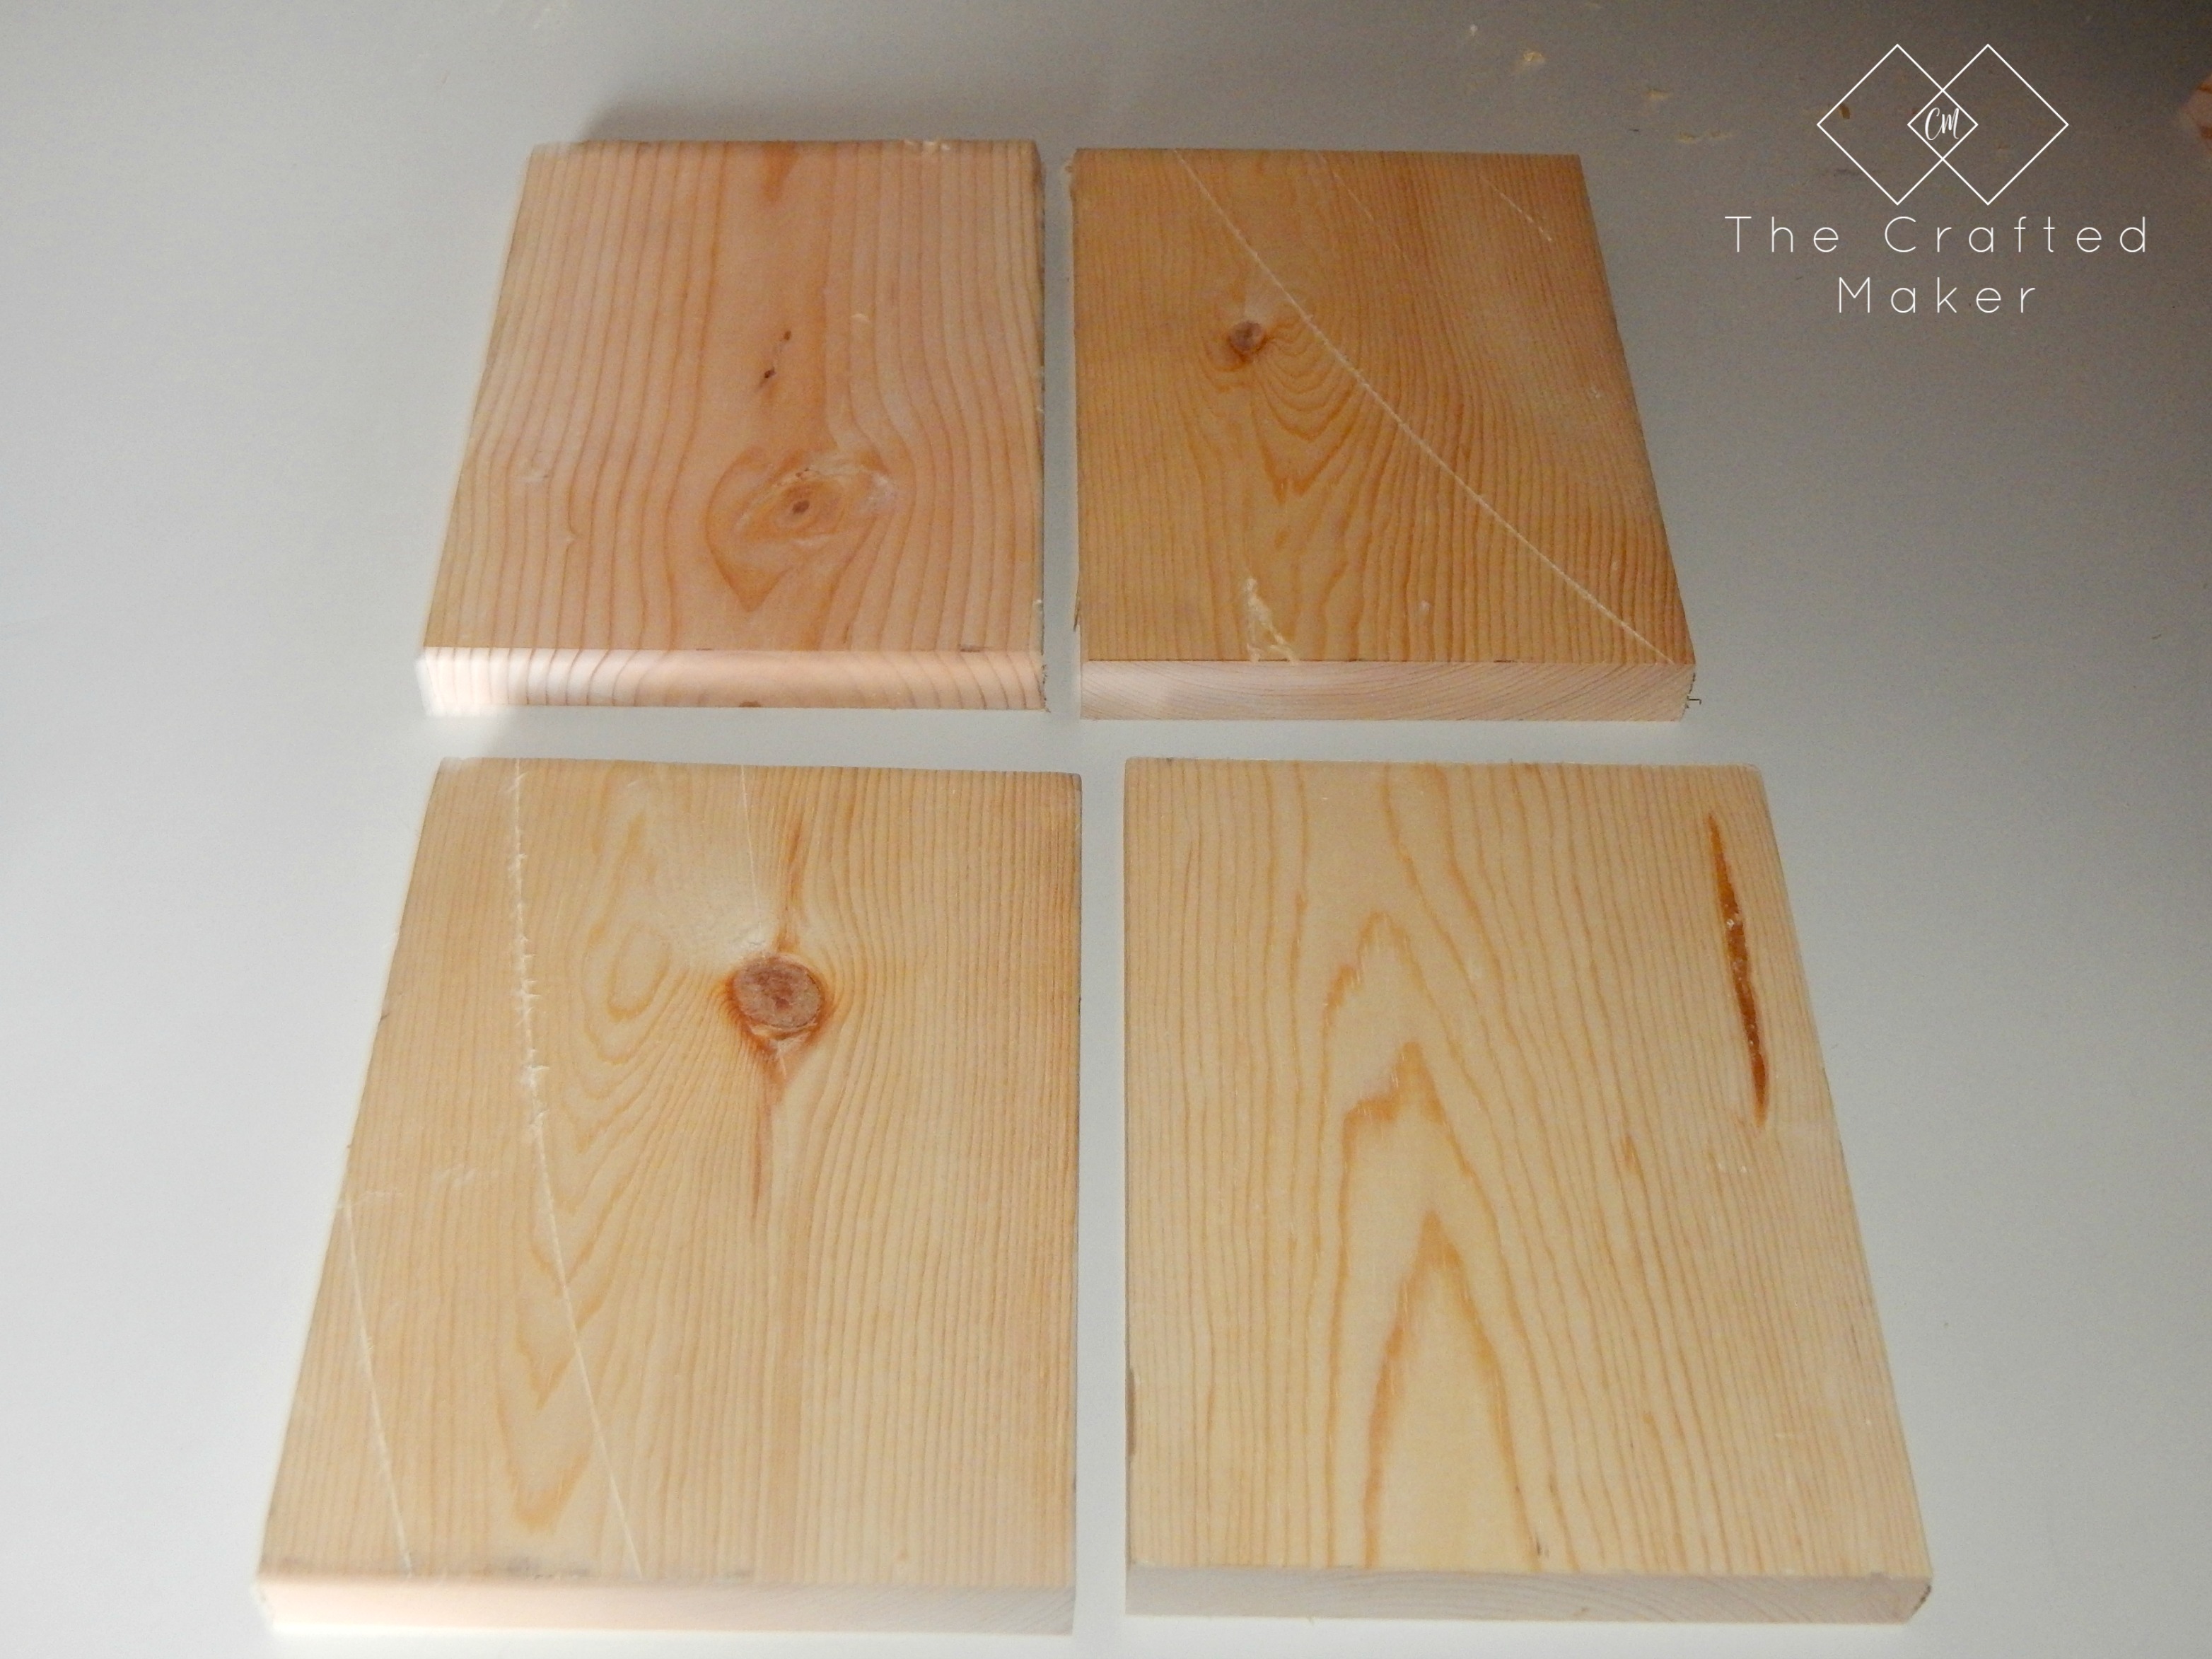
The first thing you will need to do is measure and cut your wood pieces. I am using 1X6 pine boards for my DIY wood bookends. You will need two of each size. Four pieces in total.
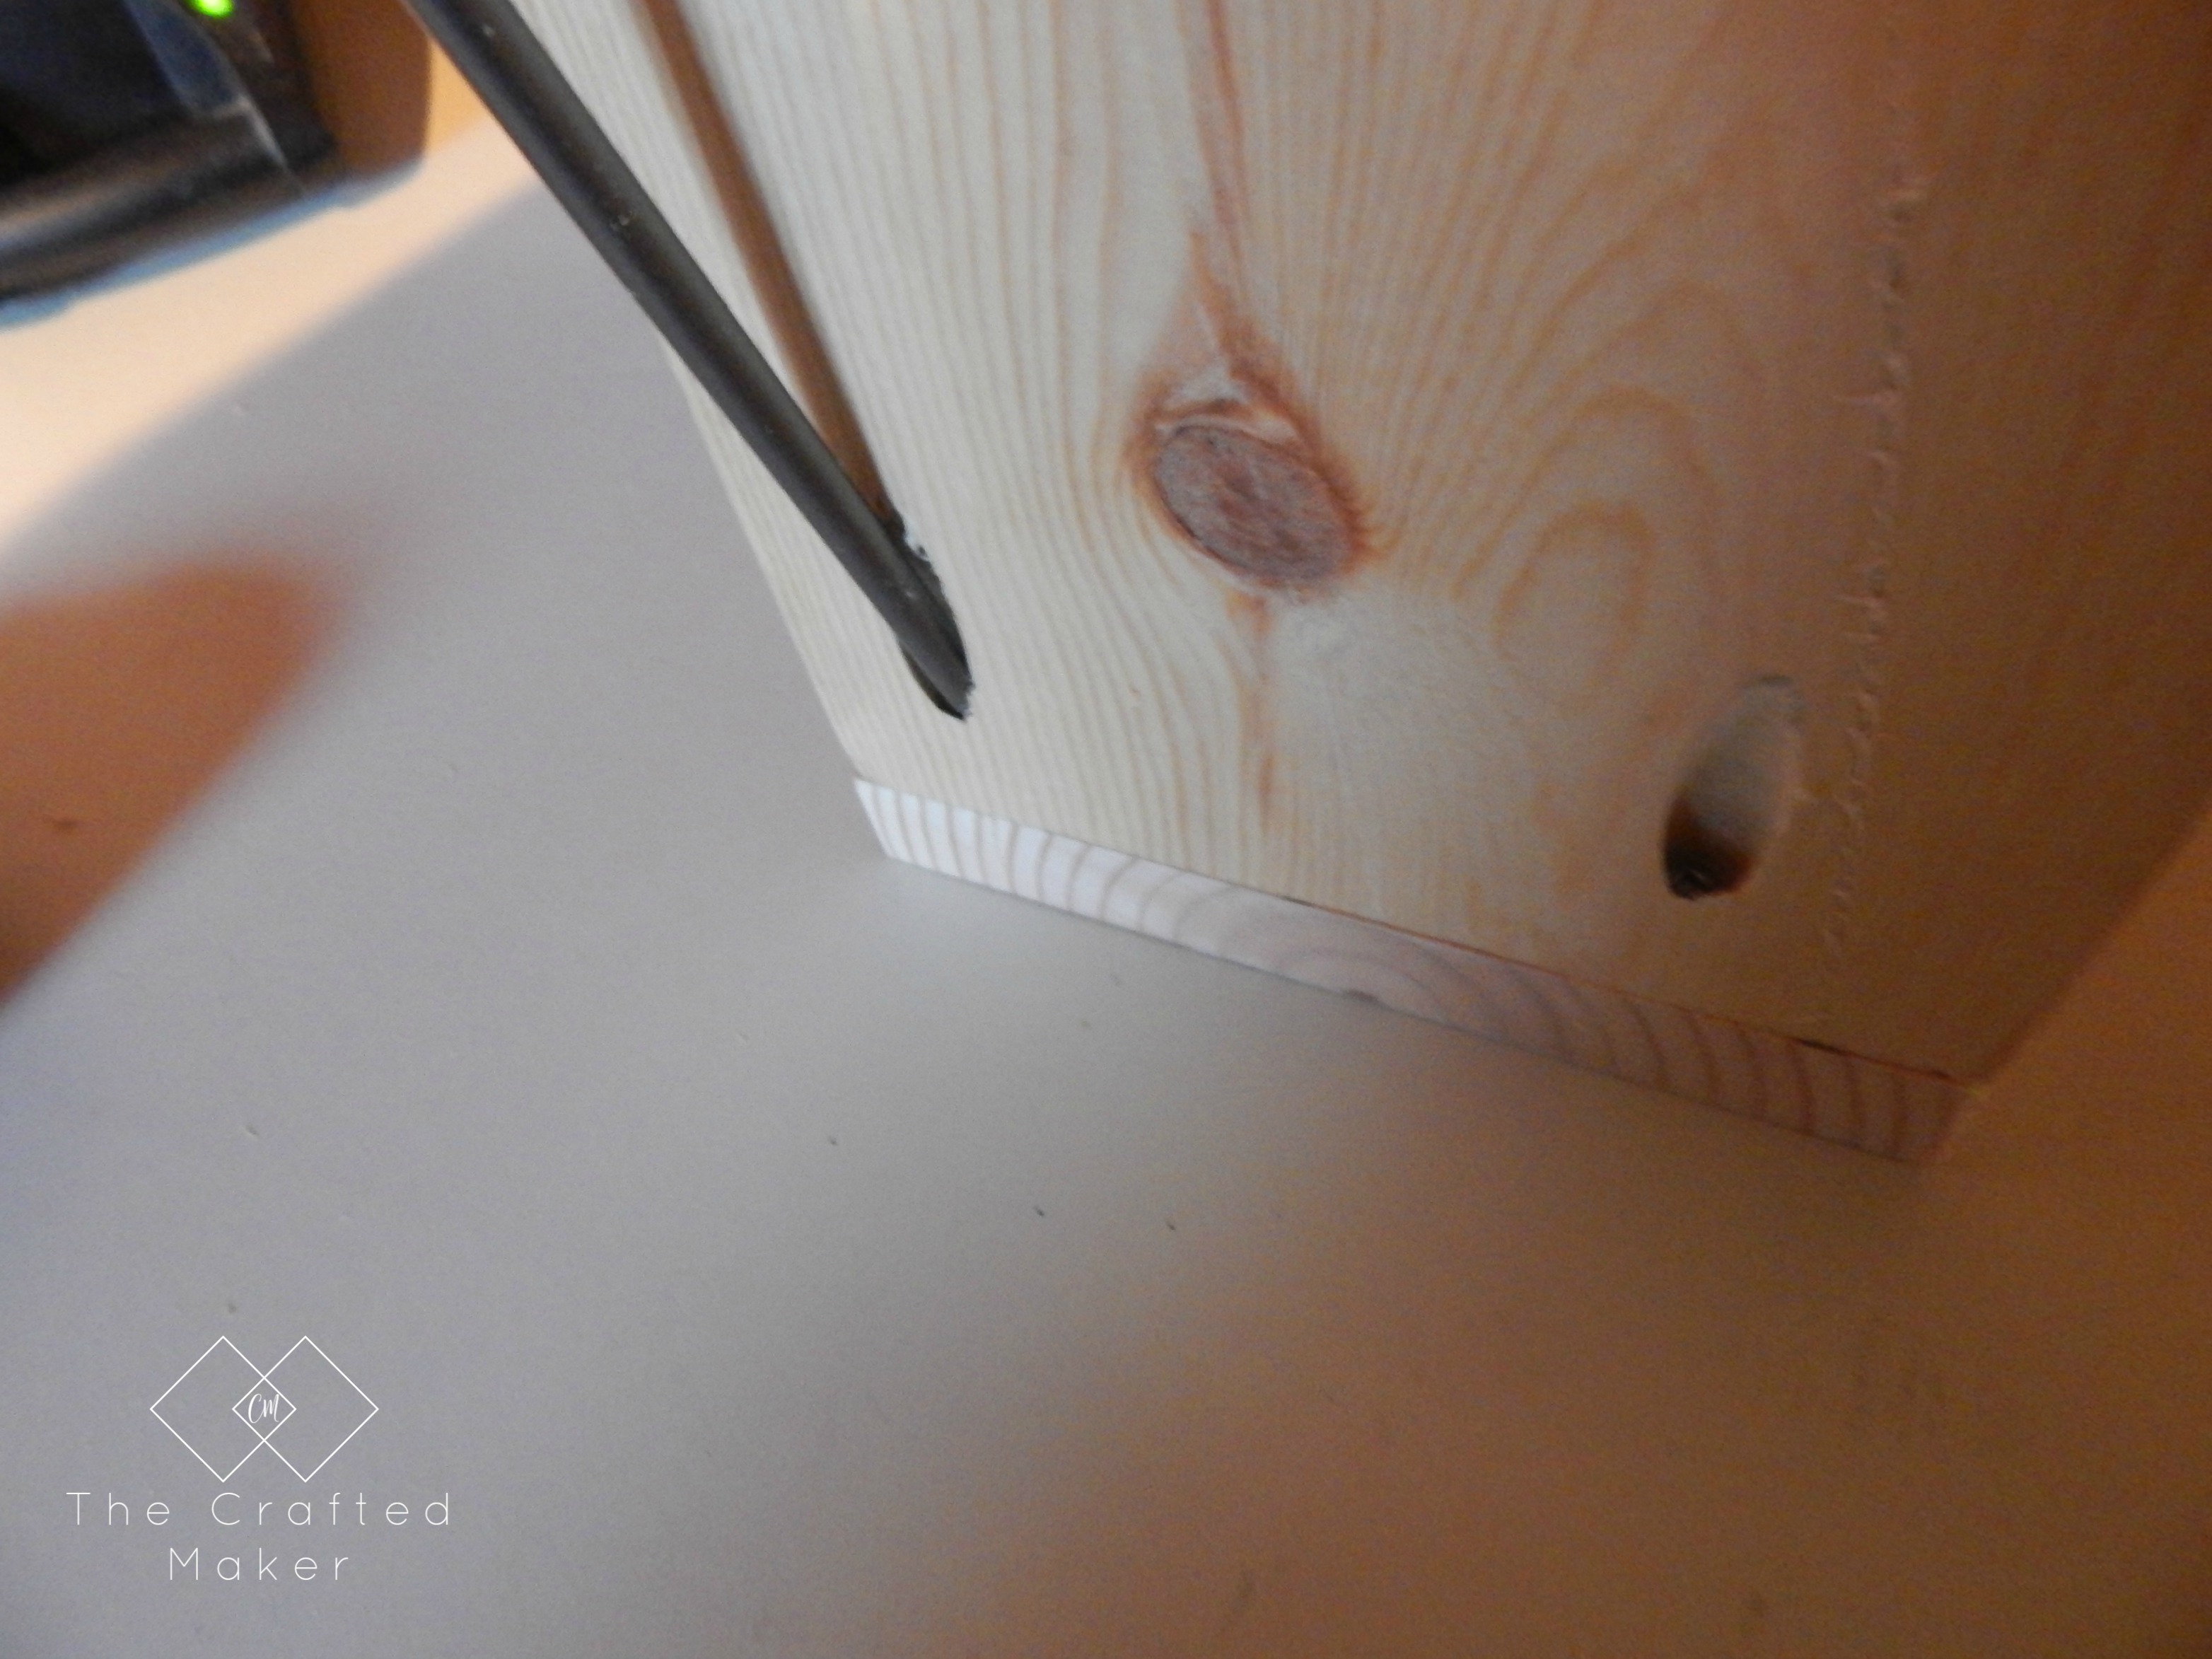
Once you have the pieces cut, its time to drill the pocket holes. The pictures show where the pocket holes need to be placed. I chose to use scrap wood for this project, so the lines on the wood do not mean anything. I must have been measuring for another cut. oops!

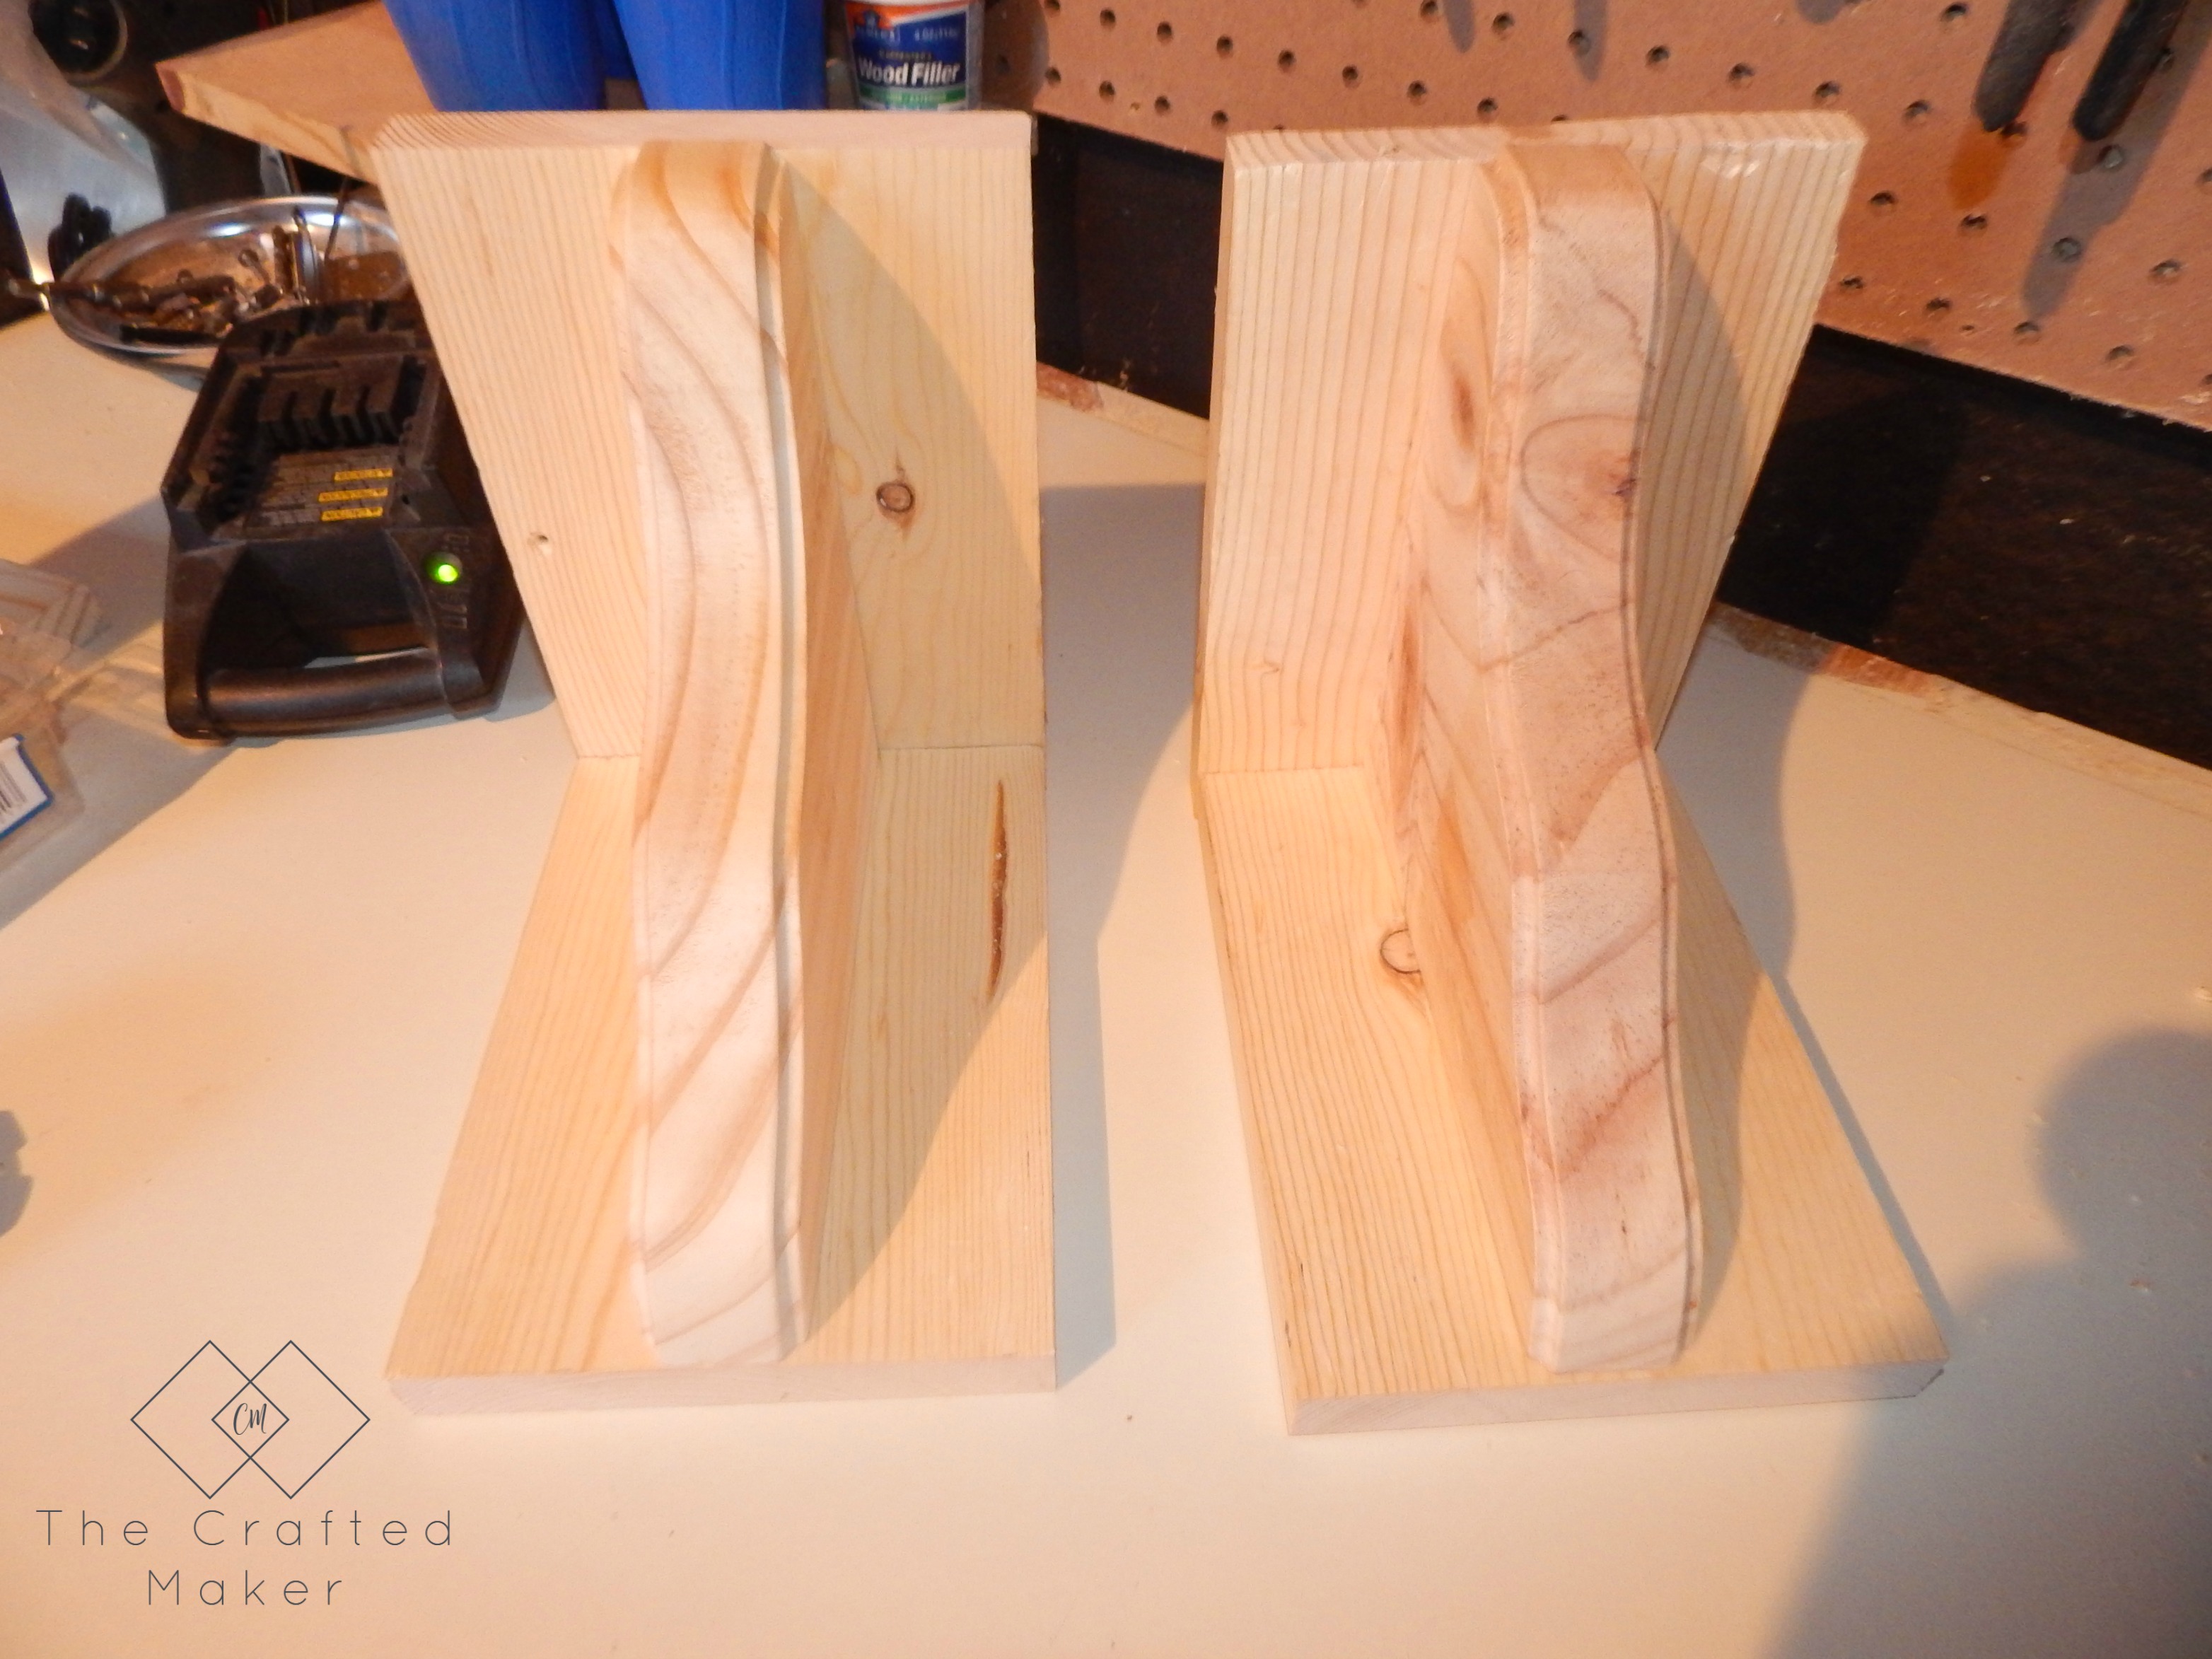
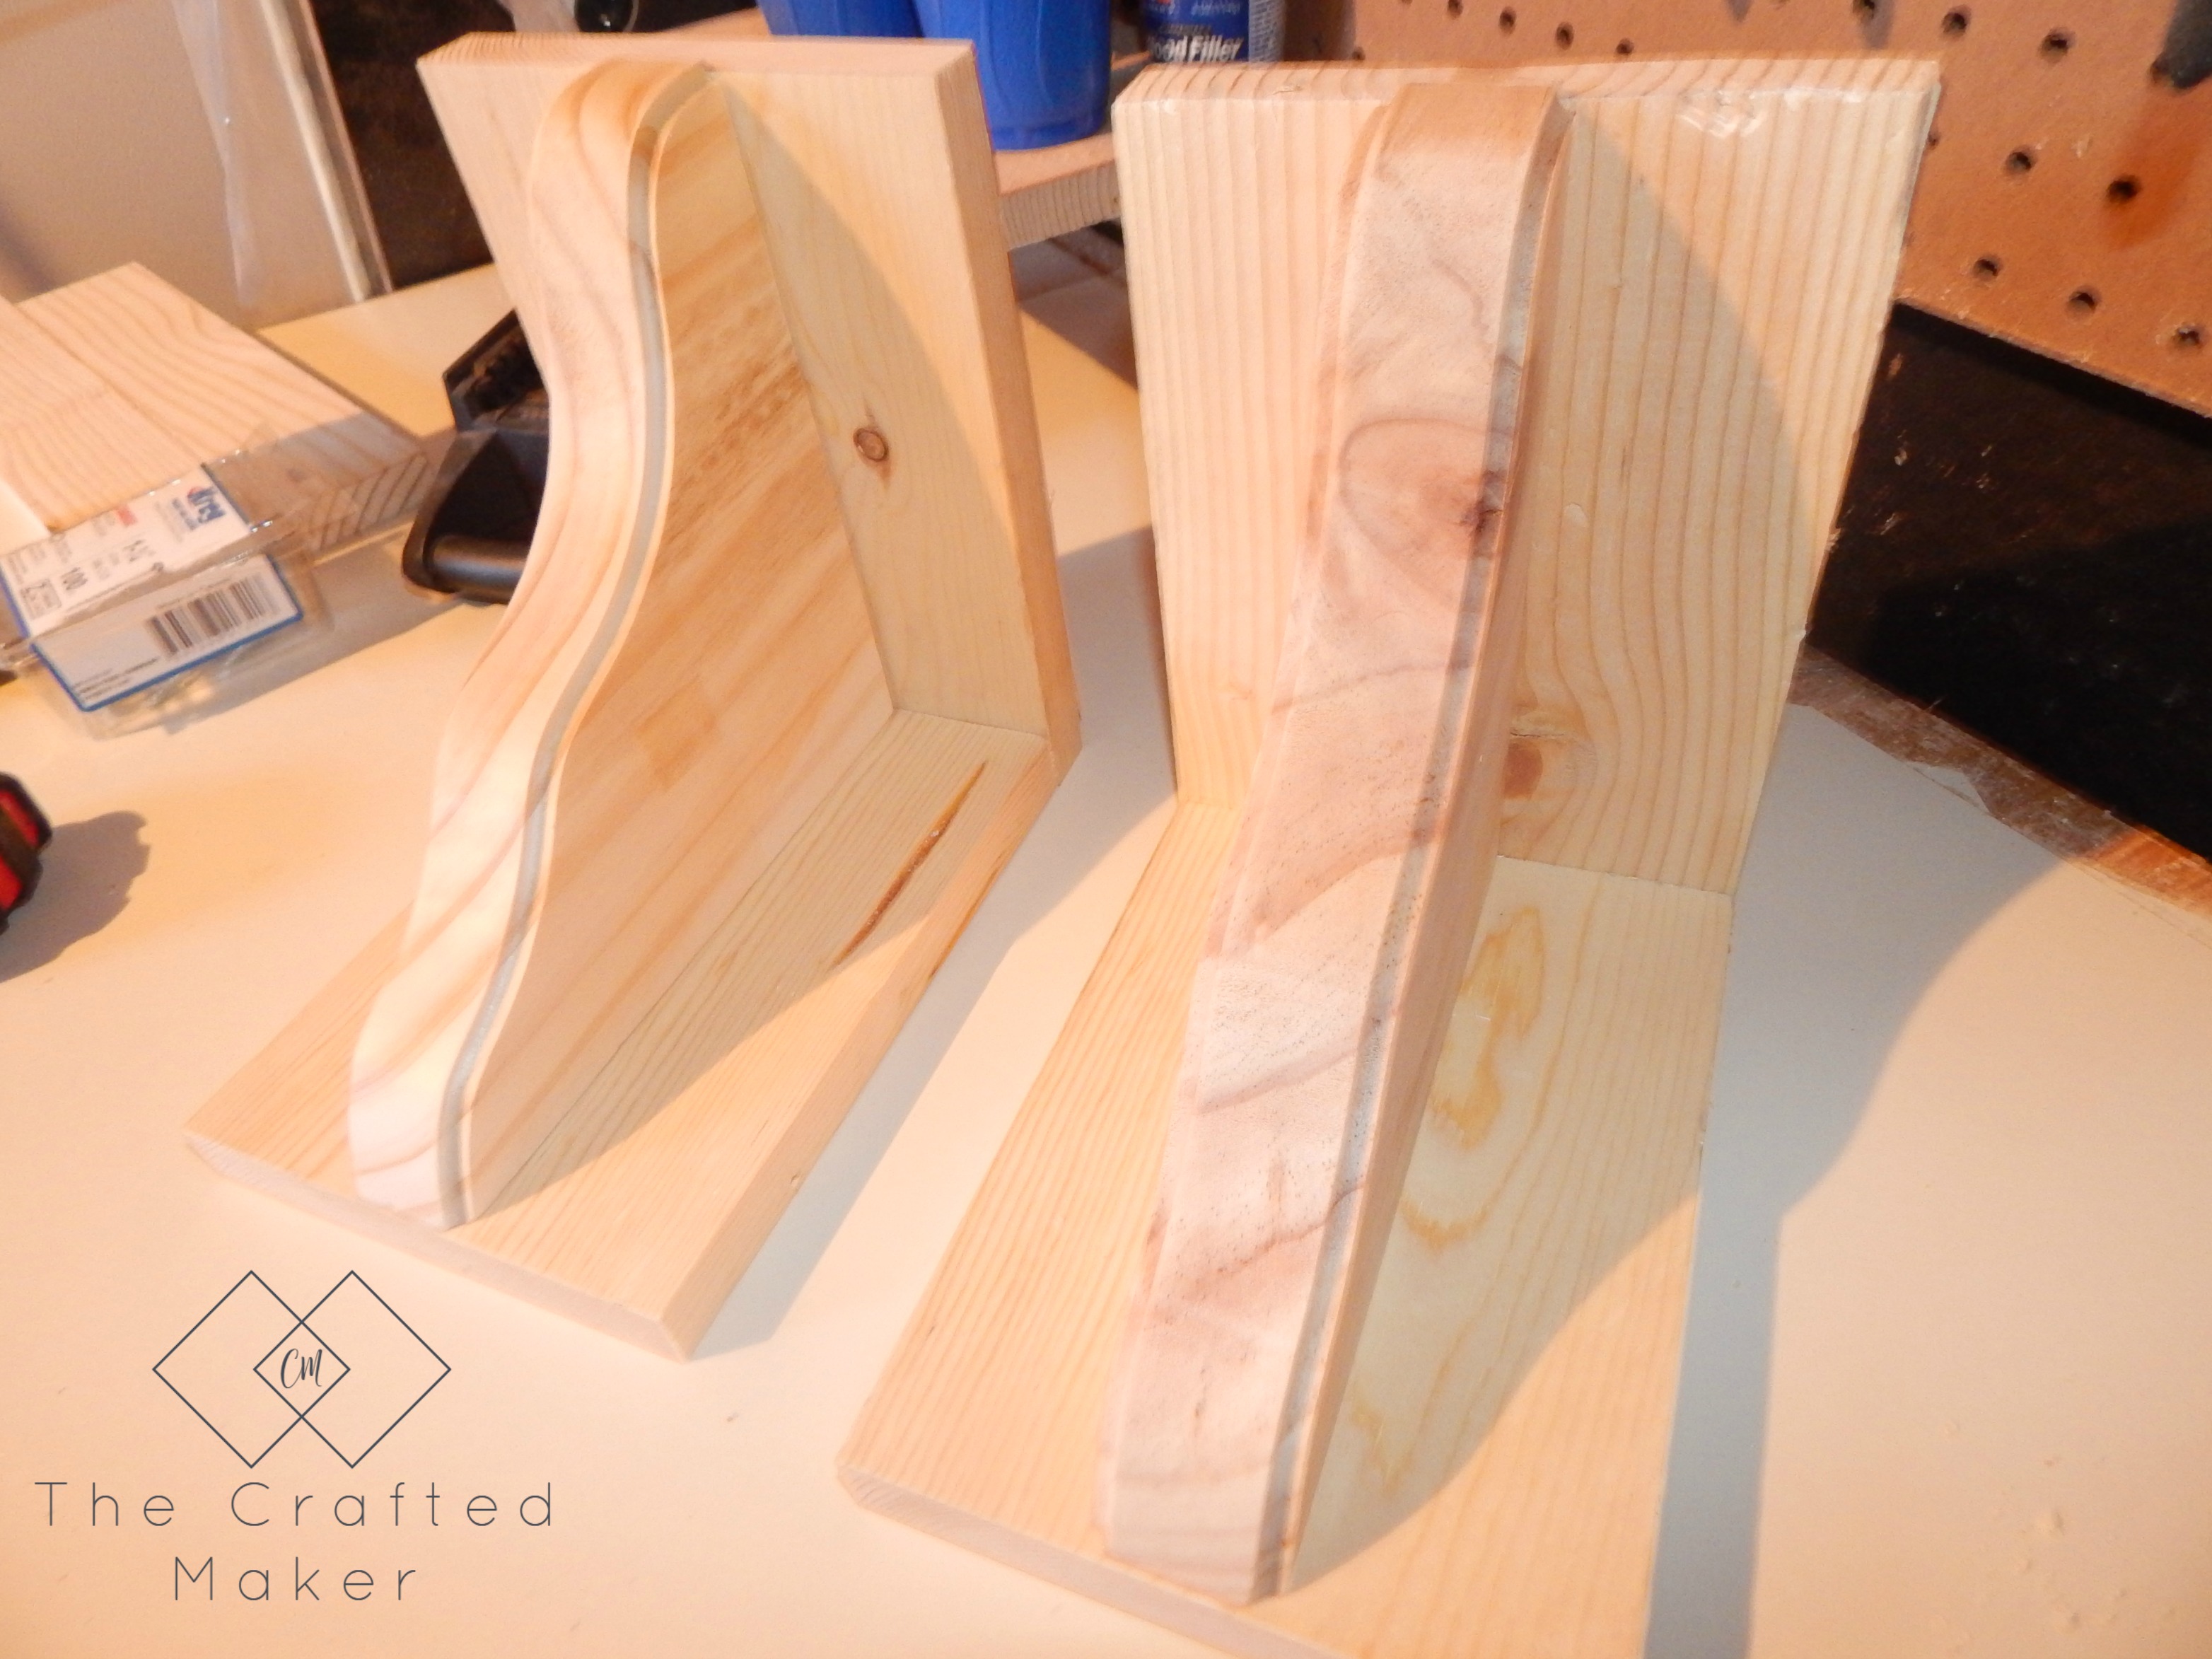
Now assemble the two pieces together for both bookends with the pocket hole screws.
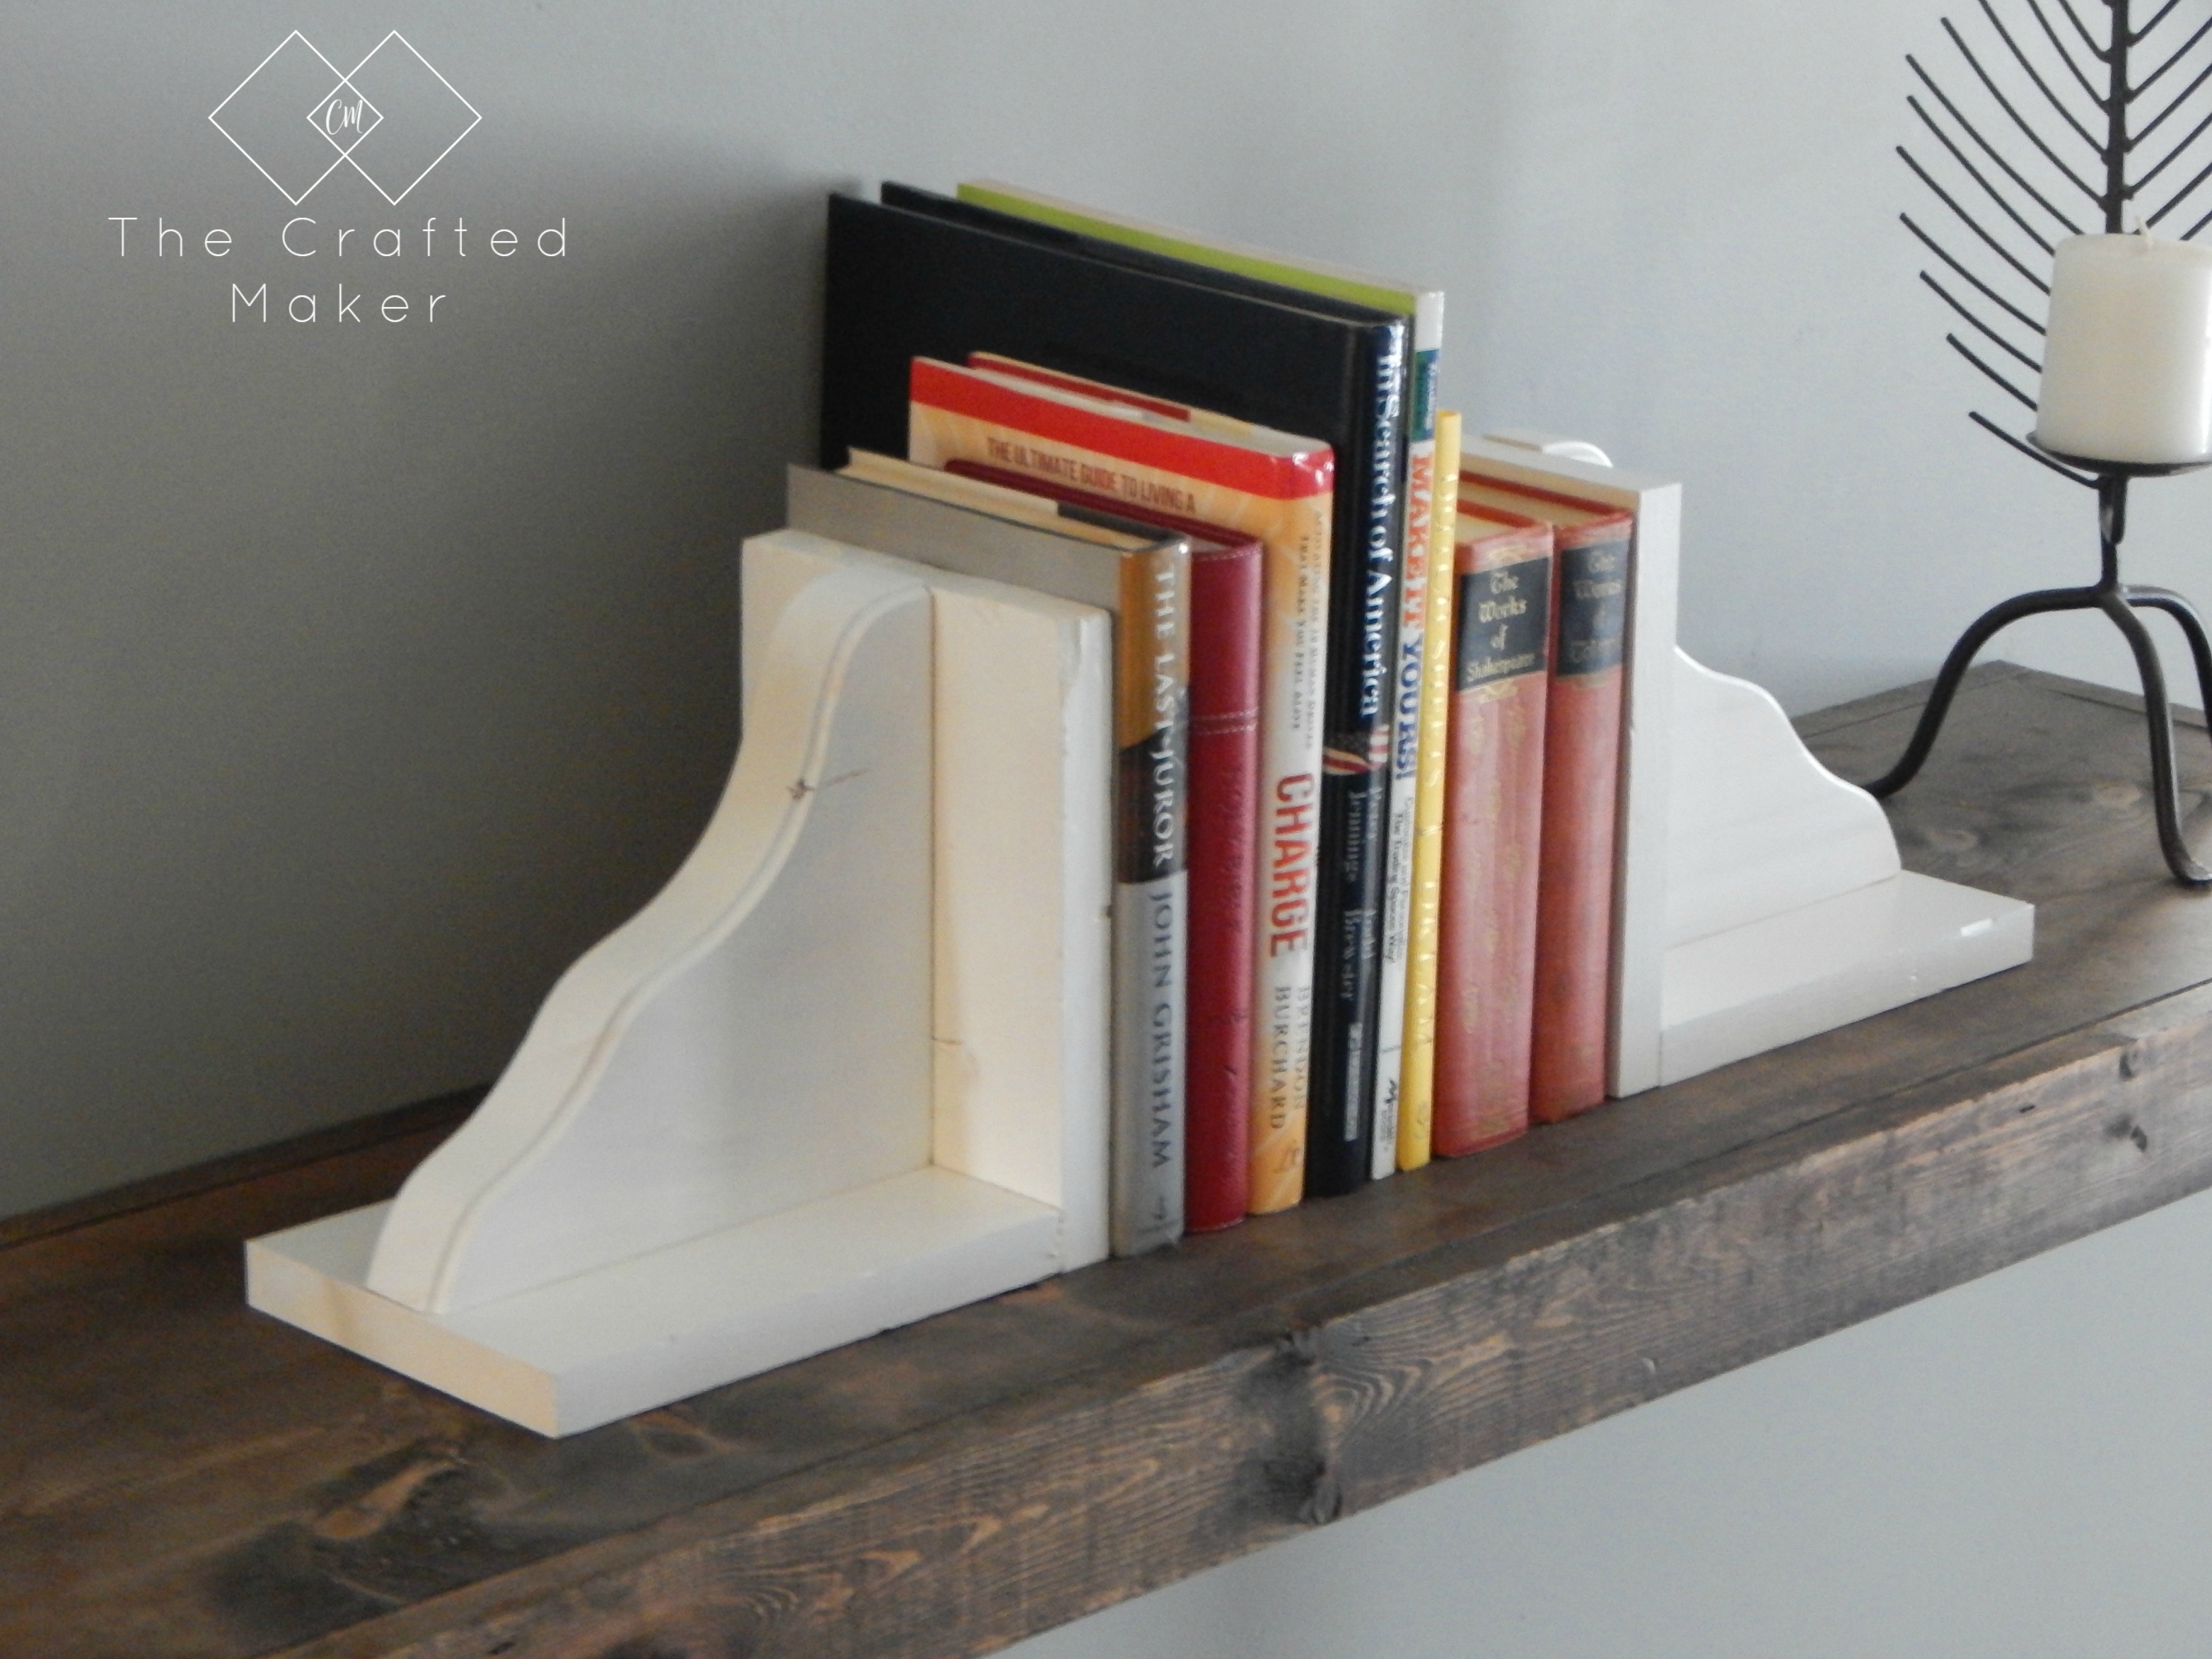
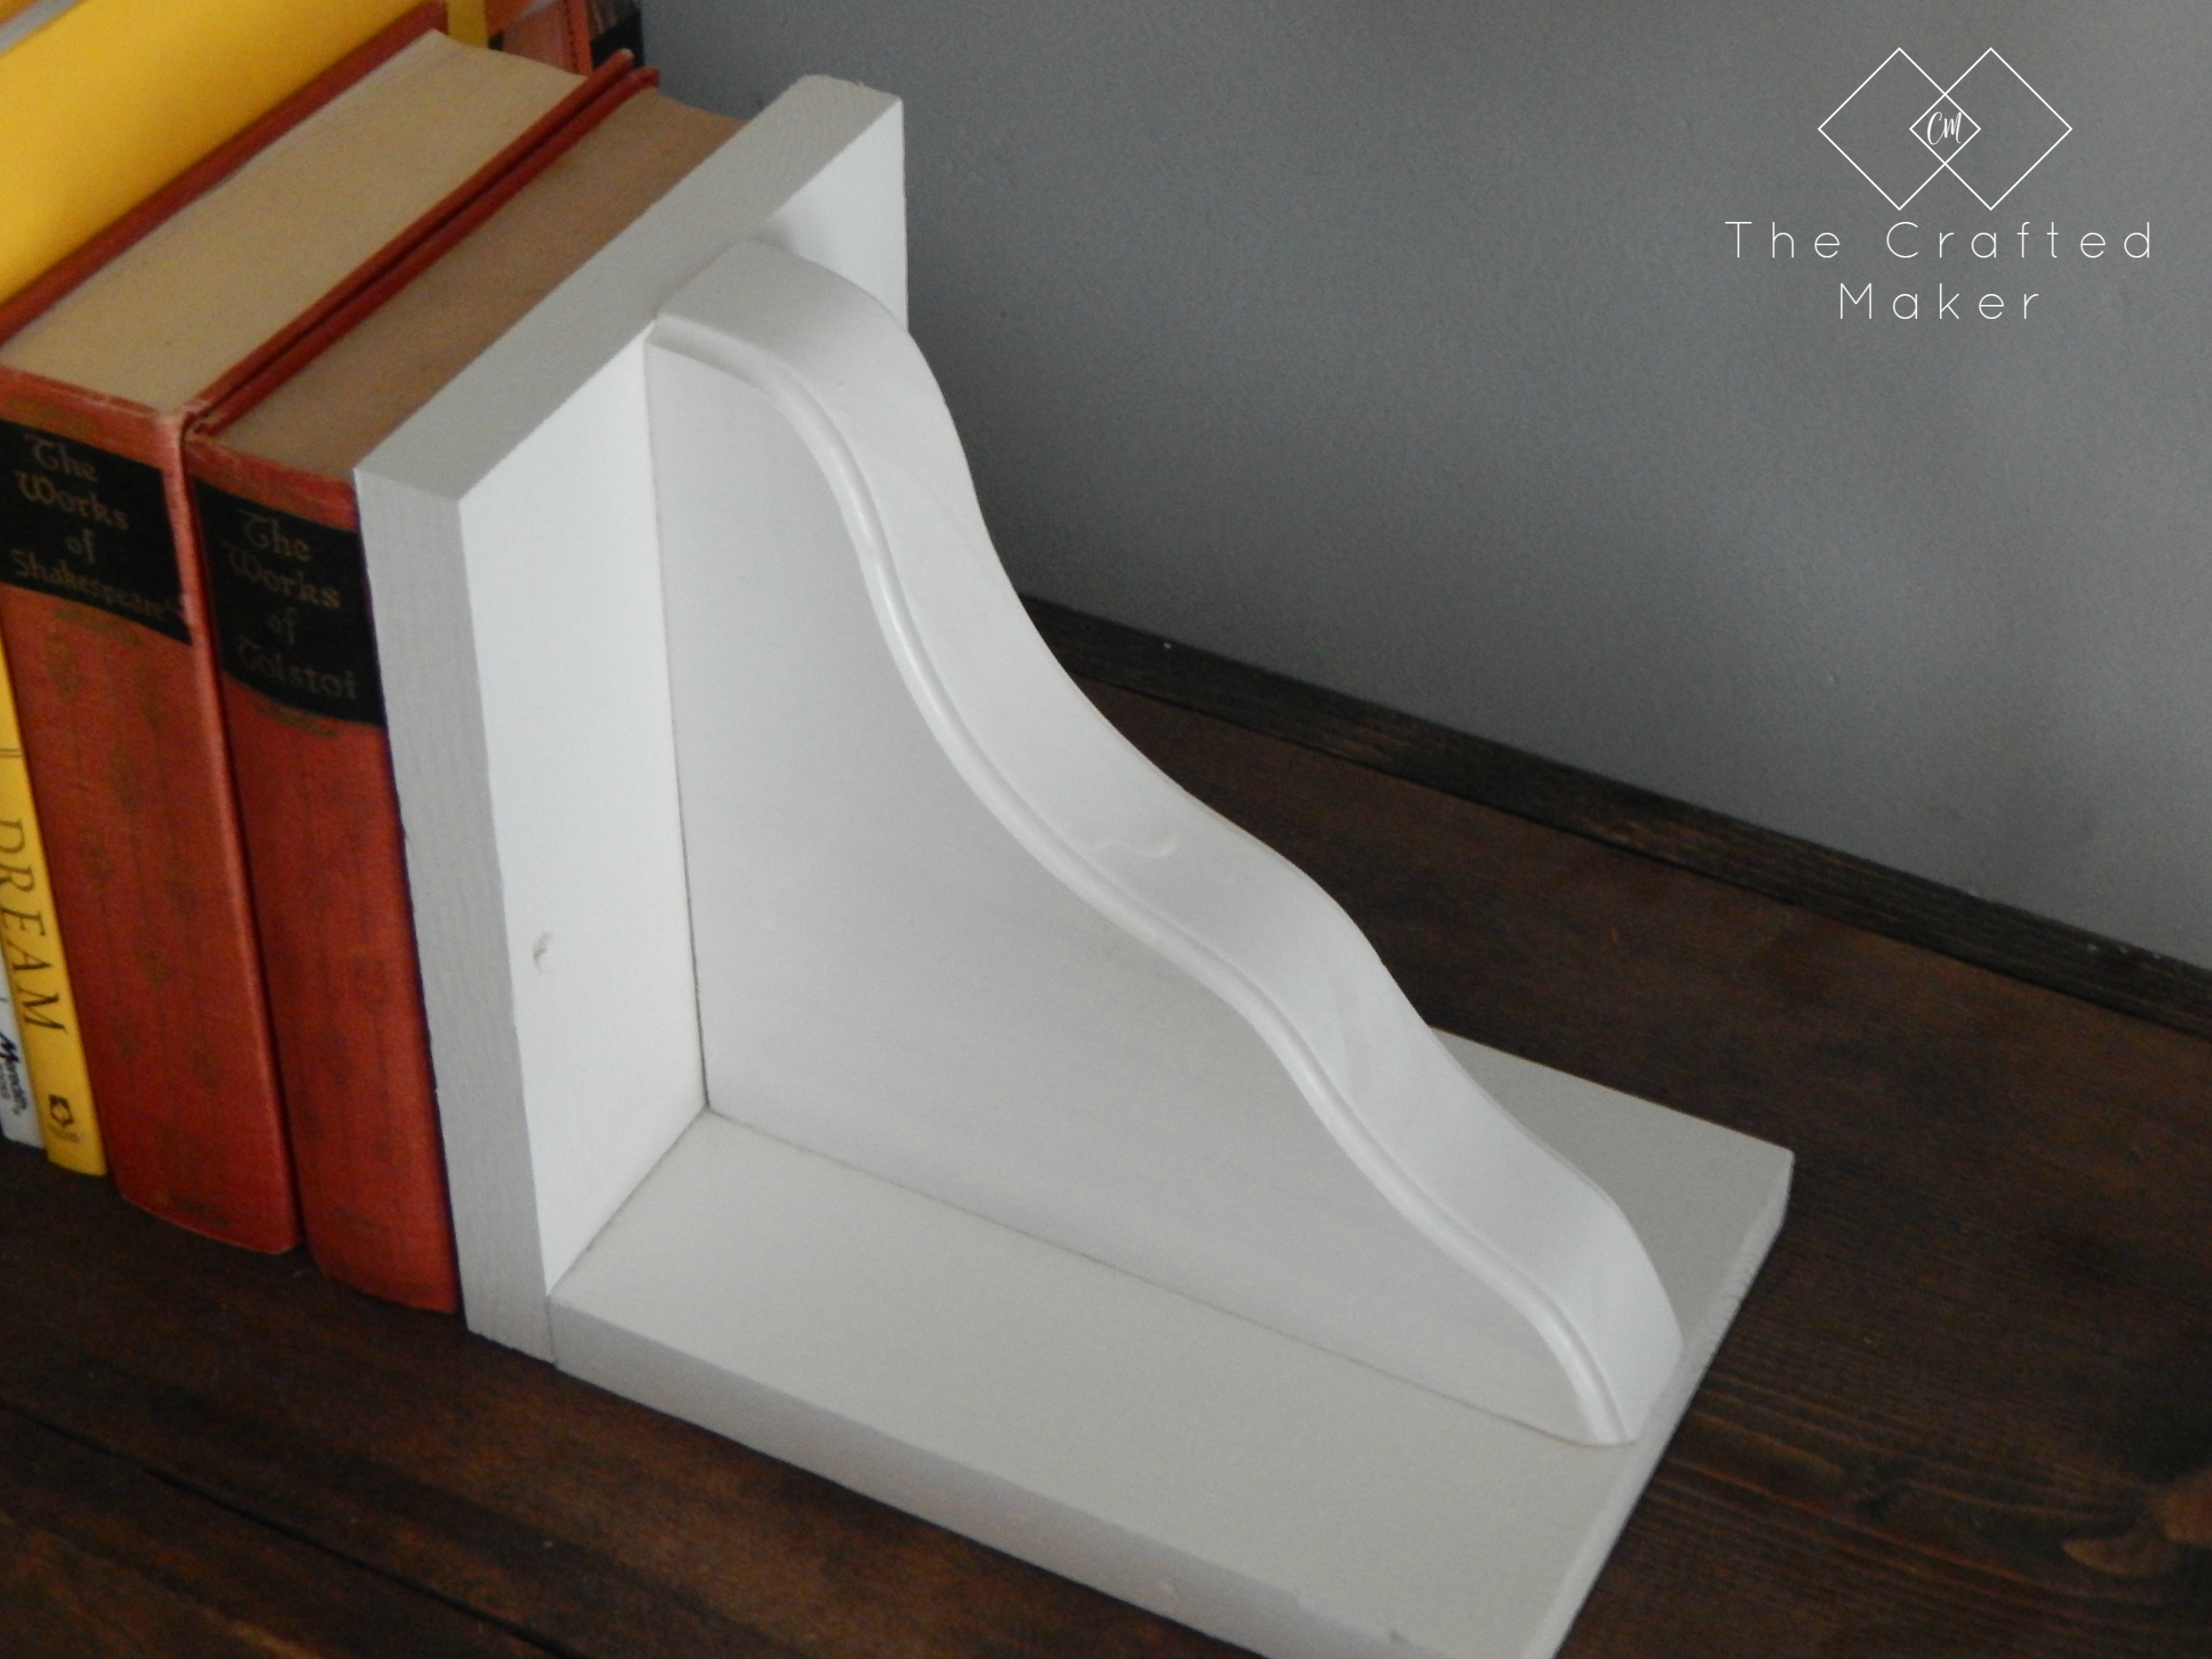
Now its time to attach the shelf brackets to the body of the bookends. Place the bracket in the center of the 1×6 boards and nail them in from the back. Repeat for the other bookend.

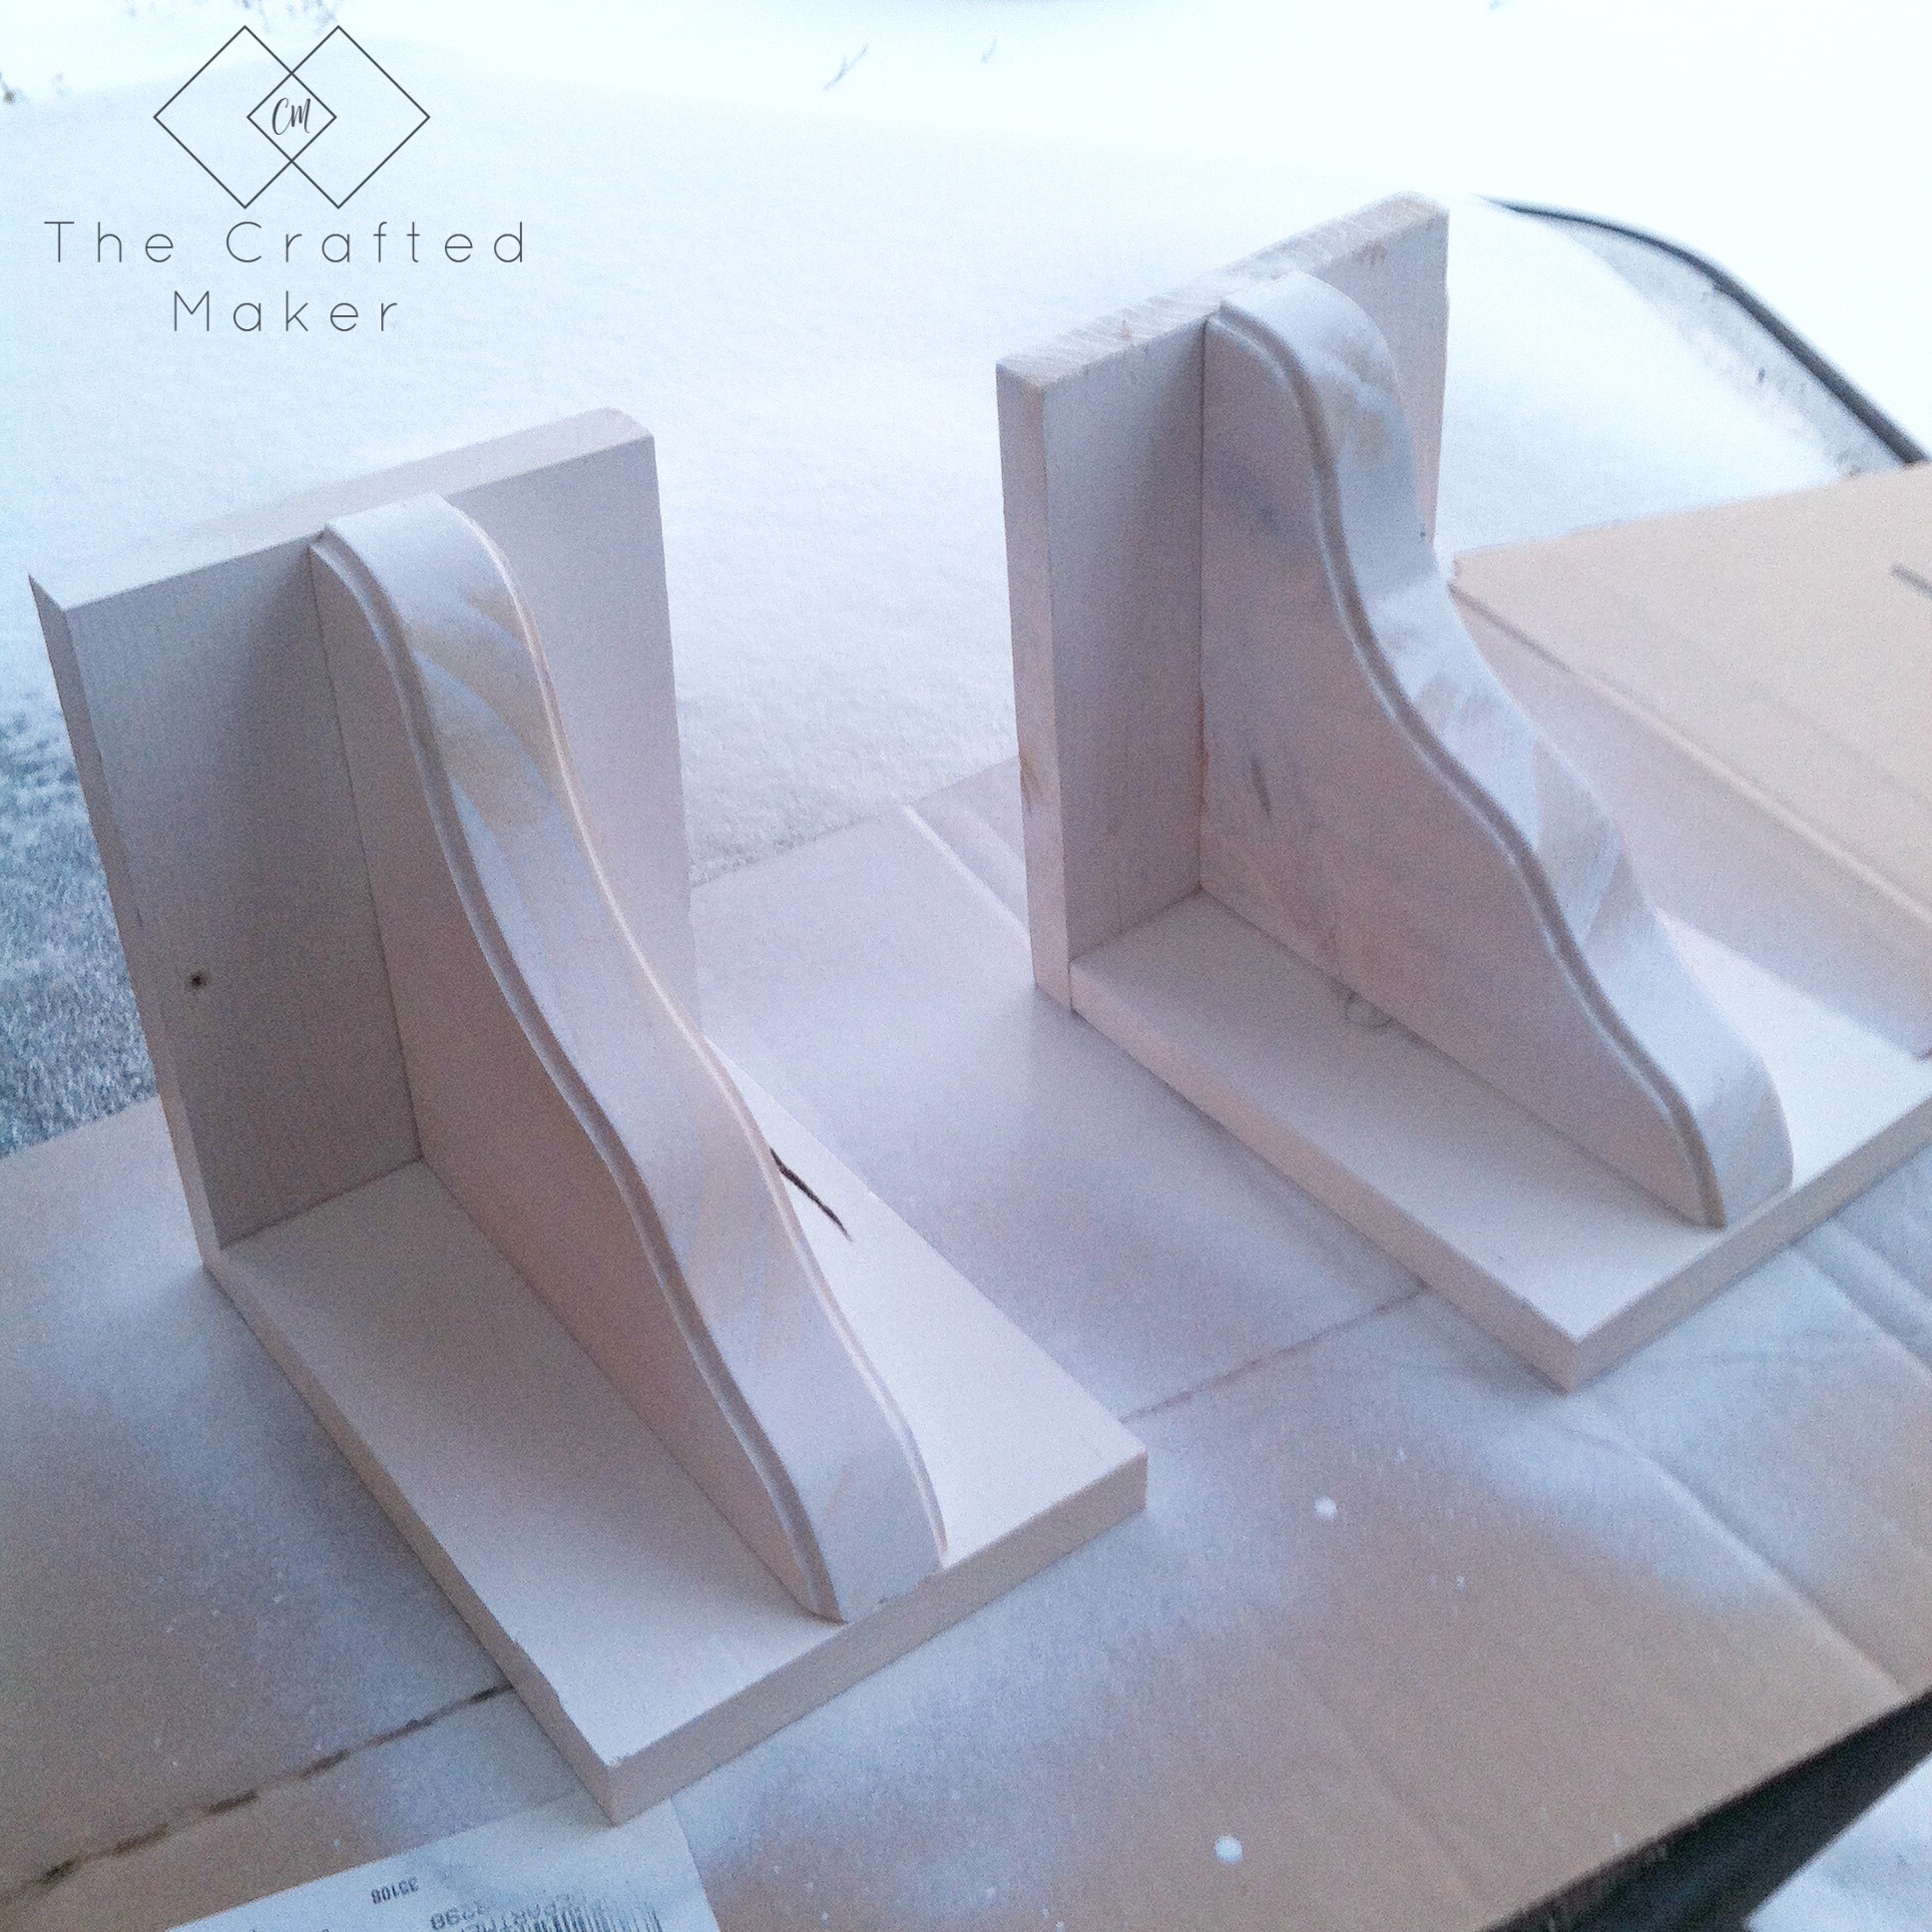
Here is what they will look like assembled and unfinished.
It’s finishing time! Spray paint with whatever color you are choosing. My DIY wood bookends are going to be white. This step may take several coats. You could also choose to stain your project with your favorite stain.
While working on this project, the weather decided to deliver some snow. It was not that fun loads of fun painting in the snow. Dedication baby!
Once the paint is dry and you have even coverage, seal the bookends with a clear wood sealer and let dry according to the product you are using.
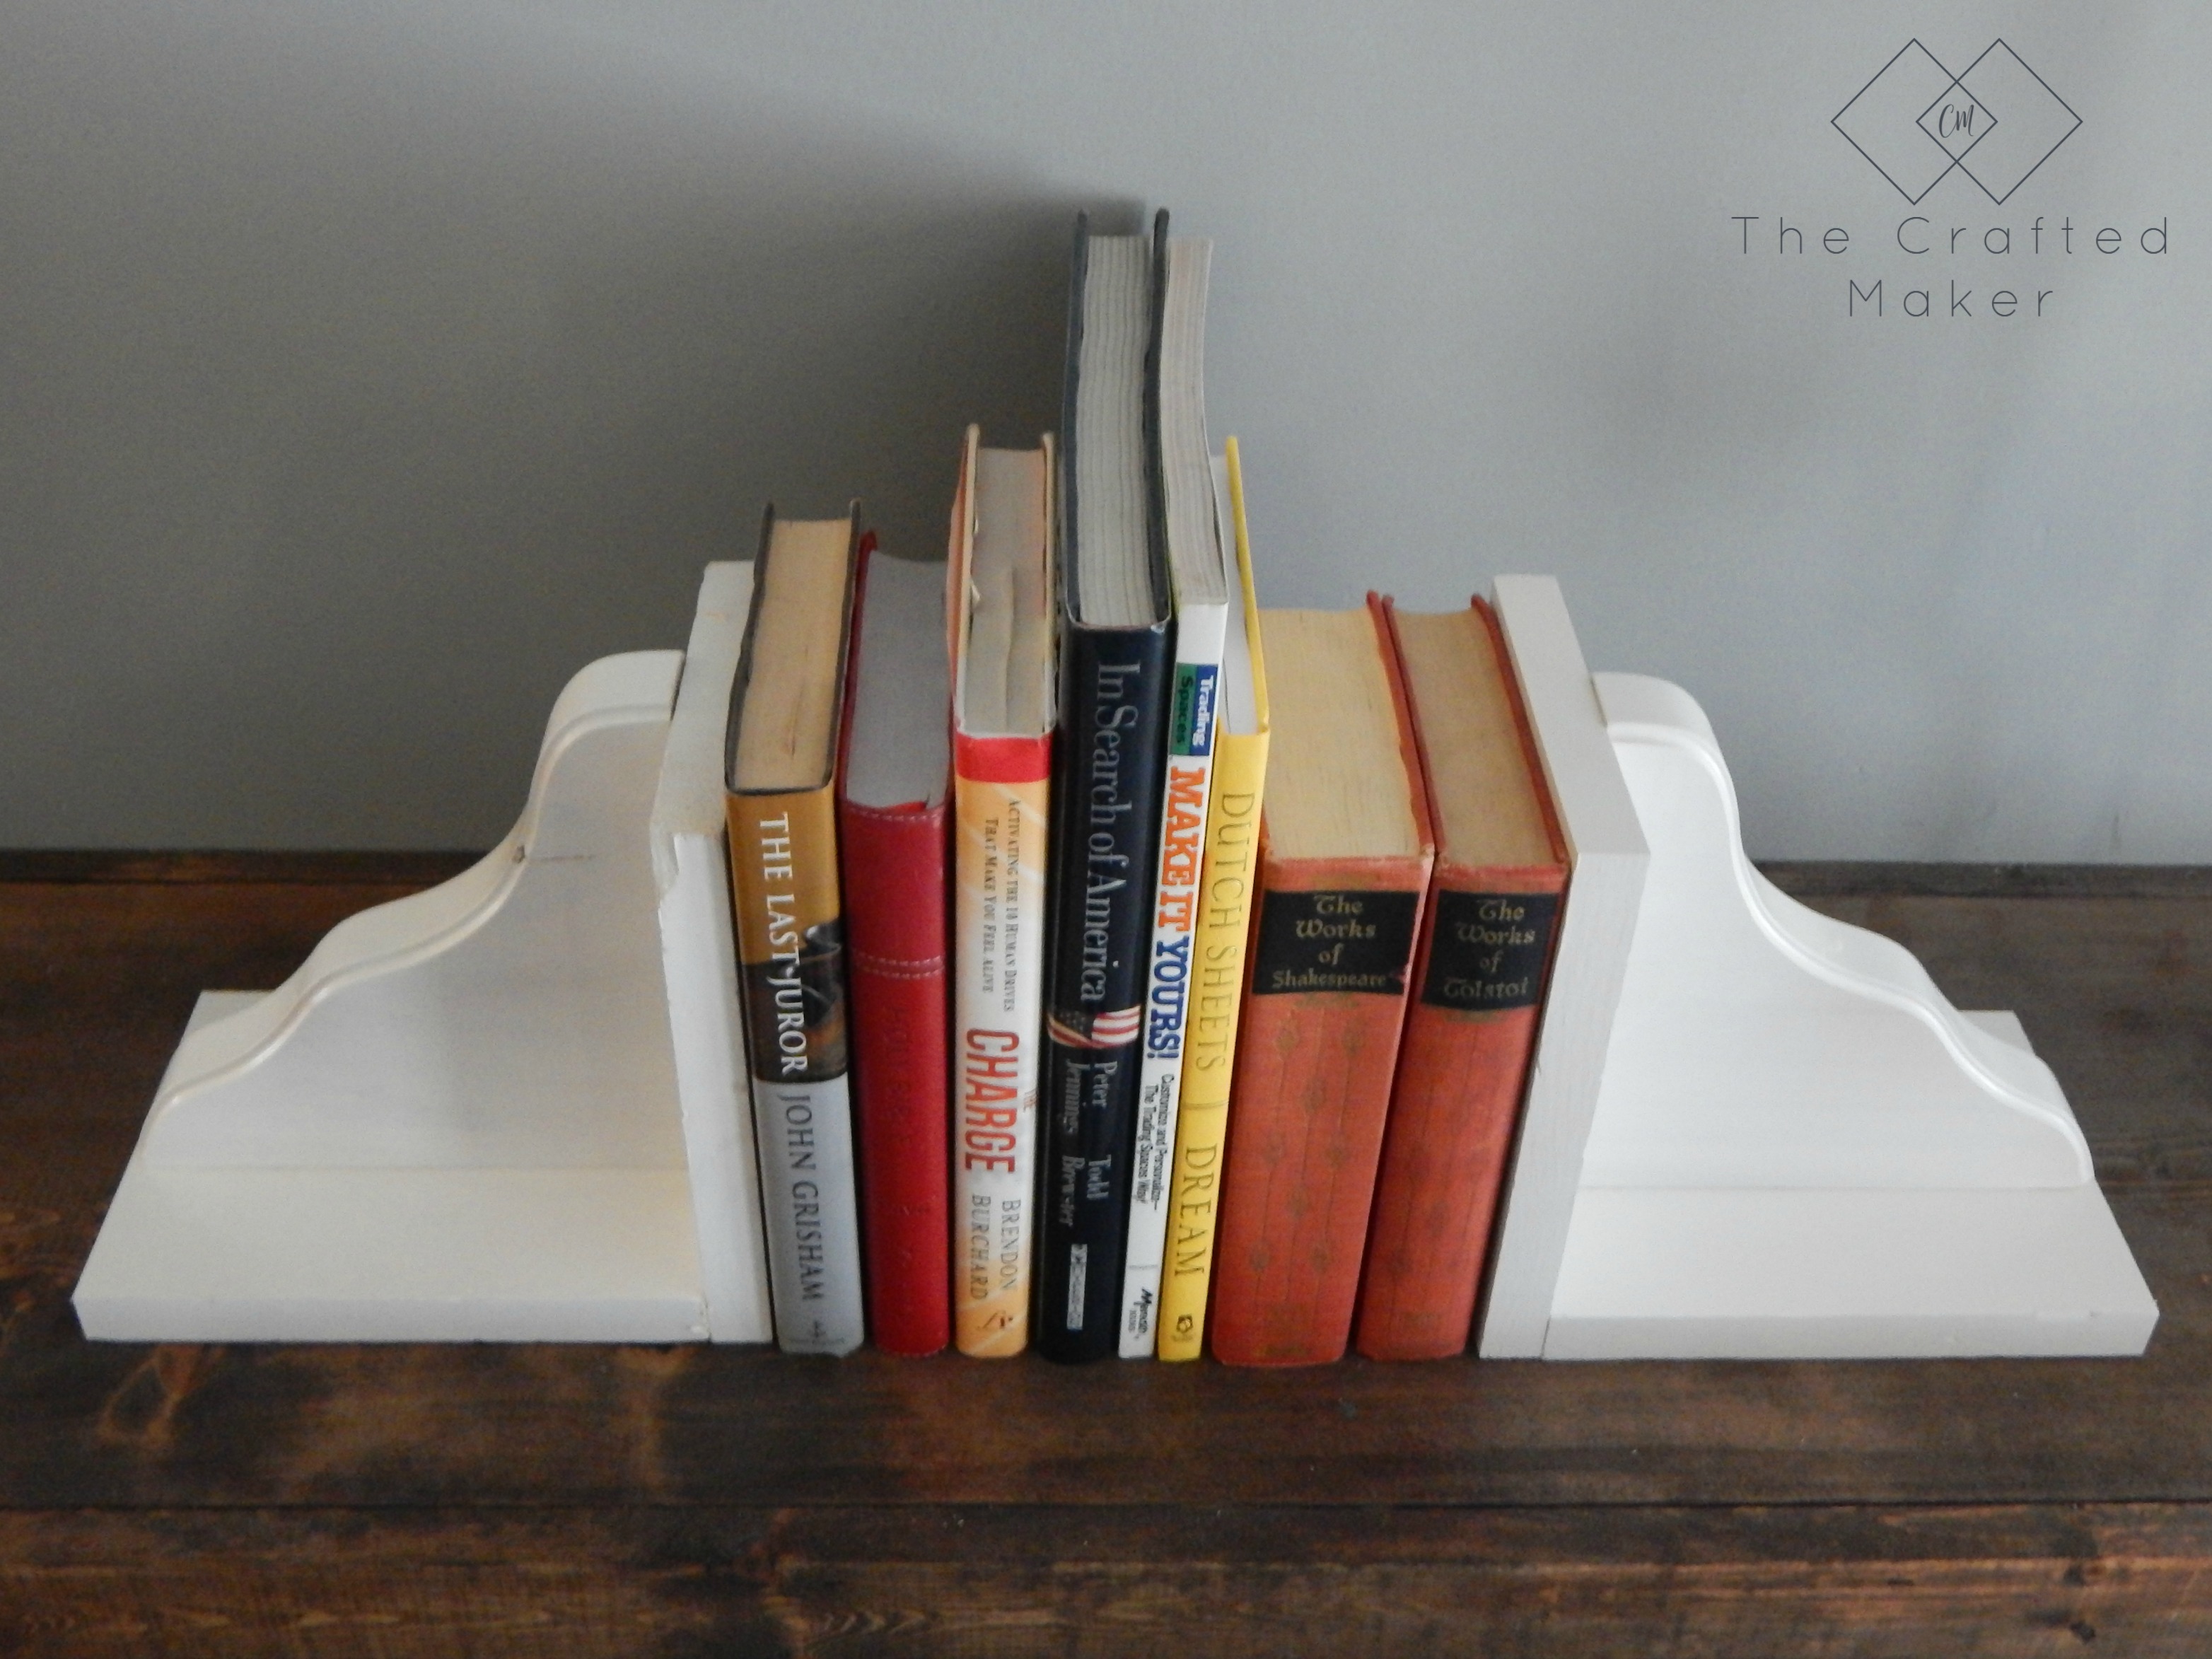
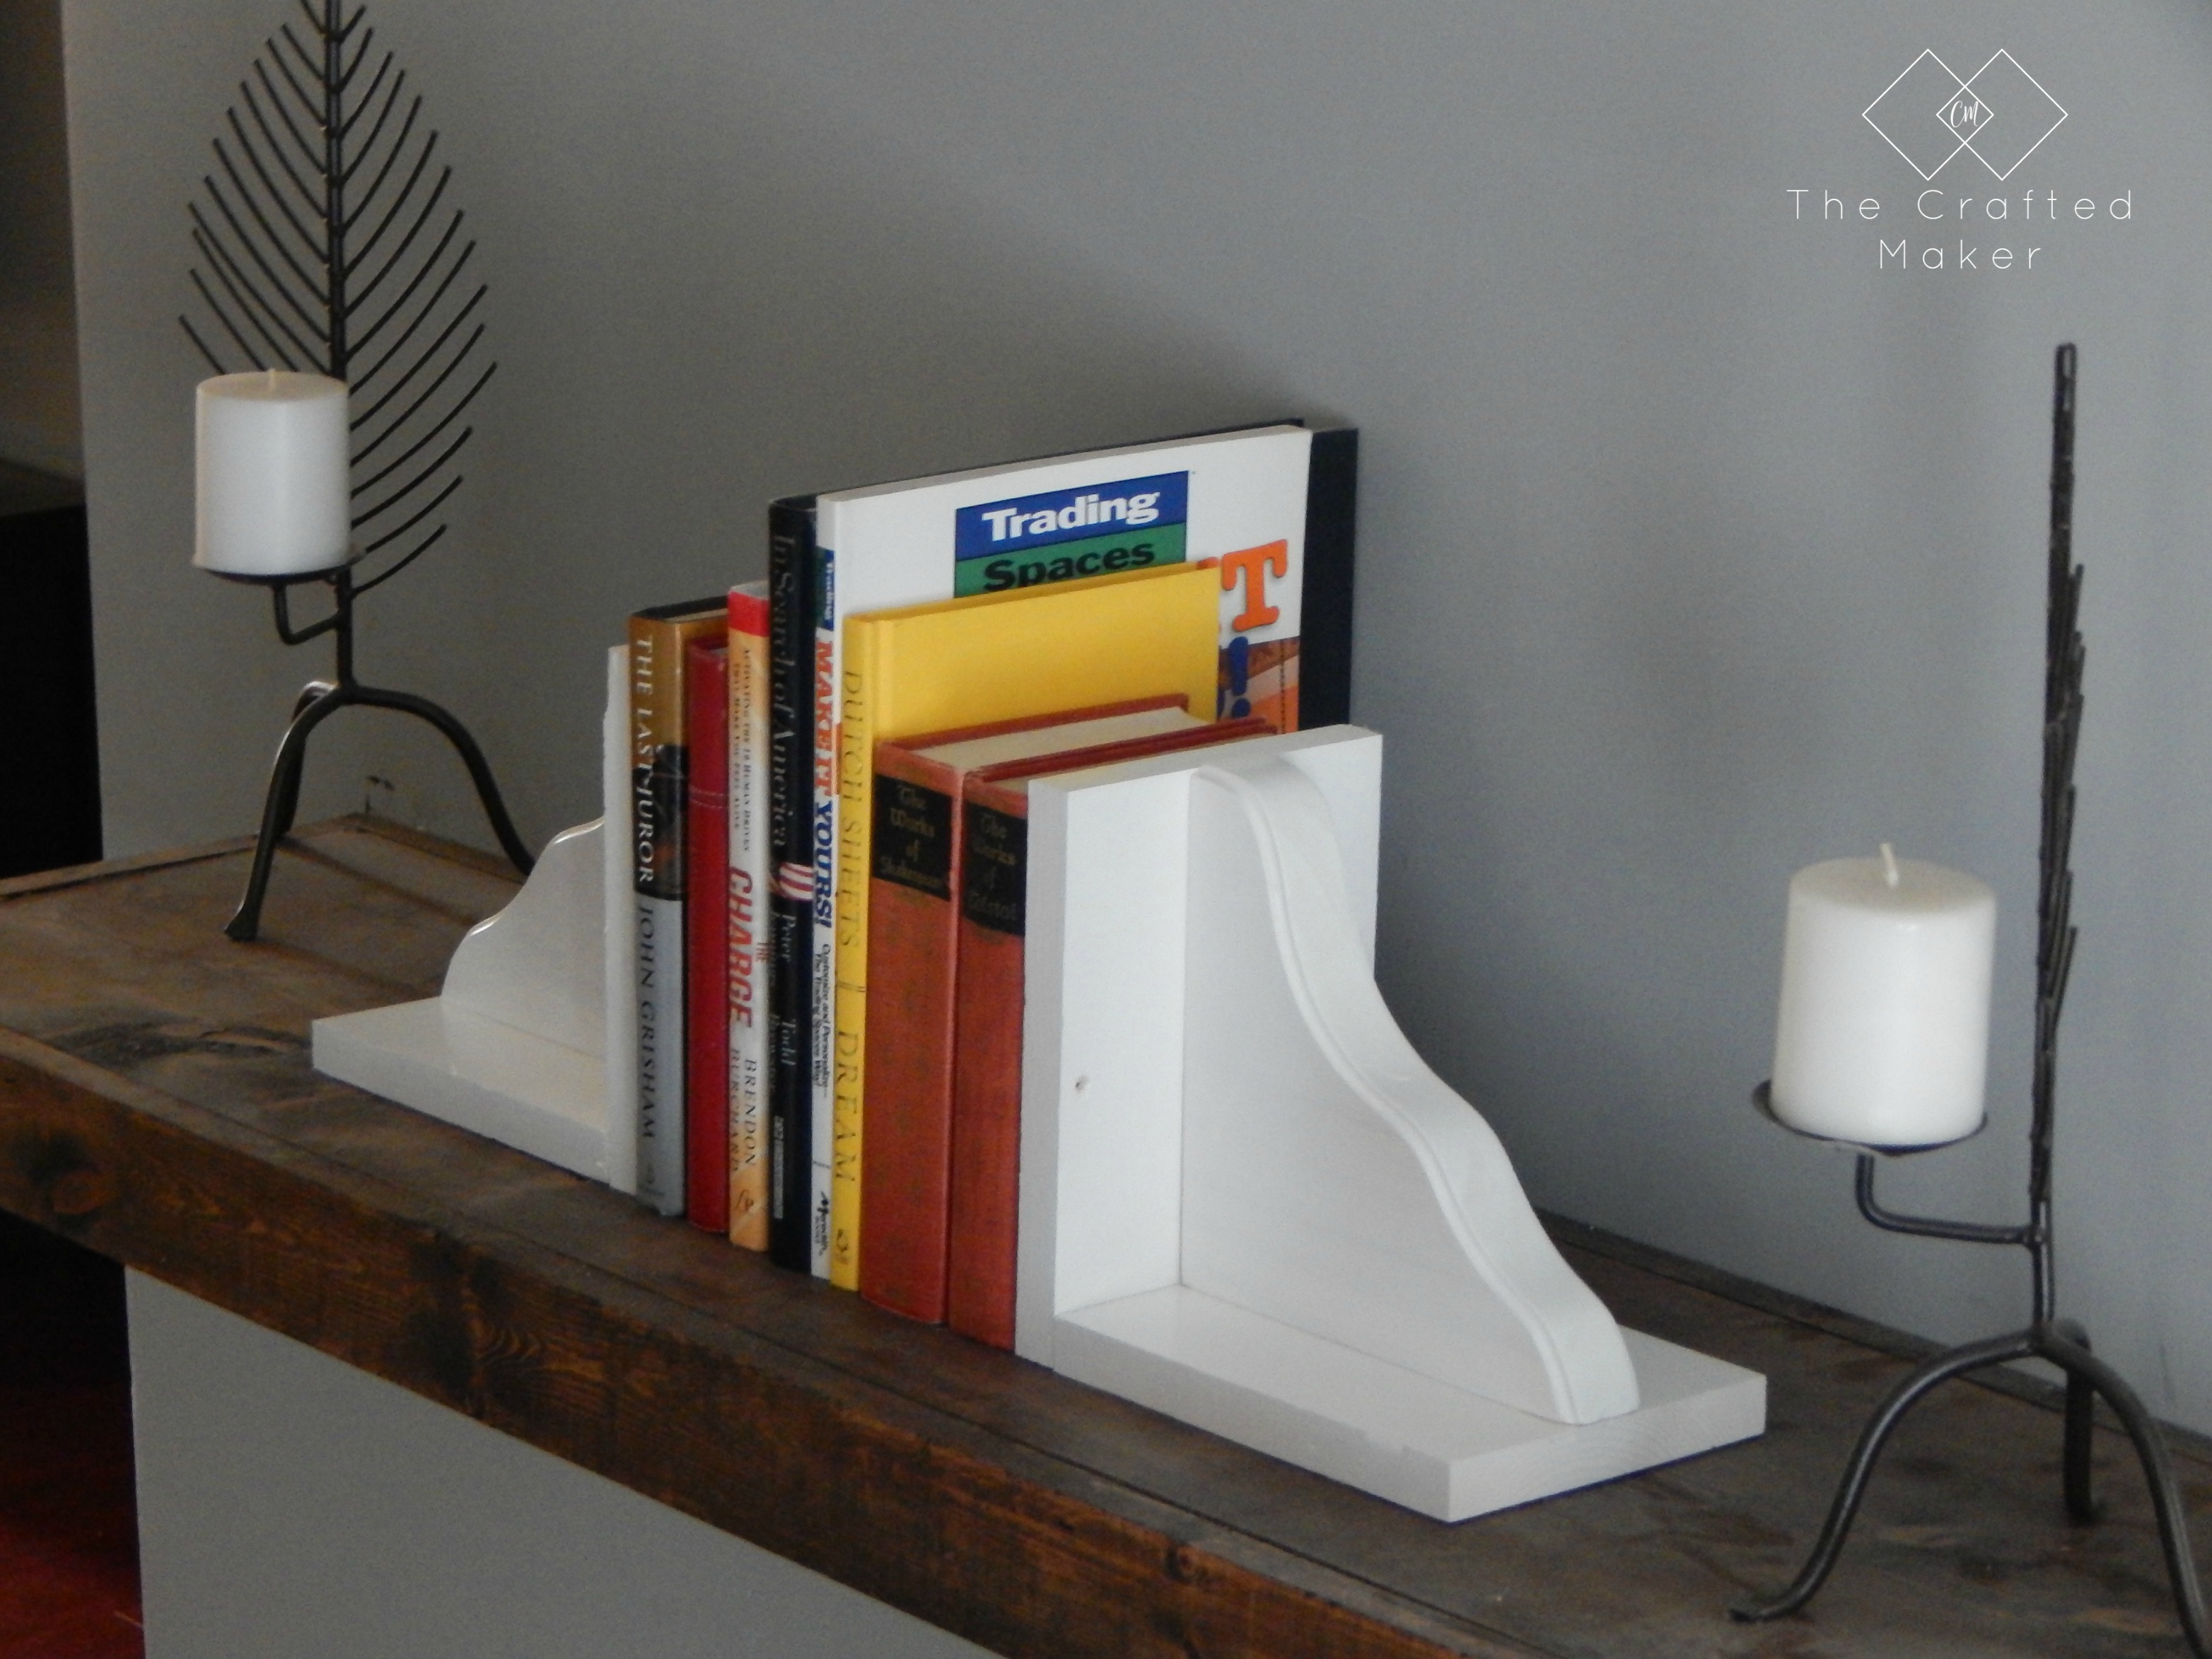
Now, these beauties are ready to be used holding up your books. I told you this was going to be a super easy project! I hope you have loads of fun and plenty of enjoyment building and using your DIY wood bookends. Here are some more pics of the finished bookends.

Thanks for spending some time with me. Be sure to find me on Instagram and Pinterest to see whats been going on and for more fun projects. Until next time…

Pinning is always appreciated!